
With Timely event registration software and event ticketing software, you can easily manage your event capacity by checking in your attendees at the door when they arrive at your event. You can do it automatically by scanning the QR code located on their event tickets and RSVPs vouchers, or manually through Timely’s event management platform. In addition to providing a quick, contactless and paperless experience to your patrons, it helps you know who came to your event and manage your attendees’ list. In this post, you will learn all the steps to use QR codes for your event tickets and RSVPs.
1. What are QR Codes?
A quick-response code (aka QR Code) simply put is a machine-scannable image. It consists of several black and white squares and dots. It is typically used for storing data that can be read by a camera app on a smartphone.
Basically, QR codes work in the same way barcodes at the supermarket. For events, they are very useful. Since each event ticket has a unique QR code, it speeds up the event check-in process, helps keep track of who has arrived at the event, and prevents ticket fraud.
Timely automatically creates an individual QR code for each of your tickets. Therefore, you do not need to worry about generating QR codes from external sources. QR codes can be scanned either from a printed ticket or from their digital versions directly from attendees’ mobile devices.
2. Locate the Event in the QR Code Tab
The first step to use this feature is to find your event you want to check-in your attendees in the QR Code tab. The QR Code tab is located in the Ticketing / RSVP menu in your Timely dashboard.
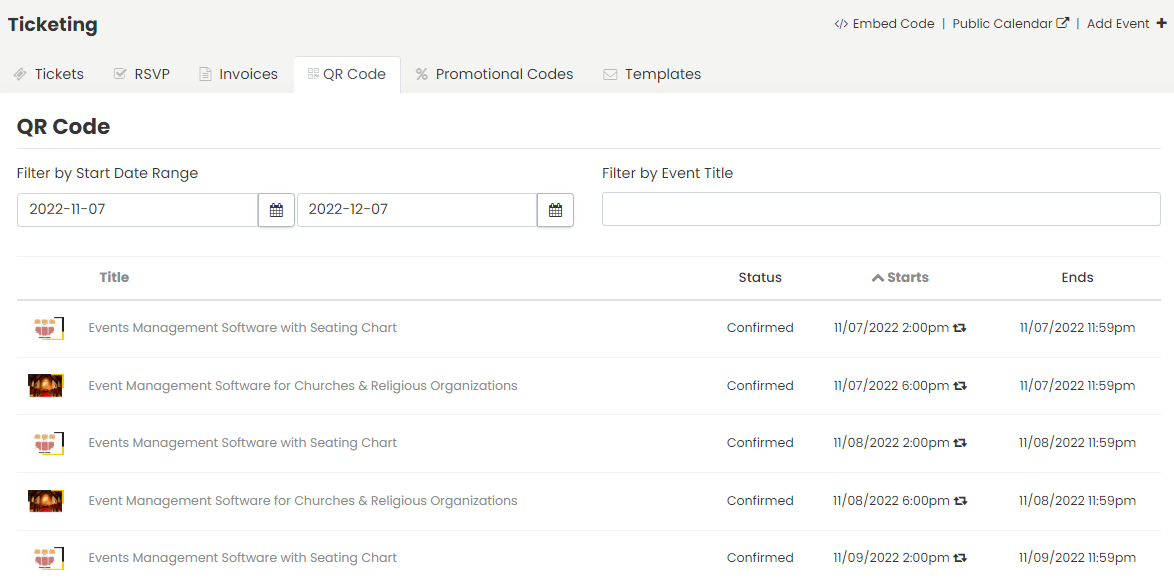
You can use the filtering bar on the top of the QR Code tab. There, you can filter events by event title or start date range. You can also use the information provided on the event list below the filtering bar to select an event. For example, event title, status, start and end date and time.
3. Performing Actions on the QR Code Page
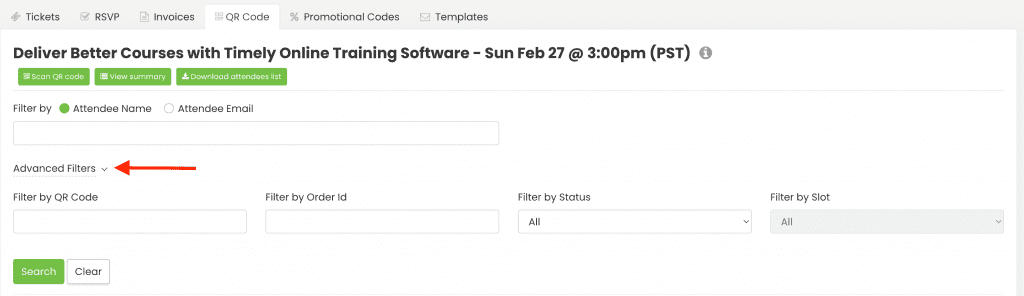
The QR Code page provides some action buttons that allow you to both see general information and perform specific tasks on your events. When you hover the mouse over your event list, you will be able to see the buttons Scan Qr Code, View Event Summary and Download Attendees List for each event.
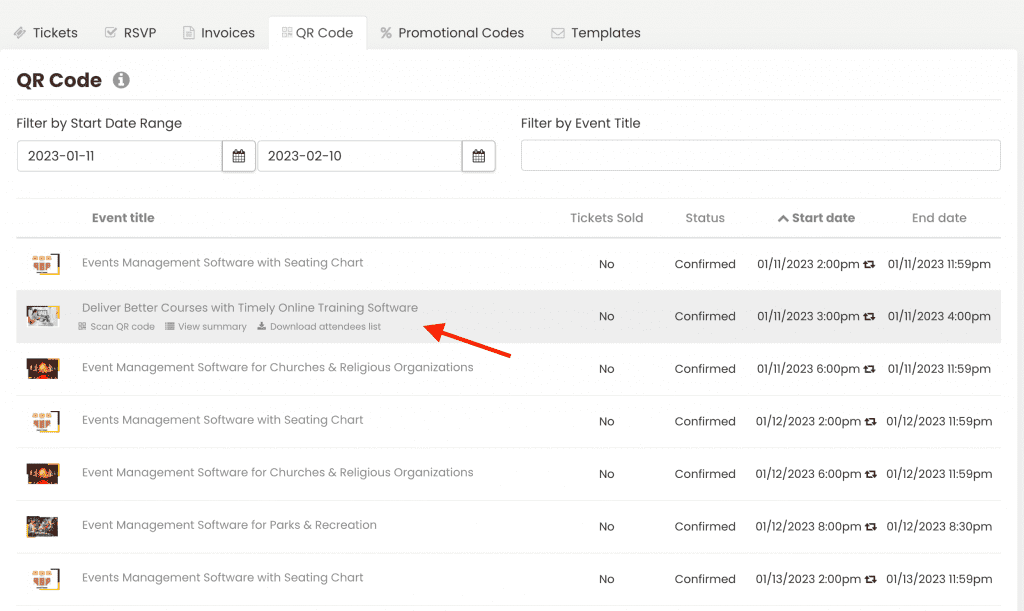
Scan QR Code
The Scan QR code button on the QR Code main page will help you scan tickets’ QR codes without opening the event on the screen. Once you click on this button, the system will ask to access the camera on your device in order to scan the tickets.
This functionality is useful in many situations. Let’s say you have two events happening on the same day and need to check-in the attendees. With this functionality, you can scan attendees’ codes for both events from the main QR Code Page without having to open the two event pages.
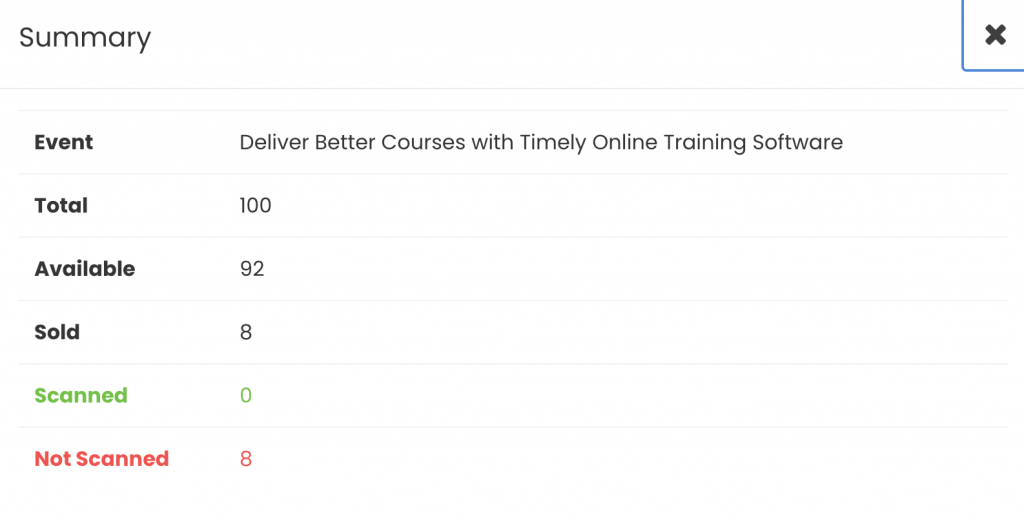
View Summary
If you want to confirm the event before scanning QR codes, you can hover the mouse over the event list and click on the View Summary button. It will allow you to check general information of the event, such as number of attendees, number of tickets, available and sold tickets, and which ones were scanned.
Download attendees list
Finally, the Download Attendees List button allows you to download a list with the information of all attendees for the selected event. Once you click on that button, the system will automatically generate a CSV file and download it into your computer. Open the file to see the list of attendees.
4. Performing Actions on the Events Page
If you prefer, after locating your event on the QR Code tab, you can click on it and a new page will open on the screen. This new page will have additional information on your event and registrants.
On top of the event page, you will see the same buttons Scan QR Code, View Summary and Download Attendees List, which work for that particular event only. These buttons have the same functionality explained above.
On this page, you will also be able to filter event registrants by name or email, making it easier to find them individually, if that is the case.
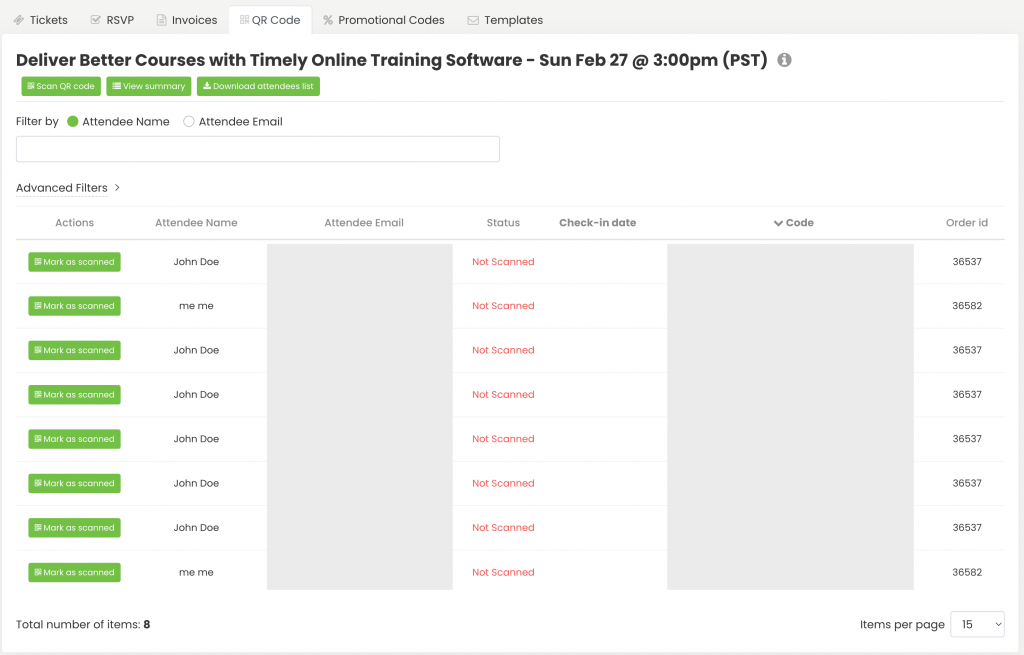
If you need to refine your search, you can use the Advanced Filters. This feature which allows you to filter tickets by QR code, Order ID, Status or Slot.
To go back to the main QR Code page and see all your events, just click on the QR Code tab on the top of the screen.
5. Scanning Tickets with a QR Code Reader
As mentioned above, with Timely event booking system, you can easily check-in your attendees by scanning the QR code found on their event tickets. By clicking on the “Scan QR Code” button, either on the QR Code main page or the event page, our system will ask you permission to access the camera on your device. You may need to click “OK” on your device to allow it to use your camera app. Your phone or computer camera will then be used as a QR code reader.
After that, just point the camera to the QR code on the event ticket you want to scan. It can be a paper ticket or an e-ticket on a smartphone screen. If the ticket presented has the right QR code for the event, the system will scan it properly. As a result, the ticket will be automatically marked as scanned in the attendee’s list.
IMPORTANT: Only the account Administrators and Attendants have permission to scan QR codes for events. To learn more about each role, check our guide on How to Add Users to Your Timely Account.
6. Manually Mark the Ticket as Scanned
There will be times when you cannot scan the QR code with your camera and need to mark tickets as scanned manually. For example, if there is an issue with the camera of your device, or attendees forgot to bring their event tickets.
In these situations, you will need to browse the attendees’ list, confirm that the person had purchased the ticket, and then allow him/her to enter the event.
To keep everything neat in your Timely system and be able to better control your event attendance, we recommend you manually mark the ticket as scanned. You can do that by clicking on the “Mark as scanned” button, in the Action column of the attendee’s list in the QR Code Tab.
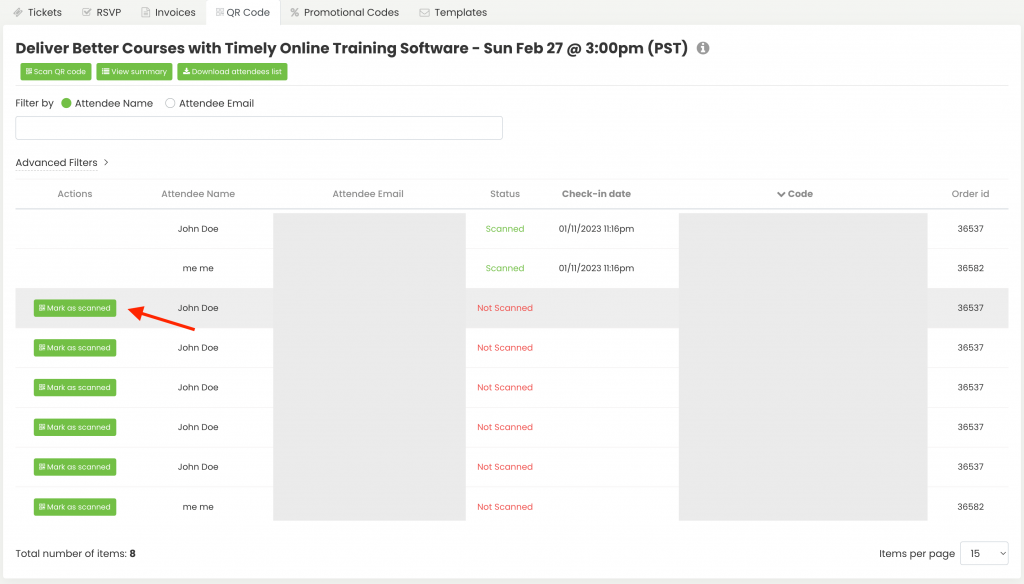
The system will ask you to confirm the action with a pop-up message on the screen. Just click Yes to confirm, or Cancel to cancel, if it was a mistake.
For more user guidance, please go to our Help Center. If you have any questions or need additional assistance, do not hesitate to contact us. Alternatively, you can open a support ticket from your Timely account’s dashboard.