Enhance your venue submission form with Timely venue management software‘s Custom Fields feature, designed to help you gather specific information from space booking requests. This customizable questionnaire adds depth to your space booking forms and streamlines the venue booking submission process.
1. What are Custom Fields and Intake Questionnaires?
Custom Fields are adaptable form fields that can be incorporated into your online venue booking submission form. These fields serve as a means to collect additional and tailored information from space requests, aligning the intake process with your specific needs.
2. How to Create a Custom Intake Questionnaire
2.1 Enabling the Event Submission Form
Before creating your custom intake questions, first you will need to enable the event submission form for space bookings. We recommend following the guide How to Set Up Space Bookings in the Event Submission Form for step-by-step instructions.
2.2. Creating Custom Fields
After enabling the event submission form, you will be able to create an intake questionnaire by using the custom fields functionality.
On the Community Events > Settings menu, scroll down the screen until you find the Fields section. Then, click on the + Add Field button to create your first custom question. To add more questions, simply click on the + Add Field button again.
Currently, there are four custom field types:
- Yes/No answer: requires registrants to mark “Yes” or “No” to respond to the question.
- Text answer: requires registrants to answer the question with a sentence.
- Checkbox answer: requires registrants to check the box if the sentence is applicable or to confirm understanding.
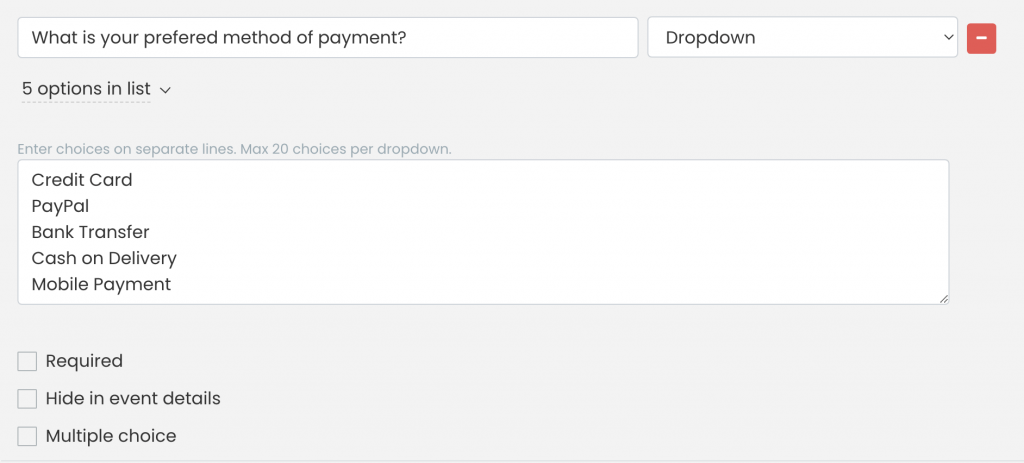
- Dropdown answer: provides a user-friendly interface to help users select the desired item from a list of available options.
- When creating a Dropdown custom field, an option called “Add choices” will appear, allowing users to enter choices on separate lines. Users can enter a maximum of 20 choices per dropdown.
- You can also choose the options Required, to make this question mandatory, Hide in event details, and Multiple choice, so that more than one choice can be made anc you can choose Unlimited, Exact Number or a Range.

2.3 Making Fields Optional or Mandatory
To ensure that your event submitters respond to the questions before completing their space booking submission, simply click the “Required” checkbox for each custom field you have created. This will make it mandatory for them to provide an answer. If you do not want a question to be mandatory, leave the “Required” box unchecked.

2.4 Showing or Hiding Questions and Answers on the Event Post
When creating custom fields, you also have the option to show or hide the questions and the venue submitters’ answers on the event post. By default, Timely software will show them on the published event details page. However, if you want these questions and answers to be private, simply click on the Hide in event details option.

2.5 Adding Links to Custom Fields
If you wish, you can also include a link in a custom field on your space booking form. This feature allows you to add any hyperlink you want, such as a link to your Terms and Conditions. By using the checkbox option or a “yes or no” option, you can ask users to confirm their acknowledgment or acceptance of your terms.
To add a link to a custom field, follow these steps:
- Click the + Add field button to create a new field.
- Add the relevant introductory text (e.g., “I agree to the”, “I consent with the”, etc.).
- Paste the following code in the Custom Field area: <a href=”LINK”>TEXT</a>.
- Replace the “LINK” text with the URL of the webpage you want to link to, ensuring it is enclosed within the quotation marks.
- Replace the “TEXT” text with the word or sentence you want to use as the anchored text for the hyperlink.
Let’s illustrate this with an example. Suppose you require users to review and accept your terms and conditions before booking a space. You can create a custom field that includes a checkbox or Yes/No answer options. Then, you can add the following text and code to the custom field:
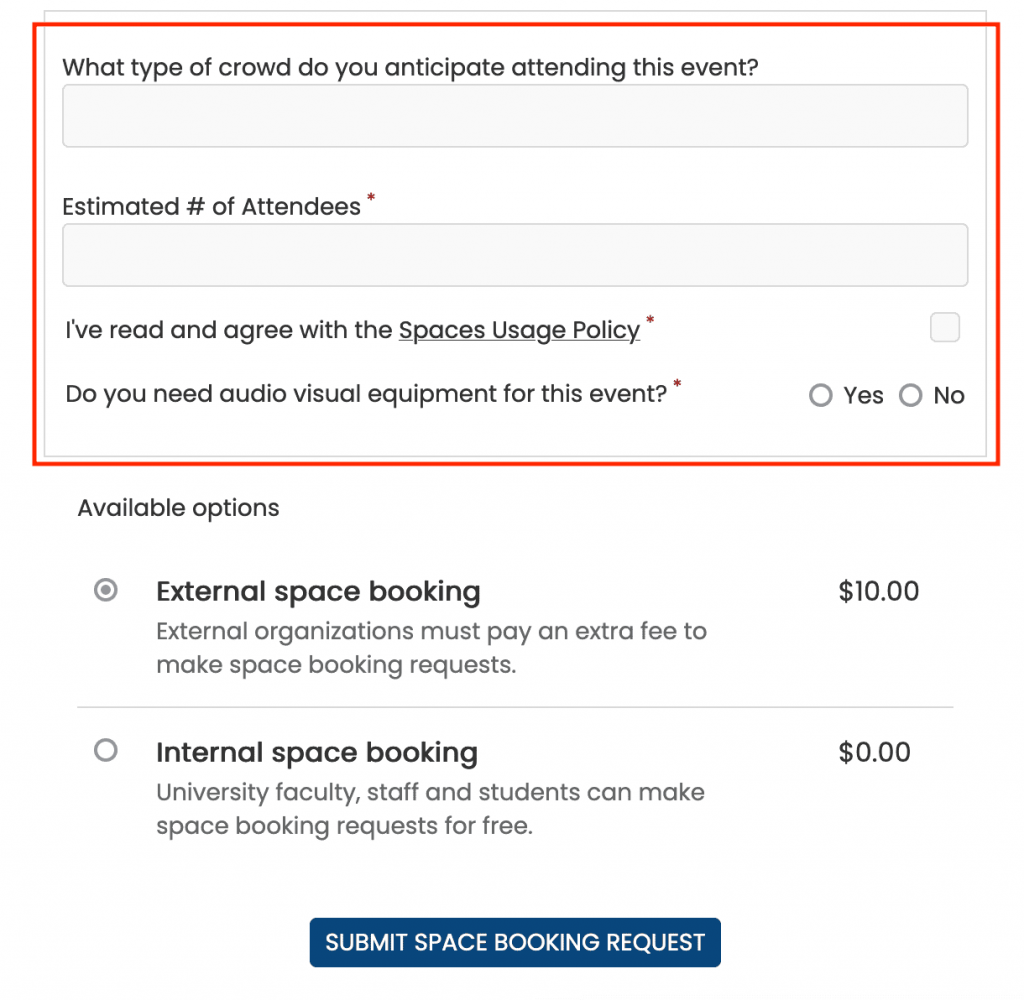
I’ve read and agree with the <a href=”https://time.ly/legal/web-accessibility-statement/”>Spaces Usage Policy</a>

By including the URL “https://www.example.com/terms-and-conditions/” and the text “Terms and Conditions” in the custom field code, you can provide a seamless experience for your users. Instead of displaying the actual URL, they will only see the text “Terms and Conditions” as a clickable link. When they click on the link, the corresponding webpage will open in a new tab on their browser.
Once you have finished setting up your Space Booking Form Custom Fields, do not forget to click on the Save button to save your settings.
3. How Will Your Audience See the Space Submission Form with Custom Fields?
After saving your Space Booking Form, click on the Public Space View shortcut located in the top right corner of your Timely dashboard to preview your space view. In case you have already installed Timely into your website, you can go to your dedicated space booking webpage.
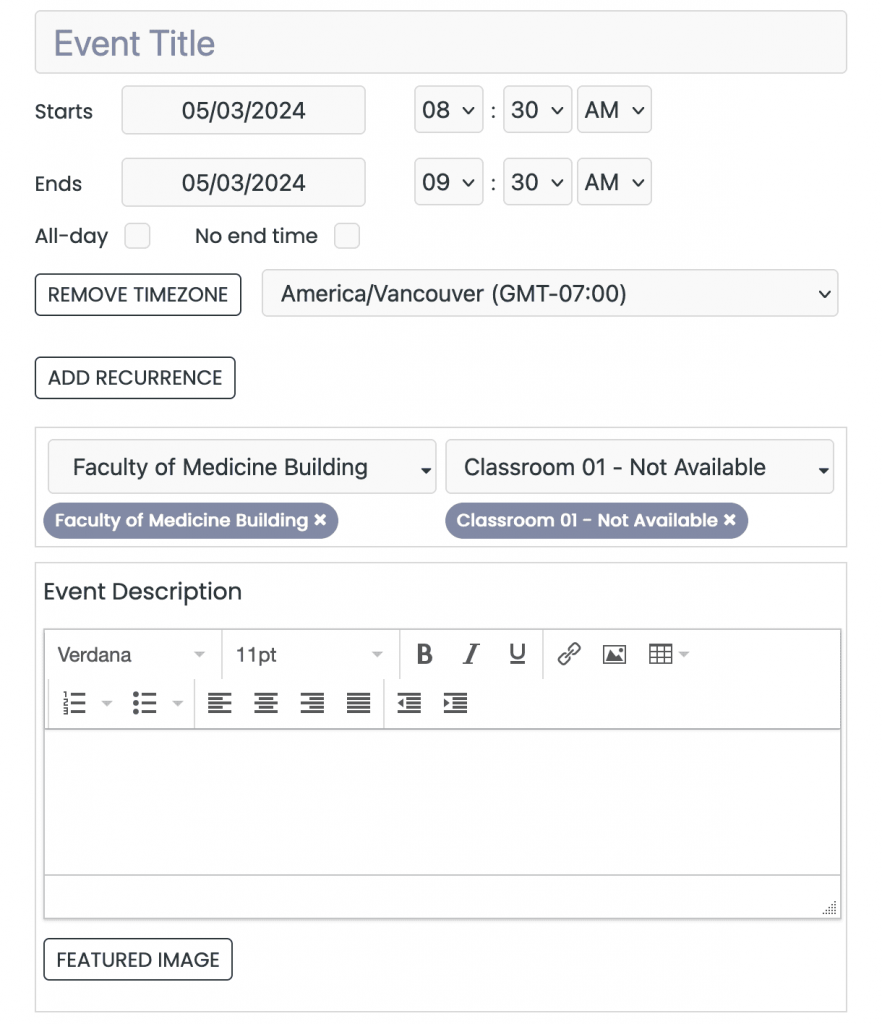
When your website visitors come to your space view and click on the +Add Event button, they will be presented with your space booking form containing all the options and custom fields you have added in the settings.


By following these steps, you can easily create customized intake questionnaires using the Custom Fields feature for your Space Booking Form. This allows you to collect specific details from venue bookers, ensuring accurate and comprehensive bookings on your space view.
Remember, the customization possibilities are endless with Custom Fields, enabling you to tailor the intake process to your unique needs. Start receiving venue booking submissions from your community and watch your integrated calendar thrive with diverse and engaging events.
4. How to Access and Manage Submitters’ Responses
To review and manage submitters’ responses to your custom questions, please refer to the guide “How to Accept, Reject, or Edit Space Booking Requests”.
Need Additional Help?
For further guidance and support, please visit our Help Center. If you have any inquiries or need assistance, don’t hesitate to contact our customer success team by opening a support ticket from your Timely account’s dashboard.
In case you require additional assistance in implementing and using Timely venue management system, we are pleased to assist. Explore all the professional services we can offer you, and get in touch with us today!