At Timely, we’re dedicated to streamlining your space booking experience. In this guide, we’ll show you how to harness the power of setting time ranges as filters for your Space Gallery View. Whether your customer is planning a private event or a business conference, this feature ensures they can find the perfect space effortlessly. Let’s dive in!
1. Why Use the Time Range Filter?
Offer more convenience to your clients by allowing them to filter available spaces based on a specific date and time range. Imagine someone is interested in organizing a Christmas event on December 25th from 10 AM to 5 PM. By setting this time range filter on your space gallery view, they can instantly view all available spaces that meet these criteria, making the booking process seamless and efficient.

2. How to Enable the Time Range Filter
Here’s a step-by-step guide to enabling the time range filter:
- Log in to your Timely account.
- Navigate to the main navigation menu and click on Venues.
- Next, select the option Settings.
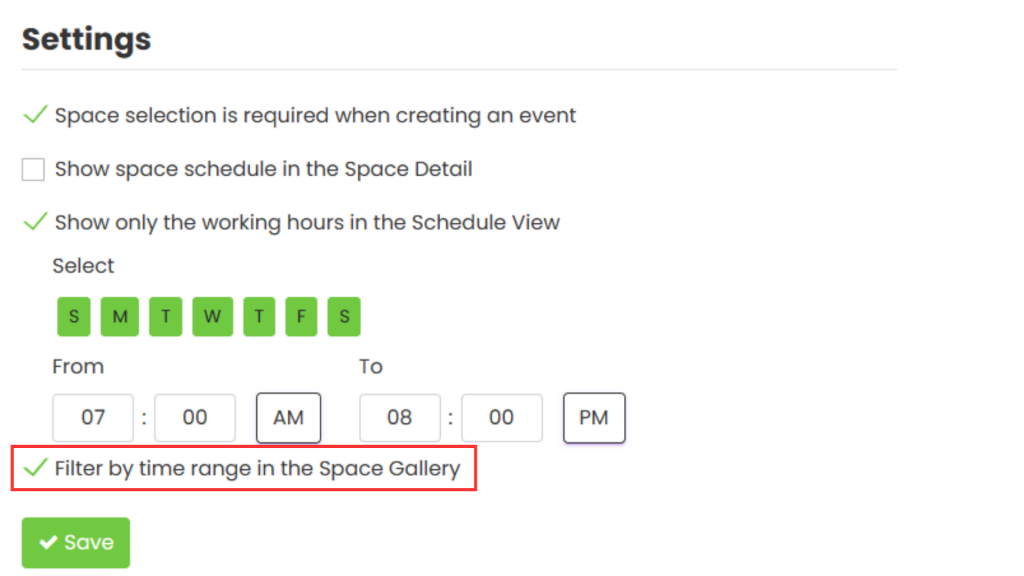
- Check the option Filter By Time range in space gallery in the schedule view.
- Lastly, click on the Save button to save your new settings.

3. Navigating the Time Range Filter on the Public Space View
Once the time range filter is enabled, here’s how you can utilize it on the public interface of your Space Gallery View:
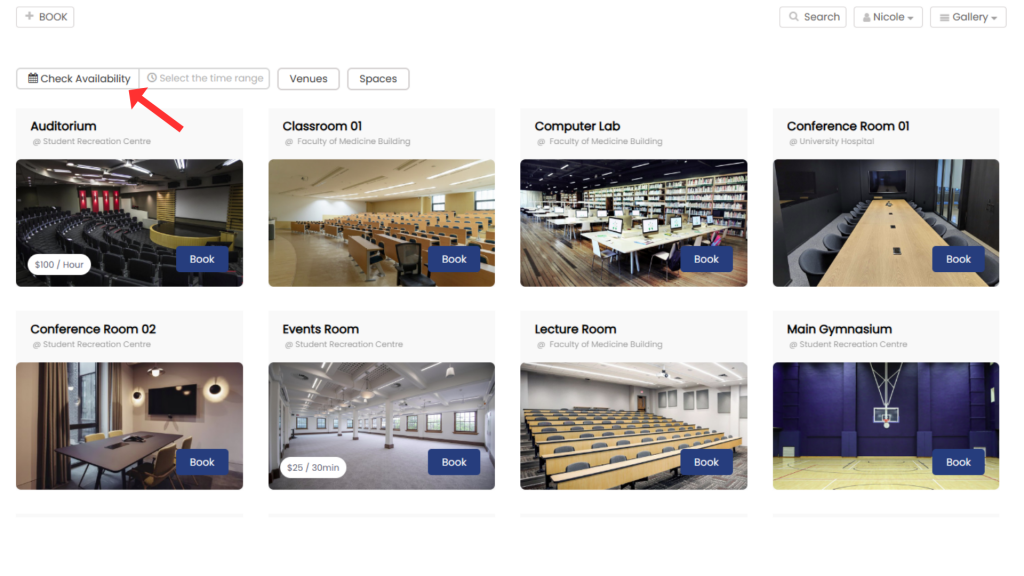
- Open the main calendar. On the left side, click on Check Availability.

- Select a specific day in the date picker to open the time picker.
Please note that the current time is set as the default time interval, providing a convenient starting point for your search. For example, if it’s currently 2:44 PM, the default time interval suggestion will be 2:00 PM – 3:00 PM. However, you can select any time that you would like to search for.

By following these simple steps, you’ll unlock the full potential of your space calendar, making it easier than ever for people to select the proper time range and book your spaces.
For more advanced tips and tricks on optimizing your space booking experience and venue management, check out our comprehensive guides on our Help Center.
Need Additional Help?
For further guidance and support, please visit our Help Center. If you have any inquiries or need assistance, don’t hesitate to contact our customer success team by opening a support ticket from your Timely account’s dashboard.
In case you require additional assistance in implementing and using Timely venue management system, we are pleased to assist. Explore all the professional services we can offer you, and get in touch with us today!