
Monetizing resources such as furniture, AV equipment, or catering services can open new revenue streams for your organization. With Timely, you can easily assign pricing to individual resources, ensuring accurate billing and resource allocation for your events. This guide explains how to set up pricing for paid resource reservations step by step.
1. Benefits of Charging for Resource Reservations
Setting prices for resource use offers several advantages:
- Generate Additional Revenue: Capitalize on your available resources by offering them as paid add-ons during event creation or booking.
- Encourage Responsible Usage: Charging for resources encourages organizers to request only what they truly need.
- Streamline Invoicing: Clear pricing integrated into event setup helps automate and simplify billing.
Learn how to create new event resources for space reservations.
2. How to Add Pricing to Resources
Follow these steps to set pricing for any resource:
- Log in to your Timely dashboard.
- From the left-hand menu, go to Resources.
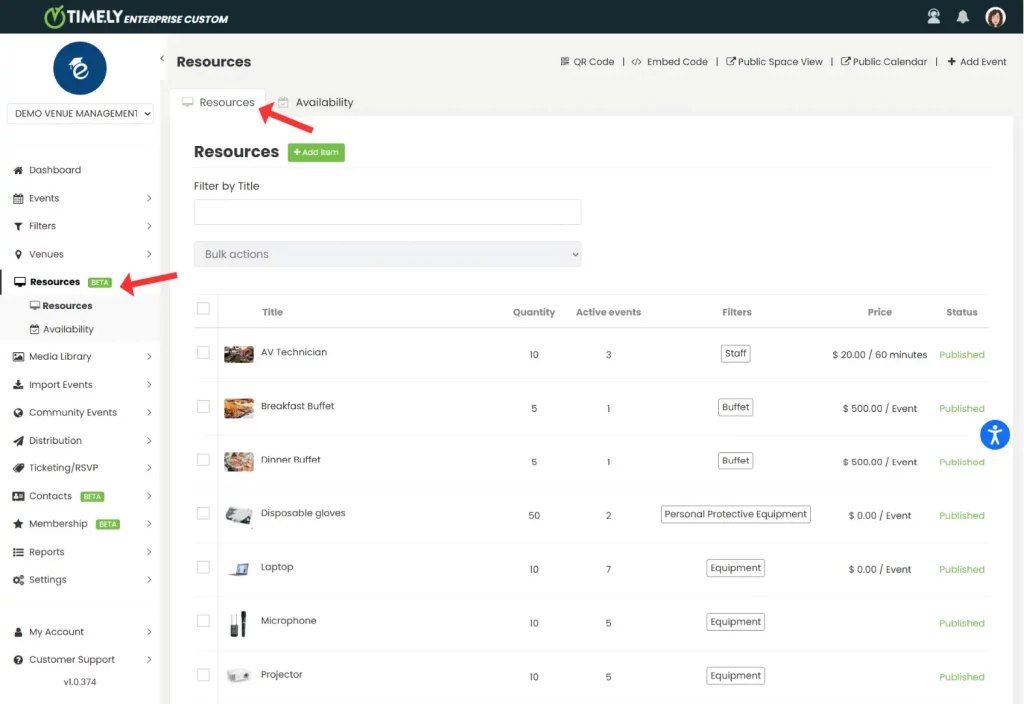
- Select a resource by clicking its name or pencil icon to edit.

- Scroll to the Pricing section within the resource form.
- Check the box labeled Enable booking charging.
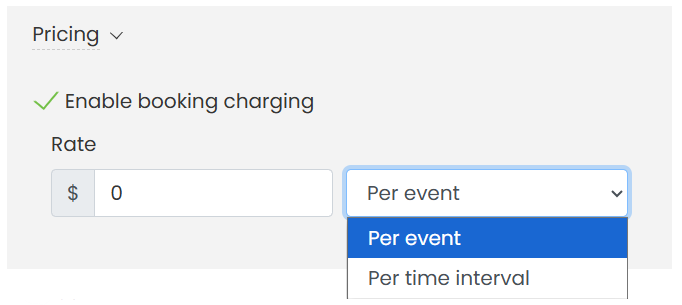
- Select a charging option from the dropdown menu:
- Per event
- Per time interval
- Define the monetary rate and time interval if applicable, which can be set by minutes, hours or days.

- Click Publish to save your settings. Your paid resources are now set up.
Need Additional Help?
For further guidance and support, please visit our Help Center. Additionally, if you have any inquiries or need assistance, don’t hesitate to contact our customer success team by opening a support ticket from your Timely account’s dashboard.
Moreover, in case you require additional assistance in implementing and using the Timely venue management system, we are happy to assist. Explore all the professional services we offer, and feel free to get in touch with us today!