Are you looking to monetize your venue space bookings? With Timely, you can easily set up pricing for paid space reservations, allowing you to generate revenue while efficiently managing your event spaces. In this guide, we’ll explore the benefits of using this feature, how to set it up on your dashboard, and the space rental process for your customers.
1. Benefits of Using the Paid Space Reservations Feature
By enabling paid space reservations, you open up new revenue streams for your business or organization. Whether you’re renting out meeting rooms, event spaces, or recreational areas, this feature allows you to charge for bookings seamlessly. Benefits include:
- Revenue Generation: Monetizing your space bookings enables you to generate additional revenue streams for your business or organization.
- Streamlined Booking Process: Offering online paid reservations offers convenience and streamlines the booking process for both you and your customers.
- Enhanced Security: Timely’s account creation and sign-in process and integrations with PCI compliant payment gateways ensure the security of your space calendar bookings and online payments.
2. How to Set Up Pricing for Paid Space Reservations
Before setting up the pricing for your paid space reservations, ensure you have added a payment gateway to your Timely account. If you haven’t done so already, please follow the instructions here.
Now, let’s proceed with setting up paid space reservations:
- Log in to your Timely account.
- Navigate to the main navigation menu and click on Venues, then select Spaces.
- Hover the mouse over the desired space and click on Edit, or click on the green +Add Item button at the top of the screen to create a new space.

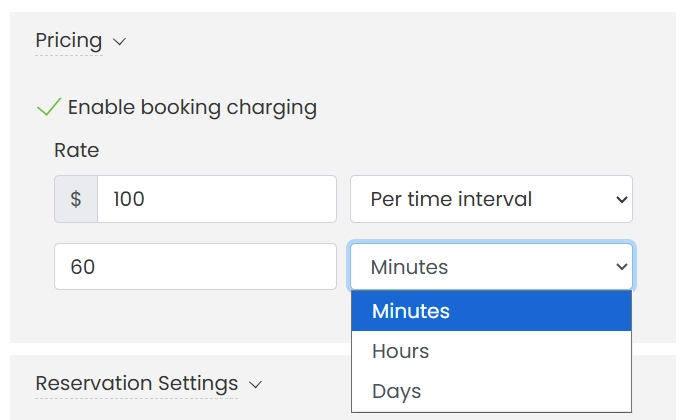
- Next, go to Pricing, then click on the checkbox Enable Booking Charging to monetize space bookings. Here, you can specify the fee title, provide a detailed description, set the rate, and determine how the charge will be applied: Per event or Per time interval.
When you choose Per event, you only need to set a single price amount.
However, when you select Per time interval, the form displays three additional fields:
- Amount – the price you will charge for each block.
- Length – the duration of the block (numeric value).
- Unit – select whether the block is measured in minutes, hours, or days.
With this option, the system automatically calculates the total booking price by multiplying the block price by the total time reserved. For example, a two-hour booking with a rate of $100 per 60 minutes interval will automatically total $200 at checkout.
- Lastly, click on the Save button to save the information.
3. How will your Customers Request to Rent your Spaces?
For security purposes, your customers must create an account with Timely to submit space booking requests. This requester / submitter account creation and sign-in process safeguard your space bookings.
New submitter users will receive an email requesting them to verify their email address to activate their account. Existing Timely submitter users can simply sign in to the application.
Upon sign-up, all system users with an approval role receive an automatic email, informing them of the new submitter user. They can approve or reject the new submitter, unless automatic approval is chosen.
After signing in, users can access the calendar with venue and space options. Here’s how they can submit booking requests:
- At the main calendar page they are able to oversee spaces and corresponding fees. Here they can also filter spaces by date and time availability.
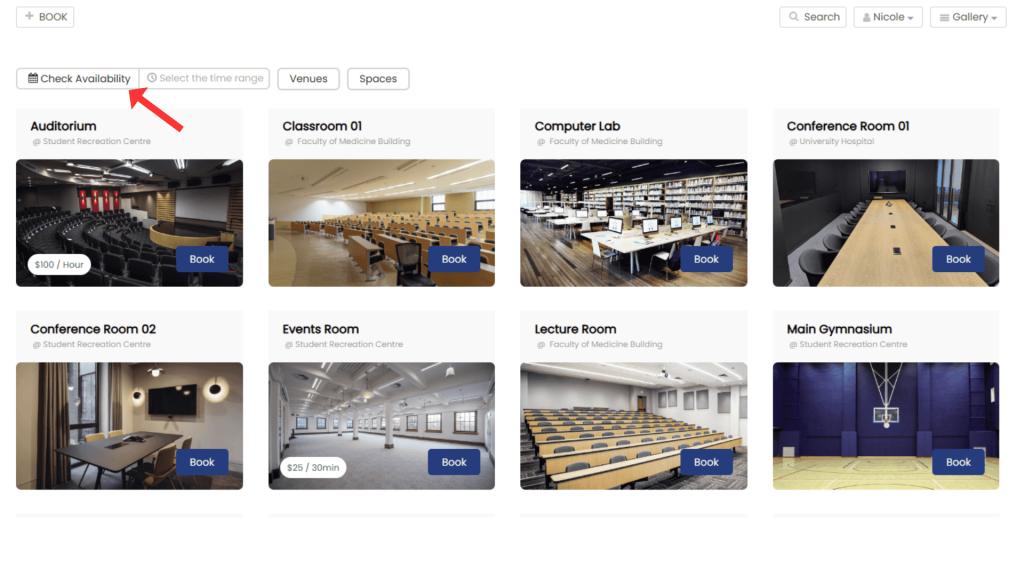
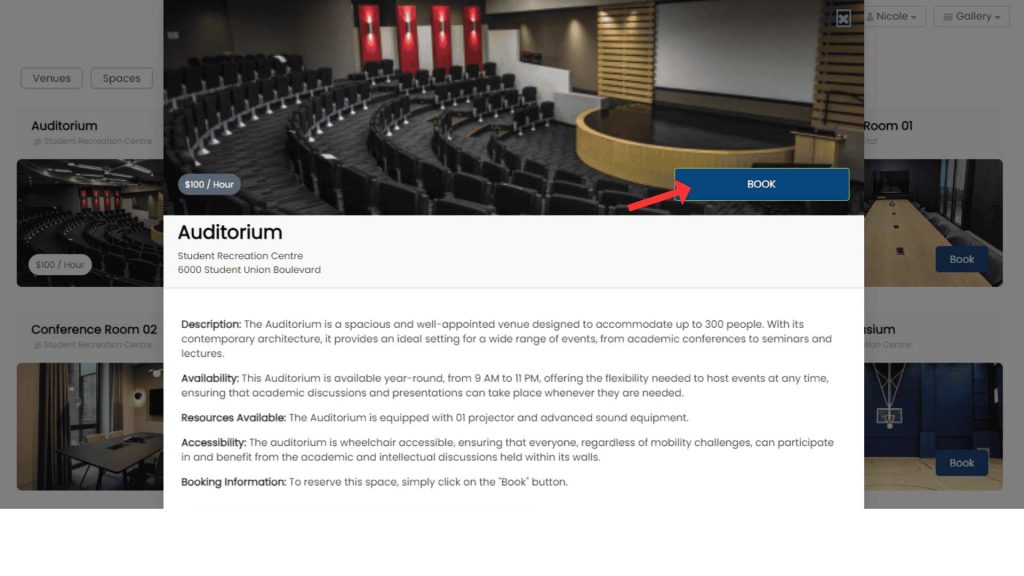
- Then click on the respective space image to view details like address, description, and availability.
- By pressing Book, they will have access to the pop-up reservation form. Where they can provide details about their event, including date, time and description, as well as answer space-related questions.
- At the bottom of the form, they will see more information about the applicable space rental fee. The system will calculate the fees based on the requested space booking time slots.
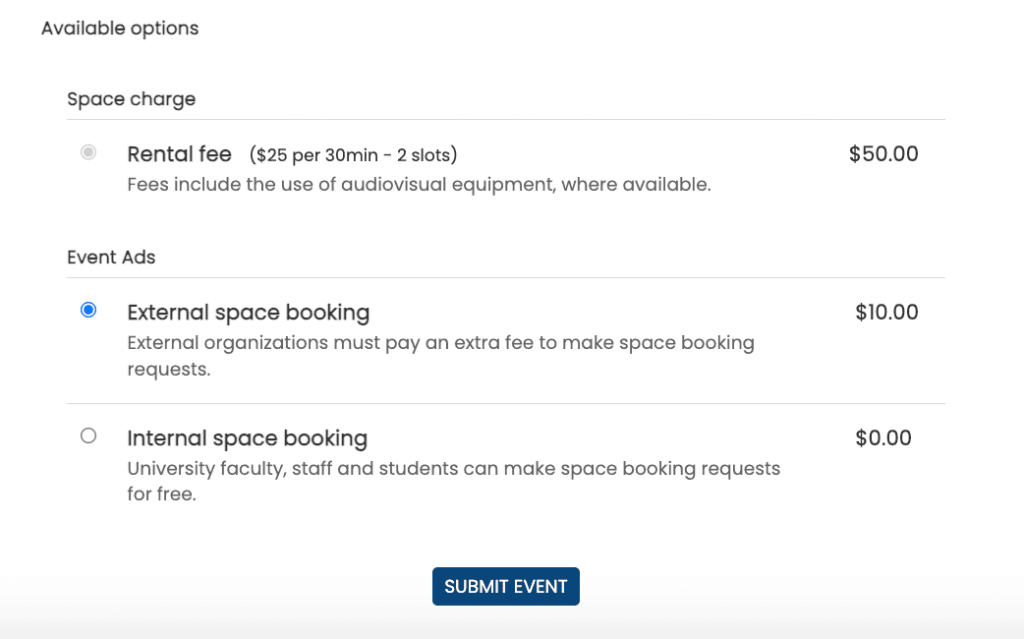
- To proceed with the booking, they will need to press Submit Event. If all necessary information is provided, a new page will open on the screen prompting the submitter to add their billing and credit card details.
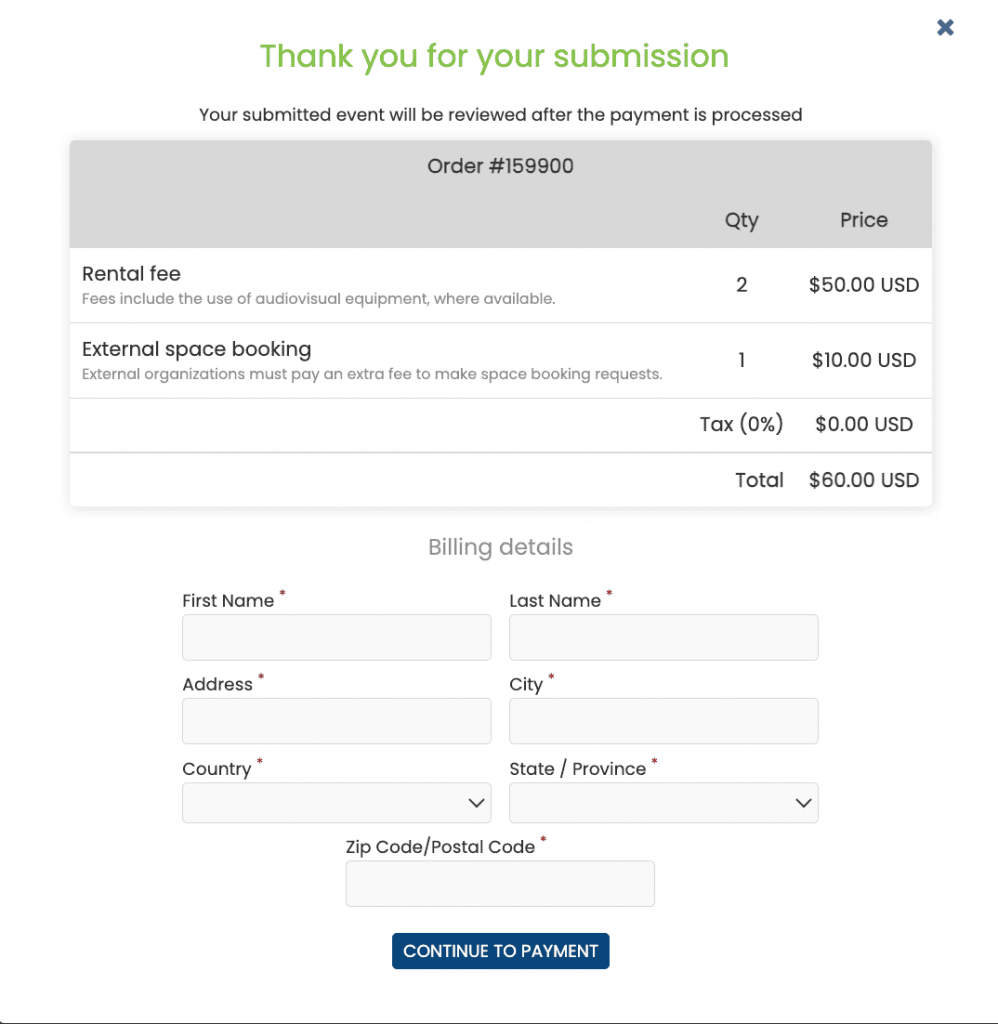
- Once the payment is processed, the system displays a thank you message and sends a booking request confirmation email to the submitter. In addition, it sends an automated email to all account Administrator users with an approval role, notifying them about the new space booking request.
Need Additional Help?
For further guidance and support, please visit our Help Center. If you have any inquiries or need assistance, don’t hesitate to contact our customer success team by opening a support ticket from your Timely account’s dashboard.
In case you require additional assistance in implementing and using Timely venue management system, we are pleased to assist. Explore all the professional services we can offer you, and get in touch with us today!