As an event professional, it’s crucial to keep track of your website’s performance and monitor user behaviour to optimize your marketing efforts. With a Timely account you can easily integrate with GTM, and have all the tools you need to gather valuable data and make informed decisions about your events business. In this post, you will learn all the steps to install Google Tag Manager on your Timely calendar. So, let’s start!
1. What is the Google Tag Manager
Google Tag Manager is a free tool developed by Google that simplifies the process of managing website tags and tracking codes. In other words, it makes it easier to add and update tags, without the need for manual code changes.
2. Benefits of Timely & GTM Integration
For businesses that publish events on their website through a Timely calendar, integrating Google Tag Manager offers several benefits.
Firstly, it allows businesses to track and analyze the performance of their events with ease, helping them understand what events are resonating with their target audience and what needs improvement. Additionally, Google Tag Manager allows businesses to create custom event tags and track user behavior on their website. With these valuable insights, businesses can optimize their marketing efforts and increase event attendance. Furthermore, Google Tag Manager ensures that website performance is not affected by slow-loading tags or incorrect codes.
Overall, using Google Tag Manager streamlines the event management process for businesses, allowing them to make data-driven decisions and improve their event strategy.
3. How to Install Google Tag Manager (GTM)
3.1 How to Obtain Your Container ID from Google Tag Manager
Before installing the Google Tag Manager on your Timely calendar, you need to have a GTM account and get the Container ID. To start, follow the steps below:
- Log in to your Google Tag Manager profile.
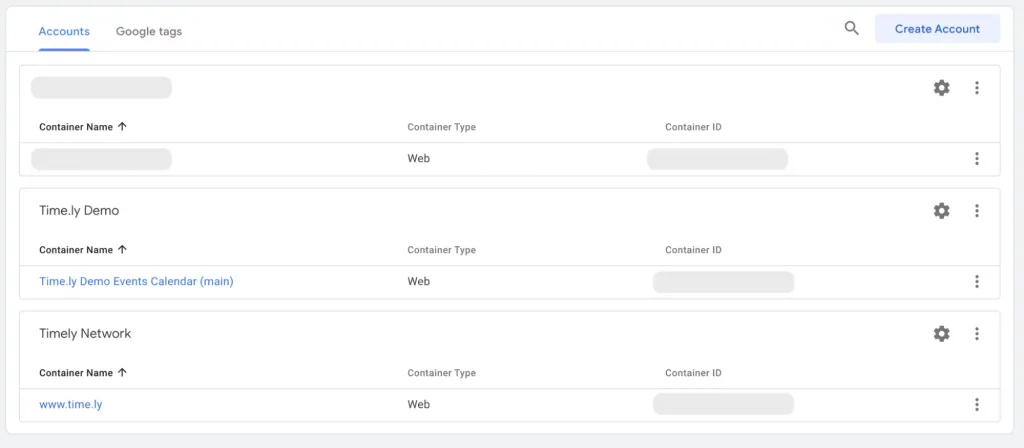
- Once logged in, you will find a list of all accounts included in your profile.

- You can create a new account for your Timely calendar, or use an existing one. Each account will have their own particular Container ID, formatted as “GTM-XXXXXX”.
- On the accounts’ list, click on the selected Container’s name.
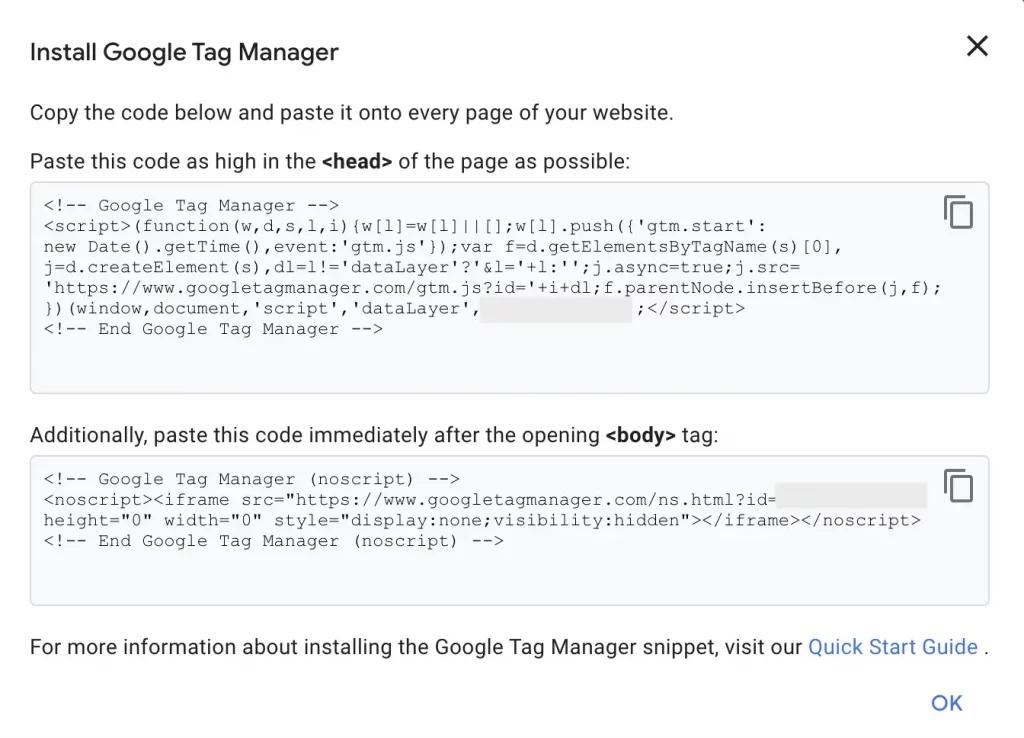
- The Workspace screen will open on your browser. There, find your Container ID on the top right corner of the screen, and then click on it.

- A new window will appear on the screen with the appropriate codes for Google Tag Manager installation.

3.2 How to Integrate GTM with Timely
Once you have obtained the Container ID from Google Tag Manager, it is time to install it on your Timely calendar. Simply follow the steps below:
- Log into your Timely account, then, navigate to Settings.
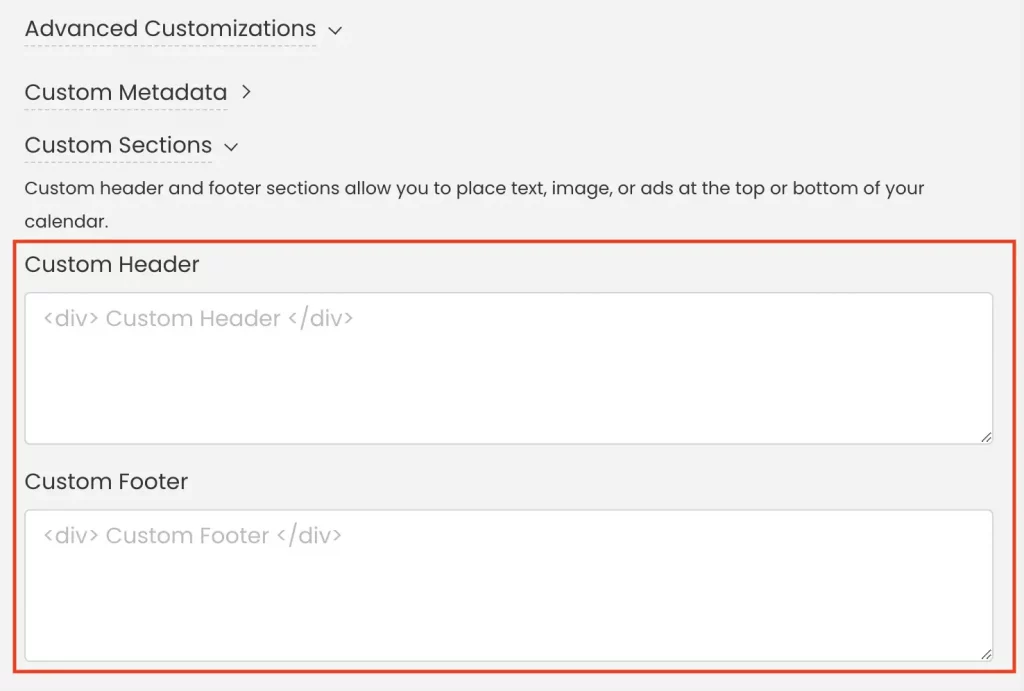
- After that, click on Design, and then go to Advanced Customizations.
- There, go to Custom Sections, and paste your Google Tag Manager code into the appropriate field (Header and Body) to connect Timely with your Google Tag Manager account.

- Then, click on the Save button to save your settings.
Integrating Google Tag Manager with Timely unlocks a wealth of marketing data and insights for your event management efforts. With Google Tag Manager‘s efficient tag management, you’ll be able to make data-driven decisions that enhance your event success.
Need Additional Help?
For further guidance and support, please visit our Help Center. If you have any inquiries or need assistance, don’t hesitate to contact our customer success team by opening a support ticket from your Timely account’s dashboard.
In case you require additional assistance in implementing and using Timely event management system, we are happy to assist. Explore all the professional and managed event services we can offer you, and get in touch with us today!