With a Timely account, you can easily install events calendar and widgets into your WordPress website. You just need to copy the code snippet provided, and apply it to the backend of your web pages. Any changes made to the calendar settings or events will appear on your site in real time. You can even use the calendar to accept bookings and rsvps, as well as sell tickets to your events, if you wish. In this post, you will learn how to add events calendar and widgets to Wordpress websites and web pages.
1. What is WordPress?
WordPress.org is the most popular content management system (CMS) currently available in the market. It is free and open source, appealing to both beginners and experienced web designers alike.
WordPress CMS is especially attractive for being easy to use. Moreover, it contains a plugin architecture and themes system, which helps customizing websites for any type business.
If you have built your site on WP or are planning to, and want to know how to add an events calendar to a WordPress website or page, this post is for you. Just keep reading.
Note: This post explains how to install Timely web-based calendar version on a WordPress website. If you want to install Timely All-in-One Events Calendar WordPress plugin instead, please follow the instructions provided on our WP Plugin user guide.
2. Full Calendar vs Widgets Embedding
Timely event calendar software provides several options for creating an online event calendar. Aside from being able to choose among more than a dozen calendar views, you can also re-create all views as a full-scale calendar view or a calendar widget view. In addition, you can display selected events on a slider or a carousel widgets to enrich your WordPress website design even more.
The main difference between a full calendar view and calendar widget view is the size of the embeddable area. A full-scale calendar is a complete calendar that is installed on a dedicated WordPress page. Often, it covers the whole page or most of it.

Stream full calendar view
In contrast, widget views are more compact and work like a mini calendar view. They can be embedded in any area of a website, alone or together with a full calendar view.

Stream calendar widget view

Agenda calendar widget view
3. How to Add Events Calendar to a WordPress Page
Before adding Timely events calendar to your WordPress page, first you need to set up the calendar embed code. If you haven’t done already, follow the steps provided in the post How to Set Up the Embed Code for your Timely Calendar.
Once that step is completed, you can go ahead and embed the code into your WordPress website by following the instructions below:
- Log in to your WordPress website dashboard.
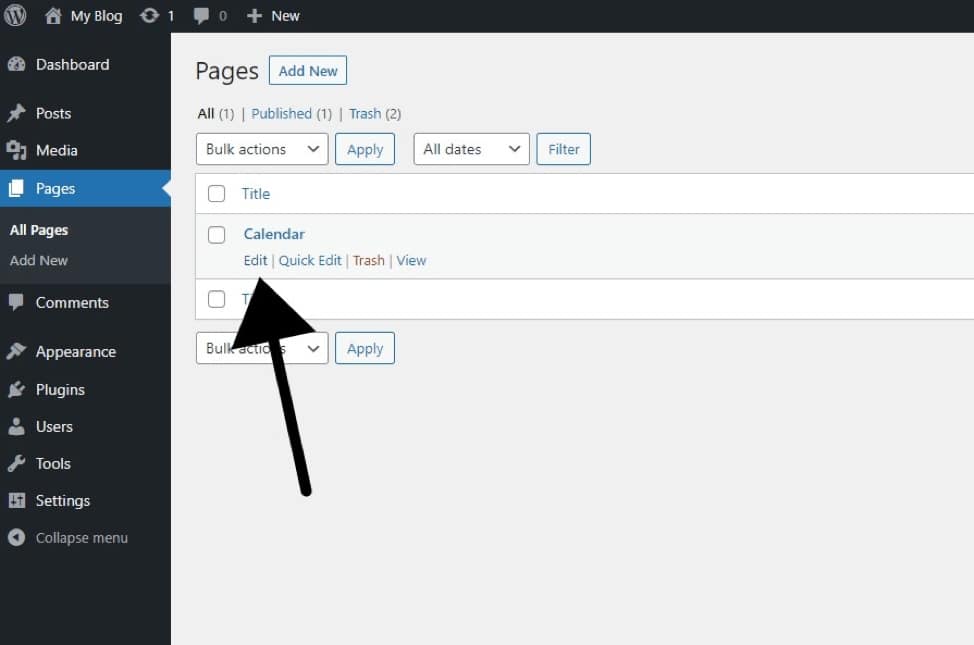
- Click Pages, from the main menu.
- Choose the page you want to edit. The WordPress visual editor will appear on the screen.
- Click on the block inserter tool next to the content area where you want to place the embed code, and select Custom HTML block:

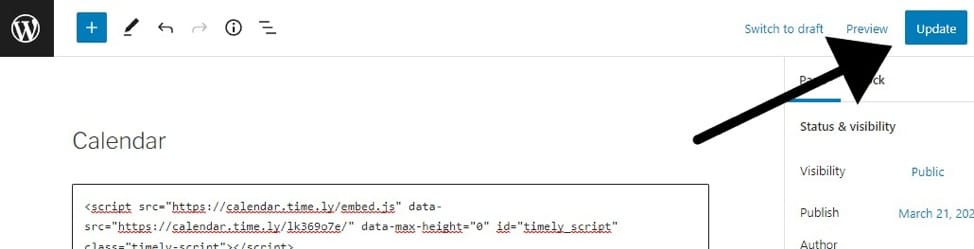
- After adding the Custom HTML block, paste the previously copied Timely calendar embed code, into the Write HTML… field:

- Click on Publish or Update to update the changes made to the WordPress page.
- Next, go to the front end of your WP site. There you will see that your Timely calendar have been properly installed, according to your embed code settings.
4. How to Add Widgets to a WordPress Website
To add widgets to your WordPress website or web page, including calendar widget views, slider and carousel widgets, first you need to set up an embed code for each widget. If you haven’t done already, follow the instructions below to create each embed code:
- How to Set Up the Embed Code for Calendar Widget Views
- How to Set Up the Embed Code for Event Sliders
- How to Set Up the Embed Code for Event Carousel
Once you have the embed codes set up, you can go ahead and embed them into the selected WordPress page by following the same instructions provided above.
The only difference is that, when designing your page, you will have to limit the embeddable area first. This way, the widget will appear exactly where you want it to be on the page.

Slider widget installed on a website
We hope that this user guide has helped you learn how to add an events calendar to WordPress websites and pages. If you wish, you can add Timely RSVP / Ticketing add-on to your calendar, and offer event booking, rsvp, and ticket sales, directly from your own website.
For more user information, please go to our Help Center. If you have any questions, feel free to contact us. Alternatively, you can open a support ticket from your Timely account.