Whether you’re hosting popular events with limited ticket availability or want to offer a waitlist option for your attendees, Timely has got you covered. With a Timely account, you can create waiting lists for your events and allow your audience to subscribe when tickets have already been sold out. This ensures that interested attendees have the opportunity to participate when new tickets become available or when existing ticket holders release their spots. In this comprehensive guide, you will learn how to create a waiting list for your event. Let’s dive in!
1. What is a Waiting List?
A waiting list provides event promoters with a greater level of authority over their guests and ticketing transactions. When preparing for an extensive event with quickly depleting tickets, promoters can generate a standby list. This list enables registrants to receive updates on event changes, additional availability, and newly released tickets.

Keeping attendees engaged and informed about your events and their availability is made easier with Timely Waiting List feature. Once enabled, guests can join a queue even when the event is full. If desired, they can even receive email notifications when a spot becomes available. They will be the first to know when they can finally purchase tickets to your events.
2. Setting Up a Waiting List for your Event
To set up a reserve list for your event, follow these step-by-step instructions:
- Log into your Timely account.
- Navigate to the event you want to add a waiting list to. If you haven’t created an event yet, refer to our guide on How to Create an Event to Create an Event.
- Once you’re on the event page, go to the Costs and Tickets section.
- Create the RSVP or Ticket for the event by following the instructions in our guide on How to Set Up Costs and Tickets for Your Events.
- After creating the RSVP or Ticket, select the checkbox labeled Enable Waiting List In Case Tickets Are Sold-Out.

- Don’t forget to agree with Timely Ticketing Terms of Service before publishing your event.
By following these steps, you will successfully set up a waiting list for your event, ensuring interested individuals can join the waitlist when tickets are sold out.
3. Setting Up Automated Notifications to Subscribers
After enabling the Waiting List feature, you have the option to send automated notifications to your waitlist subscribers whenever new tickets become available.
To do so, simply check the box Send notification automatically for who is on the waiting list. Then, publish your event.

If you wish, you can edit the email notification templates to align with your brand and style. To learn more, please follow the instructions in the user guide How to Customize Event RSVP and Ticket Email Templates.
When someone cancels their ticket, all individuals on the waitlist receive an automatic email notification about the available spot. The first person that visits the event and registers will secure the ticket.
Please note that the system does not automatically remove people from the waitlist. If someone from the waitlist gets a ticket, they need to be manually unsubscribed from the waitlist.
4. Disabling the Waiting List
When the waiting list option for an event is turned off, it serves a dual purpose. Firstly, it prevents any new individuals from being added to the waiting list for that event. Secondly, it discontinues all notifications for those who were previously registered on the waiting list, ensuring that they will no longer receive updates or notifications if spaces become available.
5. How to Register for an Event’s Waiting List
Once you publish an event, your customers will be able to register or purchase tickets. In case all tickets are sold out, they will be able to join the standby list. Here’s a step-by-step process:
- Customers will visit your Timely calendar or event page to view the event details.
- If all the tickets for the event are sold out, customers will see the WAITLIST button in the ticket section.
- After clicking on the WAITLIST button, customers will be prompted to provide their names and contact information in a form.
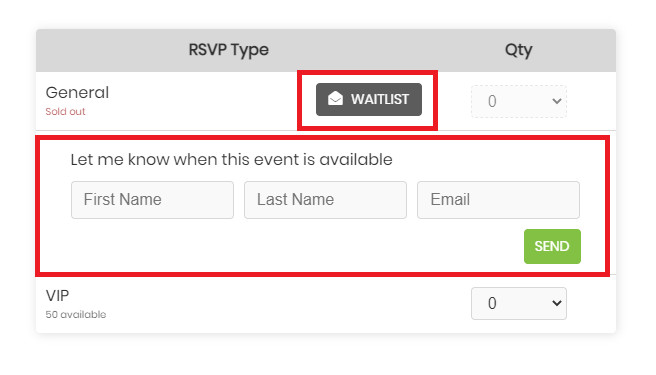
- After submitting the form, the system will display a confirmation message on the screen.

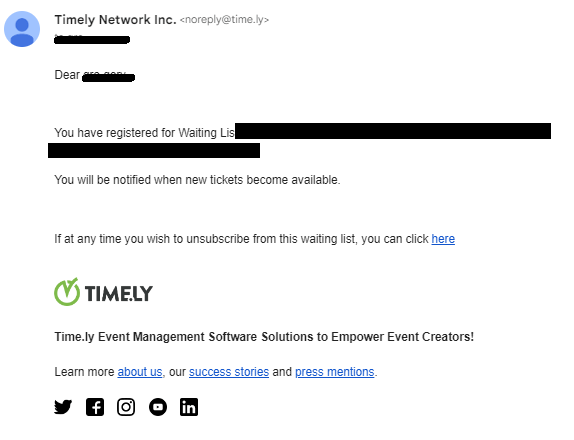
- Additionally, customers will receive an email confirming their subscription.
Whenever customers try to add themselves more than one time to the waiting list using the same email address, the system will block their subscription.

6. How to Unsubscribe from the Waiting List
Customers can unsubscribe from the waiting list by following these steps:
- Open the email received confirming the list subscription.
- In the sentence “If at any time you wish to unsubscribe from this waiting list, you can click here”, click on “here”.
- Customers will then be redirected to another page. There, they need to type the email used to subscribe to the standby list in order to unsubscribe.
- Next, they need to click on the UNSUBSCRIBE button.

Need Additional Help?
For further guidance and support, please visit our Help Center. If you have any inquiries, contact our customer success team by opening a support ticket from your Timely account’s dashboard.
In case you require additional assistance in implementing and using Timely event management system, we are pleased to assist. Explore all the professional services we can offer you, and get in touch with us today!