With a Timely account, you can have many calendar view options for your website. Their main purpose is to keep your audience informed about your upcoming events through a pleasant and interactive experience. Timely calendar layouts are designed to match your website and branding, while providing a consistent navigation throughout multiple devices. In this post, you will learn how to set up your calendar views settings and choose the best calendar format for your website.
1. What are Calendar Views?
Calendar Views are different layouts you can use to display Timely events calendar on your website. They highlight important event information you don’t want your audience to miss out on a calendar format, straight from your own website.
Besides making your site more aesthetically pleasing, Timely calendar views also make it easier for your website visitors to see the data and navigate through events in the format they prefer. They can also save and share events with their friends and family members. By correctly setting up your calendar views settings, you will ensure you are making the right choice regarding calendar layouts for your website.
2. What Calendar Views are Available?
Currently, you can choose among 13 different calendar views, including:
- Posterboard view
- Tile view
- Stream view
- Modern List view
- Modern Row view
- Clean List view
- Clean Row view
- Agenda view
- Compact Agenda view
- Year view
- Month view
- Week view
- Map view
Although Timely gives you a lot of room to work with different calendar styles, it might be overwhelming at first. If you’re not sure on which Timely calendar view is the best for you, check our calendar demo page with all views available. Alternatively, you can continue reading this post to learn more about our current calendar views.
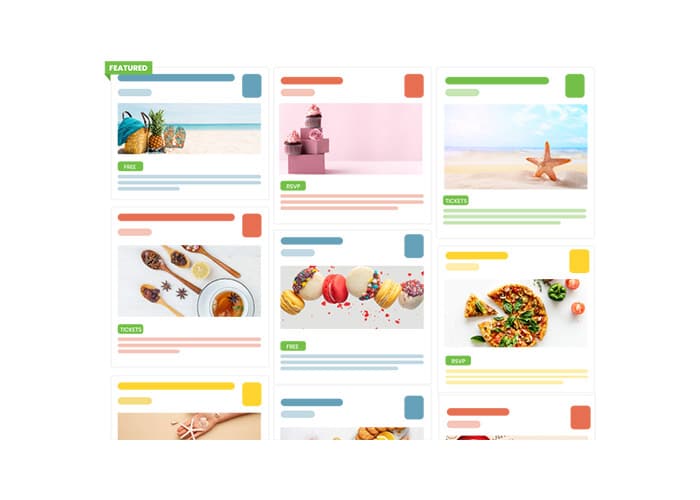
Posterboard View
The Posterboard View displays events as individual posters on your page on a Pinterest-like masonry layout. This view is one of our customers’ favorite calendar views due to its easy access to event information and beautiful design.
Tile View
Timely’s Tile View is a great calendar view to showcase events online. The layout and behaviour is similar to an Instagram Feed. Event posts are displayed on mosaic tiles prioritizing images. Event title and date are also highlighted in this view. Once you hover the mouse or click on the post you can see more details.
Stream View
The Stream View is perfect if you want to display a list of events, but still provide some visual information. Its a great calendar layout to display events vertically and without using too much space of your webpage.
Modern List View
The Modern List View is somewhat similar to the Stream View since it works as an event listing with a mix of text and visual content. However, event posts are displayed in a wider layout allowing more event information and larger images.
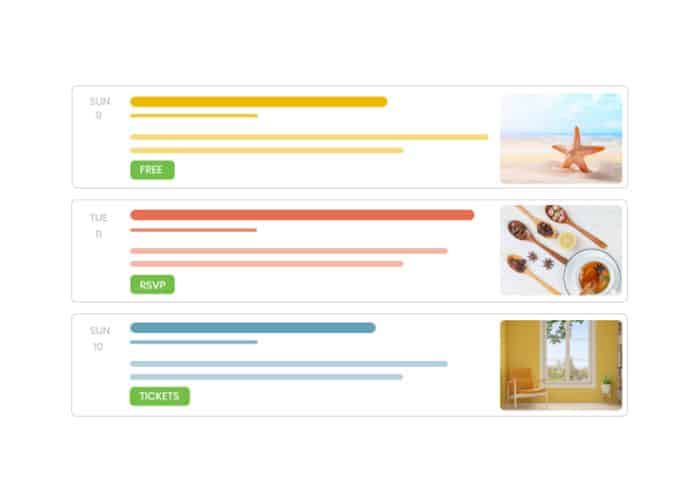
Modern Row View
The Modern Row View works the same way as the Modern List View. However, the layout is slightly different. In addition, the event date is shown as the first information, and the images are displayed on the right side of the screen, instead of the left.
Clean List View
The Clean List View is displays events in a list like the Modern List View, but without images. This view is mostly used when you want your audience to access event information on an organized and fast way.
Clean Row View
The Clean Row View displays information vertically and similarly to the Modern List View, but with no images listed. It lets your audience check the most relevant information quick, like in an online agenda.
Agenda View
The Agenda View provides a simple way to display events in chronological order. It’s a great calendar view to highlight important information. Moreover, it fits perfectly any space on your website and scales vertically very well.
Compact Agenda View
The Compact Agenda View is similar to the Agenda View, but more compact. It displays events by date in a vertical list. The nicest part is that all buttons are visible on the calendar. Thus, your audience is able to favorite, share events and buy tickets without needing to click on the event post.
Year View
The Year View provides an overview of all the events planned throughout the year. People can take a look at your whole schedule for general information about your upcoming events. They can also see all events happening on a specific day with one click.
Month View
With the Month View your audience can see all the events you have planned for the month. This calendar view is ideal when you want to give people a taste of what to expect for the current month.
Week View
Timely’s Week View lets your audience go through all events you have planned for the week. If you wish, you can add engaging images and event descriptions to illustrate your events. It is great for people who like to plan week by week!
Map View
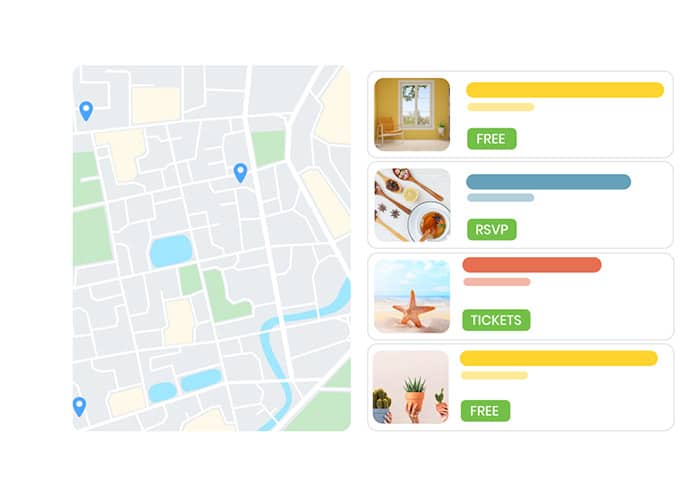
The Map View lets you display your event information while prioritizing the event venues’ location. It shows show exactly where the event will take place while displaying general information. It is great for localization purposes and directions. Timely Map View works with a Google Maps API key.
3. How to Set Up a Default Calendar View
Once you have decided on the best calendar layout for your website, setting up your preferred calendar view on your Timely dashboard is quite simple. Follow the steps below to set up the default view for your online calendar:
- Log in to your Timely account.
- On the left side menu, click on Settings. Then, choose the Design Settings.
- A new page will open on the screen. Click on the option Views.
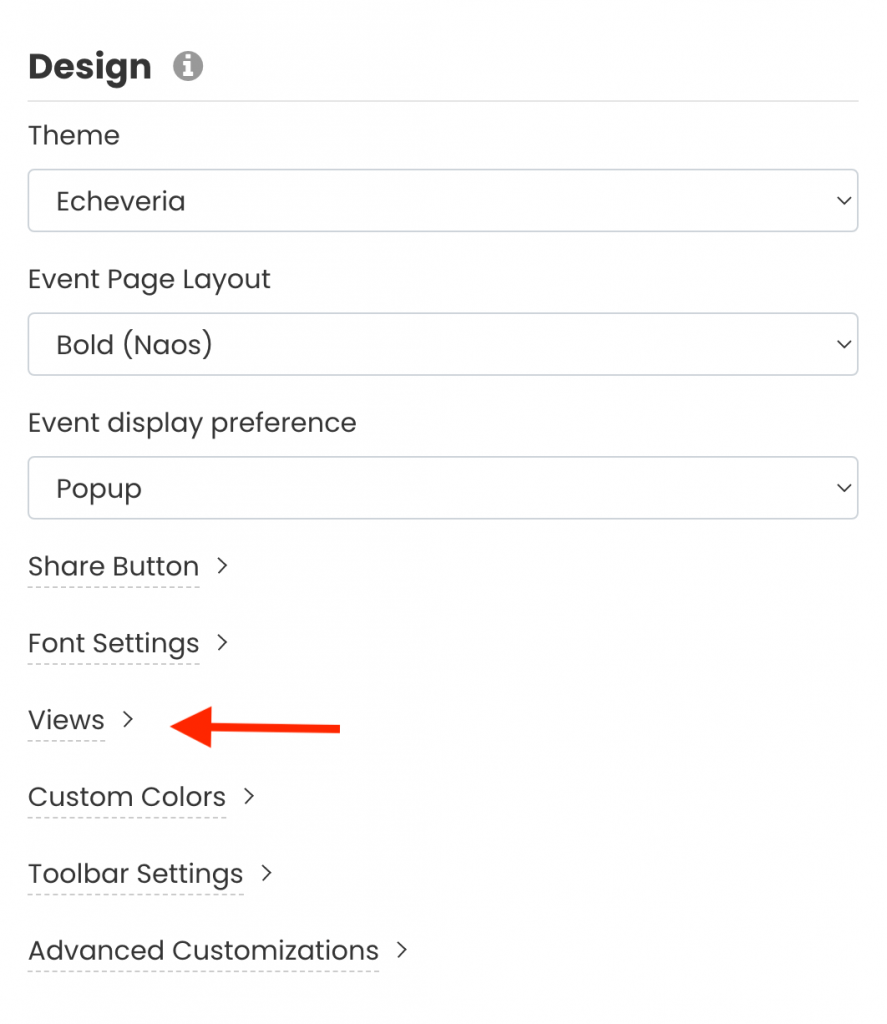
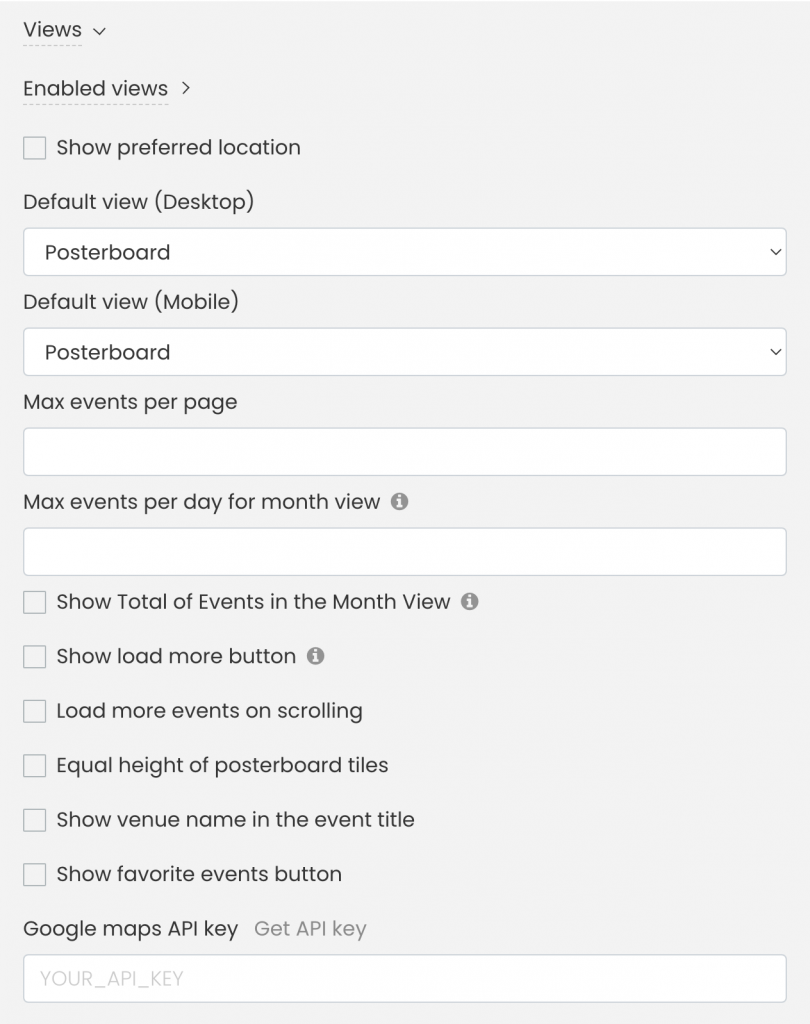
- A new section will open on the screen allowing you to personalize your calendar views.
Enabled views
The Enabled Views option allows you to control which calendar views will be available for your audience to choose from on your public calendar. To add a calendar view, click on the select views’ checkbox.
If you don’t want your audience to see your events in a different calendar view than the default view, just de-selects all the options.
Show preferred location
By checking the preferred location box, a small Google Maps will open on the screen. There, you will be able to choose the preferred location for your Map View. If you are not planning to use Timely Map View, just leave the box unchecked.

Default Calendar Views for Desktop and Mobile
This option allows you to set the default calendar view for your events calendar. Although all Timely calendar views are responsive and look great on any device, if you wish, you can set up a different view for desktop and mobile.
Show Events
This option lets you choose among several settings, as follows:
- Max events per page: For all Calendar Views, you can set the maximum number of events to be displayed per page.
- Max events per day for Month View: For the Month View, you can set the maximum number of events to be displayed per day on the date picker pop-up. For example, if you have 5 events on a specific date, but just want to show 2 events per day on the calendar, your audience will need to click on the day to see all the events happening on that day.
- Show total of events in the Month View: For the Month View, you can show the total number of events happening during the month.
- Load more events on scrolling: You can allow more events to appear on the screen on scrolling. In this case, you will also be able to set the maximum of events loaded when scrolling.
- Show load more button: You can choose between showing a clickable load more button. Once your website visitors click on the button, the calendar will load more events instantly.
Additional Calendar Layout Settings
For those who want to customize their calendar view even more, these are some additional settings:
- Equal height of Posterboard tiles: Posterboard may appear not aligned depending on the featured images you choose for events. By checking this box, your posterboard tiles will always be the same height.
- Show Venue name in the event title: If you promote in-person events, you might want to check this box and show the venue name next to the event title. By doing so, you let people know if the event is happening near them, and help them decide to attend or not.
- Show favorite events button: Allow your users to favorite your events, so they can find these events more easily in the future.
- Google maps API key: If you are planning to use Timely Map View, you will need to integrate your calendar with your Google Maps account. Here is where you can add your Google Maps API key.
- When you are done setting up your calendar view, do not forget to click the Save button at the end of the Design section to save your new settings.
For more user guidance, please go to our Help Center. If you have any questions or need additional assistance, do not hesitate to contact us. Alternatively, you can open a support ticket from your Timely account’s dashboard.