In today’s event-driven world, clear and effective communication with event submitters is crucial. Timely‘s custom notification feature for community events allows organizers to craft and send personalized messages at any point in the event submission process. This guide will show you how to create, edit, and manually send custom emails to event submitters using Timely’s event management platform.
1. Benefits of Custom Notifications
Sending personalized messages offers a range of benefits for event organizers and submitters:
- Enhanced Engagement: Keep event submitters actively involved by sending timely, relevant messages—whether it’s collecting additional event details, providing key information regarding the submission process, or requesting post-submission feedback.
- Increased Flexibility: Custom notifications give you the power to communicate whenever needed. This flexibility ensures that you can address last-minute changes, reminders, or follow-ups with ease, enhancing the overall event submission experience.
- Improved Professionalism: Every message is an opportunity to showcase your organization’s professionalism. Custom notifications allow you to align your communication with your brand voice, ensuring consistency in tone and style.
- Efficiency in Communication: By tailoring messages, you can provide the right information to the right people, avoiding unnecessary clutter. This targeted approach helps to streamline communication, making it easier for submitters to stay informed without feeling overwhelmed.
2. What Are Custom Manual Notifications?
Manual notifications allow Timely users to control communication manually rather than relying solely on automated emails triggered by specific actions within the software. This means greater flexibility to craft messages suited for specific needs, which can be sent at any point, manually.
3. Creating Custom Community Events Email Templates
Setting up custom community events email templates in Timely is straightforward:
- Go to your Timely dashboard;
- From the main menu, select Community Events. Then click on the Templates tab.
- Scroll down to the Custom Notification Templates section, where you can see how many templates your plan supports and how many have been created.

- Click +Add Item to create a new template. This will open an editing screen where you can customize various aspects of the notification:
- Template Name: Create a name to easily identify the template.
- Email Subject: Write a subject that reflects the content of the message.
- Header: Add a personalized greeting or introduction.
- Body: Write your main message. You can include dynamic fields to personalize the content based on the event or submitter’s details.
- Footer: Include your signature, logo, or any additional closing information.
- Preview your message by sending it to yourself to check for accuracy.
- Once you’re satisfied, click Save.
These templates can be used for sending notifications to event submitters manually.
4. How to Manually Send Custom Community Events Notifications
After creating your custom templates, you can send them to event submitters manually. Here’s how to do it:
4.1 Sending Custom Notifications to Submitters
- Go to your Timely dashboard;
- On the left side menu, click on Community Events;
- Navigate to Submitted Events (for free event submissions) or Orders (for paid event submissions).

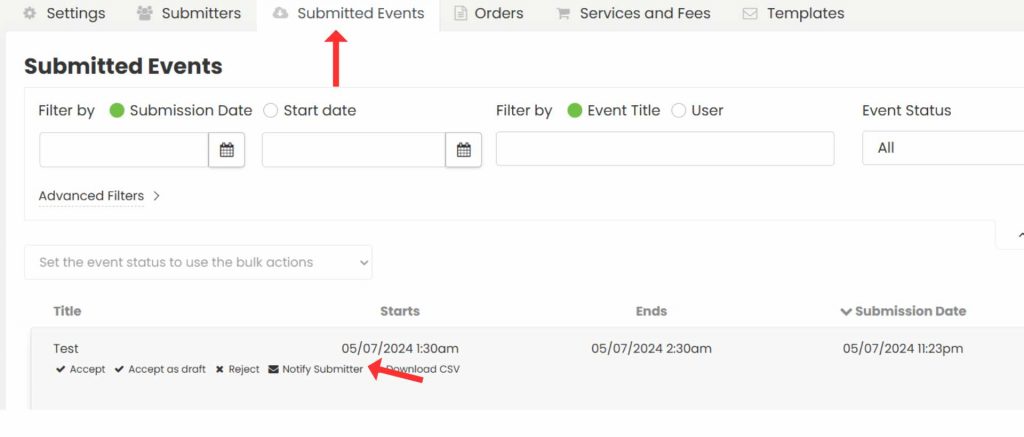
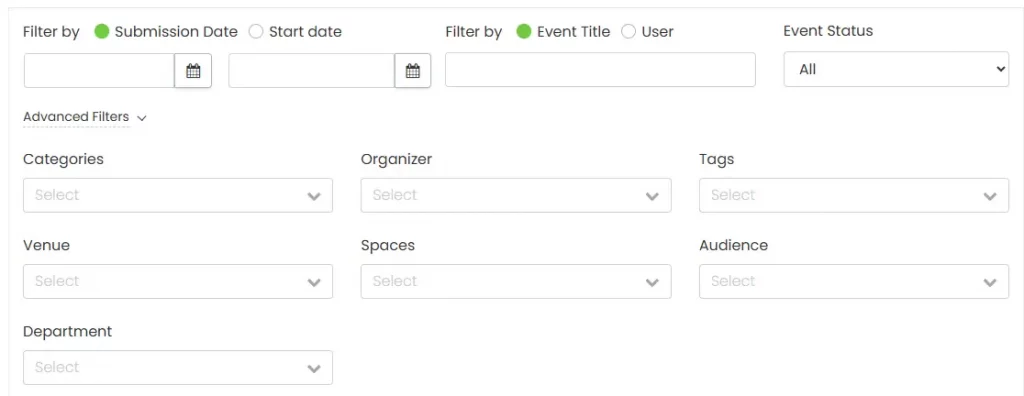
- You will see all the submitted events or orders. If you wish, you can filter by submission date, start date, organizer, and others.
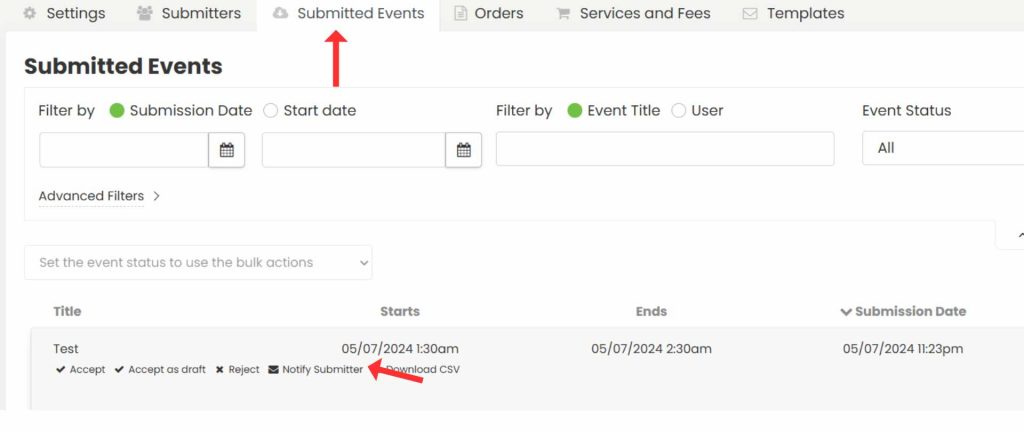
- After choosing a submitter on the list, hover the mouse over the event’s name. Then, click on the button to Notify Submitter.
- A pop-up window will appear on the screen. Select a custom notification template from your predefined templates.
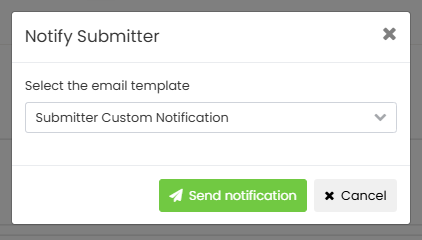
- Next, click on the Send notification button. Timely software will send the custom notification email to your submitters automatically.
4.2 Sending Bulk Notifications to Submitters
Follow these simple steps to send custom notifications to multiple submitters at once for Orders Tab:
- Log into your Timely account.
- On the main menu on the left, go to Community events.
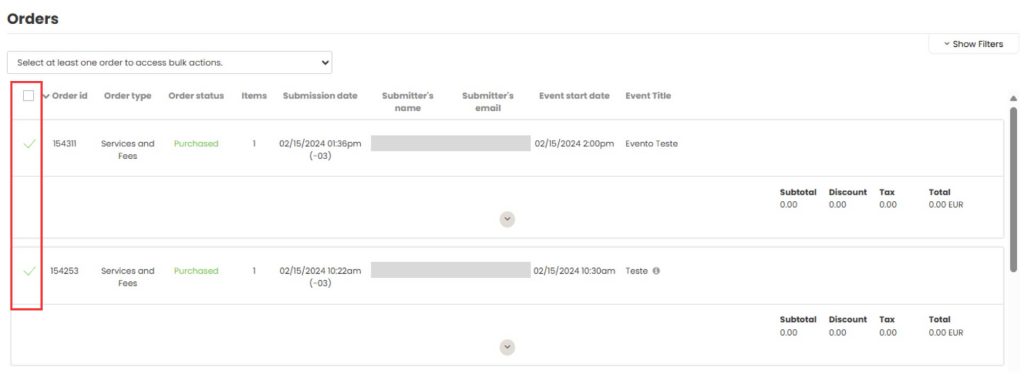
- Then, click on the Orders tab. You will see all the orders.
- You will see all the orders. If you wish, you can use the filter at the top of the screen to help you find the submitter.

- Check the box next to at least one order to activate bulk actions.
- Click on the action box and select the menu Notify Submitters from the available options.

- A pop-up will appear, presenting your Custom Email Templates created. Choose the template you wish to use.
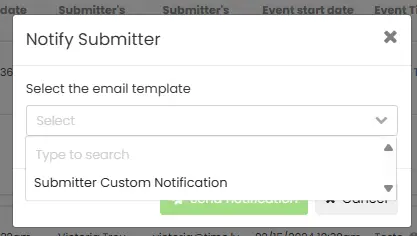
- Once you’ve selected your template, hit the Send Notification button.
- After sending, you’ll receive a confirmation message stating, Notification sent successfully.
5. Avoiding Duplicate Notifications
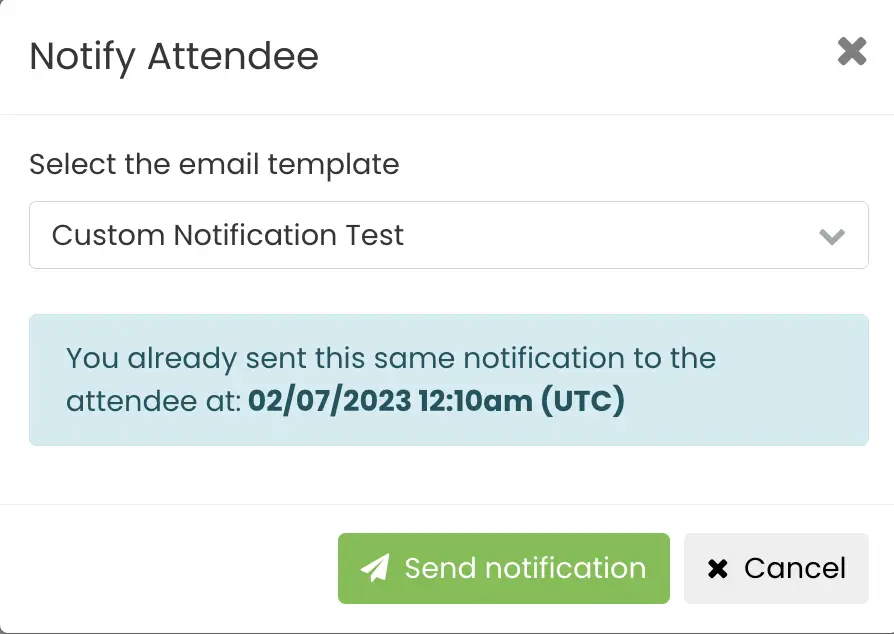
There might be situations where you have already sent a notification to a submitter, and accidentally chooses to send the same message to the same person. No need to worry! Timely system will alert you.
In this situation, a popup window will appear on the screen letting you know the date and time the last message was sent. You can either press Send notification or Cancel, as appropriate.
Need Additional Help?
For further guidance and support, please visit our Help Center. Additionally, if you have any inquiries or need assistance, don’t hesitate to contact our customer success team by opening a support ticket from your Timely account’s dashboard.
Moreover, in case you require additional assistance in implementing and using Timely event management system, we are happy to assist. Explore all the professional services we offer, and feel free to get in touch with us today!