In today’s fast-paced world, capturing attention and keeping it requires more than just text and images. That is where audio comes in. By adding audio files to your event landing pages, you can create a richer, more immersive experience for your audience and boost engagement in a way that static content cannot do. So you are able to stand out from the crowd, grab attention, and leave a lasting impression on your audience. In this post, you will learn how to add audio files to your event posts. Let’s dive in!
1. Why Add Audio Files to Your Event Posts?
Static text and images are solid foundations for effective communication, but audio injects a dynamic dimension, capturing the very essence and energy of your event. Imagine the impact: a captivating speaker introduction, a snippet of a catchy song, or even a live recording can instantly draw people in and ignite their curiosity.
Audio doesn’t just grab attention; it fosters inclusivity. Not everyone can easily access text-based information due to visual impairments or learning differences. Audio provides an alternative path to understanding, making your events more accessible to a wider audience.
Moreover, it paints a vivid picture of your event’s unique personality. Let the sounds of your venue, the energy of your performers, or the passion of your speakers immerse potential attendees and showcase your event’s true spirit.
2. How to Source the Audio Embed Code
2.1 WordPress Media Library
WordPress users can upload MP3/Wav audio files directly to the WordPress Media Library and then select them for embedding following the steps below:
- Start by logging in to WordPress, then on the left menu, go to Media.
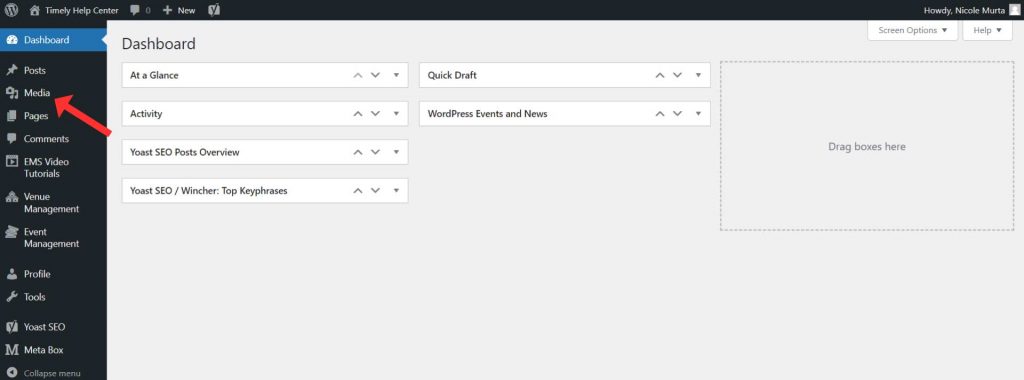
- A new page will open, you have the options to;
- use the upload button in the block to upload an audio file from your computer,
- choose an existing file from the media library,
- or insert an existing audio file from the URL.
The audio block supports all popular audio formats such as, .wav .ogg .mp3, among others.

- Once the file has finished uploading, you will now see a new audio file on the page.
- Click on it, and a new page will appear. On the right side, find the File URL, copy it so that you are able to create the embed code.
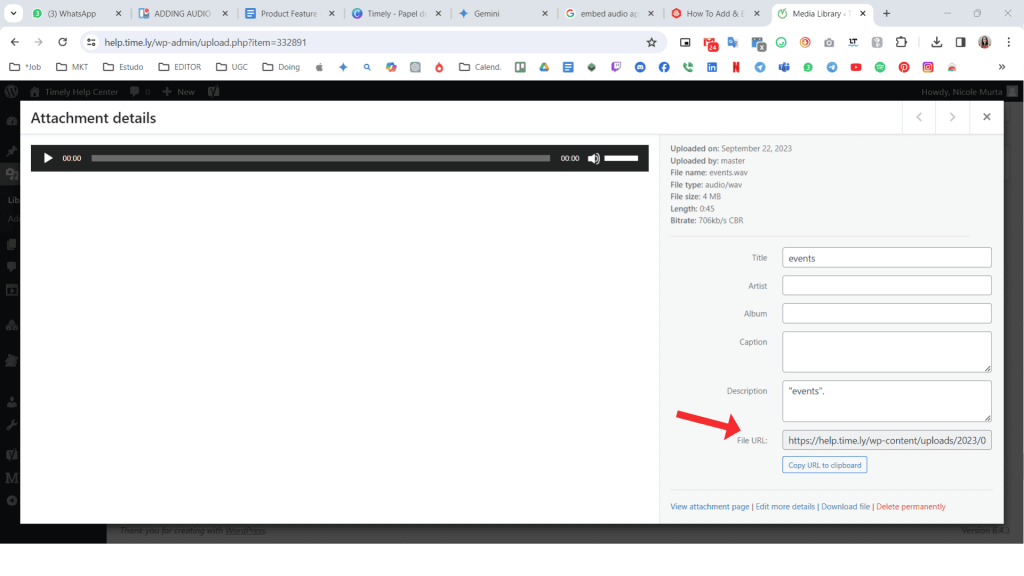
- Then, paste the url to the following code and use it as your embed code:
<audio controls>
<source src=”YOUR AUDIO URL” type=”audio/mpeg”>
Your browser does not support the audio element.
</audio>
2.2 SoundCloud
To get an embed code for your track or playlist on SoundCloud follow the step-by-step process:
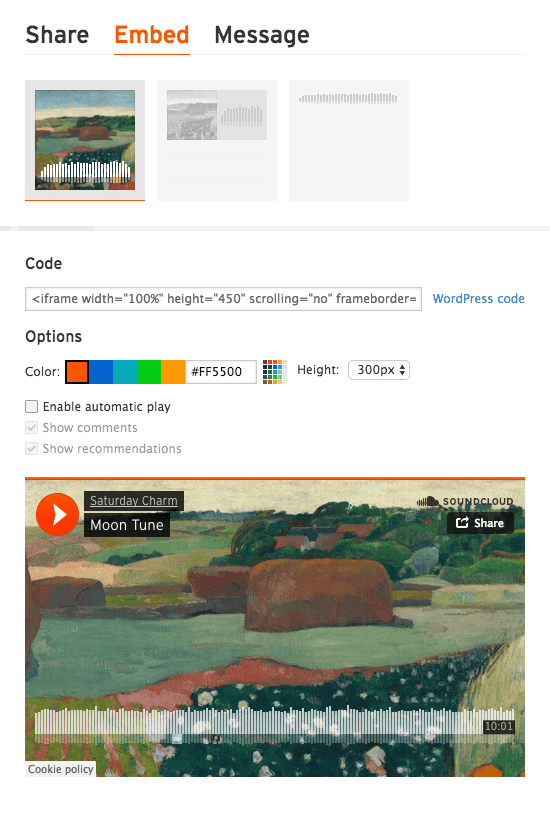
- Click the Share button below the waveform and an overlay will appear.
- Then click on the embed tab to view what options you have to embed your player. Copy-paste the embed code from Code & preview.
2.3 Spotify
To get an embed code for your track or playlist on Spotify, follow the step-by-step process:
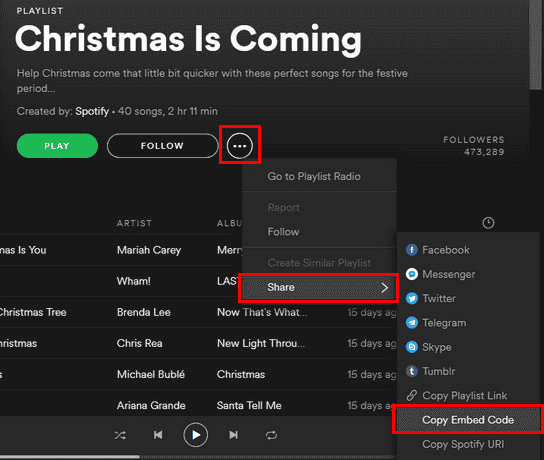
- Go to the artist profile, album, song, playlist, or podcast you want to share and click More options next to it.
- Then select Share and then select Copy Embed Code.
2.4 Apple Music
To get an embed code for your track or playlist on Apple Music, follow the step-by-step:
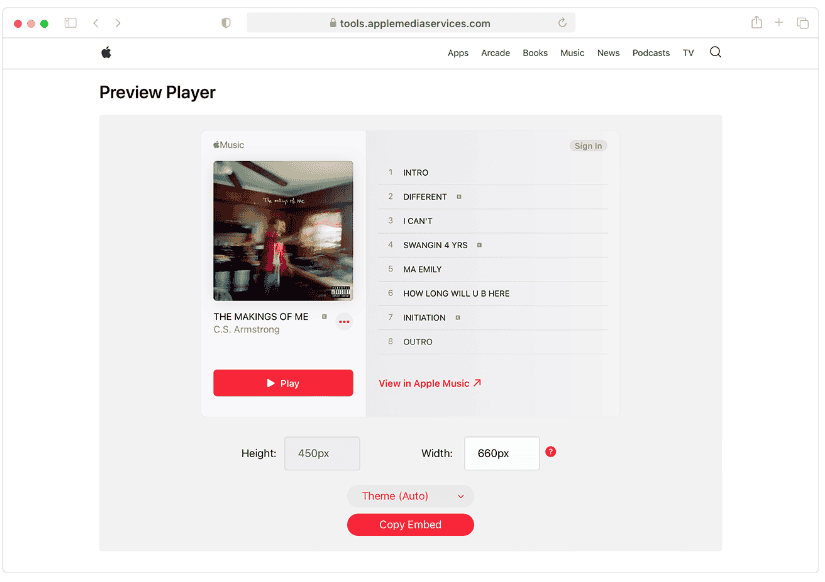
- Go to Apple Music Marketing Tools. Search for the song or album you want to embed.
- Scroll down to the Preview Player section and edit to your desired height and width.
- Click Copy Embed to copy the embed code to your clipboard and add to your website.
2.5 Amazon Music
To get an embed code for your track or playlist on Amazon Music, follow the step-by-step:
- First, please ensure that you are signed out of your Amazon account. Next, click here and then click on “Open Web Player”.

- Find the premade Amazon Music Unlimited playlist / album / song you would like to embed via web player:
- Navigate to the playlist detail page and click the Share icon on the playlist landing page:
- A Share this playlist dialog opens. Click the Embed button to generate and copy the embeddable iframe code.
3. How to Add an Audio to the Description of an Event?
By incorporating audio into your event descriptions, you position yourself as forward-thinking and innovative, leaving a lasting impression on potential attendees. To add audio descriptions to your event posts, simply follow the steps below:
- Login to your Timely account.
- On the welcome page, click on the Add Event button shortcut on the top of the page. Alternatively, you can use the main navigation menu, and then click on Events.
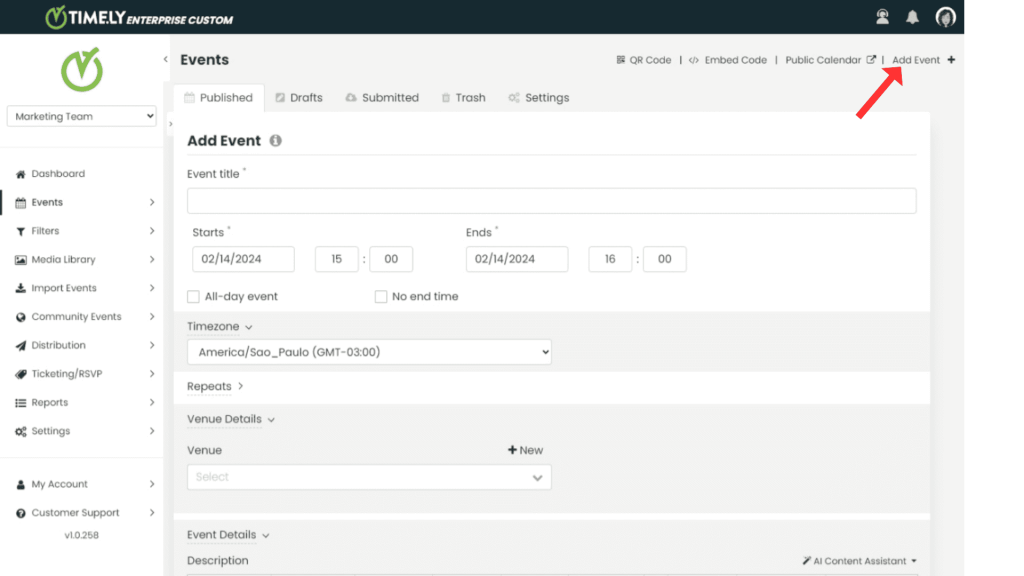
- On the Add Event section, start creating a new event. You can also pick a previously created event to edit, if you wish.
- Go to the event Description section, and then click on the Source code icon

- After that, add the audio embed code.
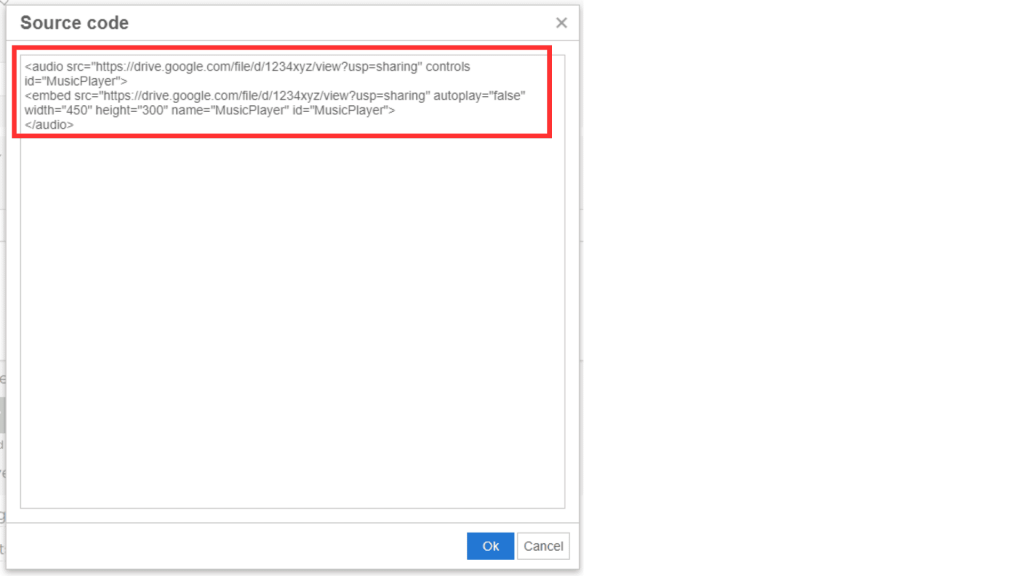
- Then press Ok and the audio is going to show as in the picture below.

In addition to learning how to add audio files and images to your posts, you can also explore how to incorporate SlideShare presentations. Enhance the visual appeal and engagement of your event listings with these powerful features.
Need Additional Help?
For further guidance and support, please visit our Help Center. If you have any inquiries or need assistance, don’t hesitate to contact our customer success team by opening a support ticket from your Timely account’s dashboard.
In case you require additional assistance in implementing and using Timely event management system, we are pleased to assist. Explore all the professional services we can offer you, and get in touch with us today!