With a Timely account, you can easily incorporate an event calendar and widgets onto your Squarespace webpages. All you have to do is copy a code snippet and add it to the back end of your site. Then, any modifications or updates you make to your calendar and events will display immediately. You can even use the calendar to accept bookings and sell tickets to your events, if you wish. This article will provide guidance on how to add an events calendar and widgets to your Squarespace website.
1. What is Squarespace?
Squarespace is a leading provider of website building and hosting solutions via its SaaS offerings. By providing pre-built templates and easy-to-use drag-and-drop components, Squarespace users can effortlessly construct and personalize web pages.
Furthermore, Squarespace’s online community offers both professionals and users a space to communicate and grow their understanding. Additionally, the company provides detailed tutorials and helpful videos to assist users in getting the most out of Squarespace and its services.
If you have already established or are intending to create a website with Squarespace, this post will show you how to add an events calendar on a Squarespace web page. Keep reading to learn more.
2. Full Calendar vs Widgets Embedding
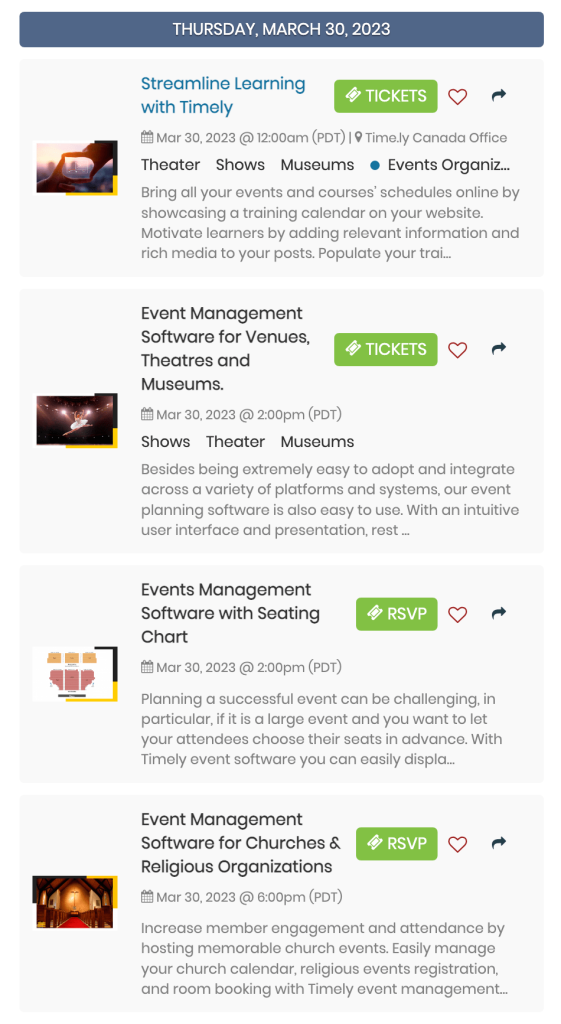
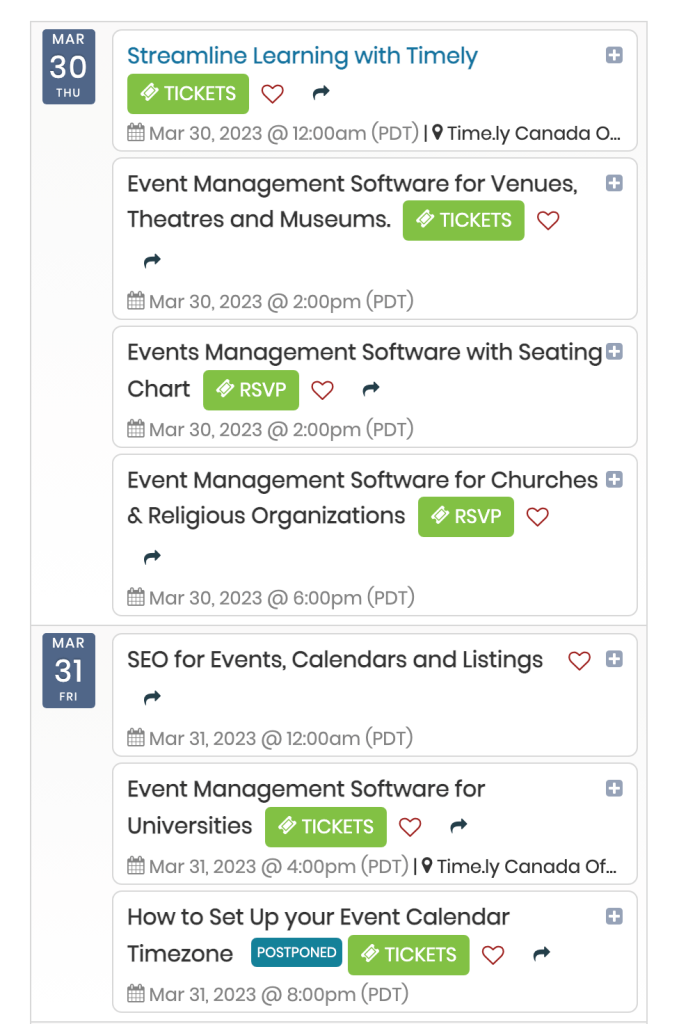
Surely, when it comes to organizing and promoting events on Squarespace, the most convenient and effective solution is Timely event calendar software. It allows for customization, offering over a dozen calendar views that can be either used to build a full-scale calendar or adapted into a smaller calendar widget. Moreover, slider and carousel widgets can be employed to enhance the design of your Squarespace site and better present the events of your choosing.
A full-scale calendar, which may span an entire Squarespace page, is distinguishable from a widget view, as the latter is usually smaller and requires less space. Nevertheless, both options can be embedded individually or together to create an engaging experience for visitors.

3. How to Add Full Calendar Views to a Squarespace Page
Squarespace supports adding external widgets to your site. However, the options depend on your plan. All plans can add basic Code blocks. However, adding advanced Code blocks is a premium feature and only available to Business and Commerce plans. See below how to install Timely on your Squarespace website using both options.
3.1 Calendar for Squarespace: All Plans
All Squarespace plans can add a Timely full calendar view using a basic Embed block. Before you begin, you need to set up the calendar embed code. If you haven’t done already, follow the steps provided in the post How to Set Up the Embed Code for your Timely Calendar.
Once you have this information, you can go ahead and follow the instructions below:
- Log in to your Squarespace account.
- In the Home menu, click on Pages.
- Select the page you want to edit, and then click on Edit on the top left corner.
- Hover over the block section where you want to add the calendar. Then, click on Add Block or insert point, depending on the Squarespace editor type you are using.
- Next, select Embed from the menu, and place it on your webpage.

- Open the block editor by clicking on the pencil icon.
- A box will pop-up on the screen. Click on Code snippet.
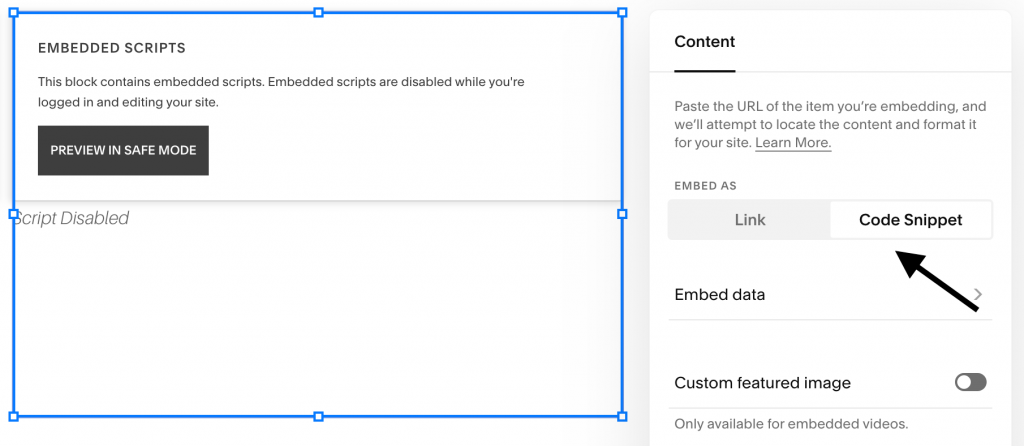
- Next, click on Embed data. A new section will open on the screen where you can paste your calendar embed code.
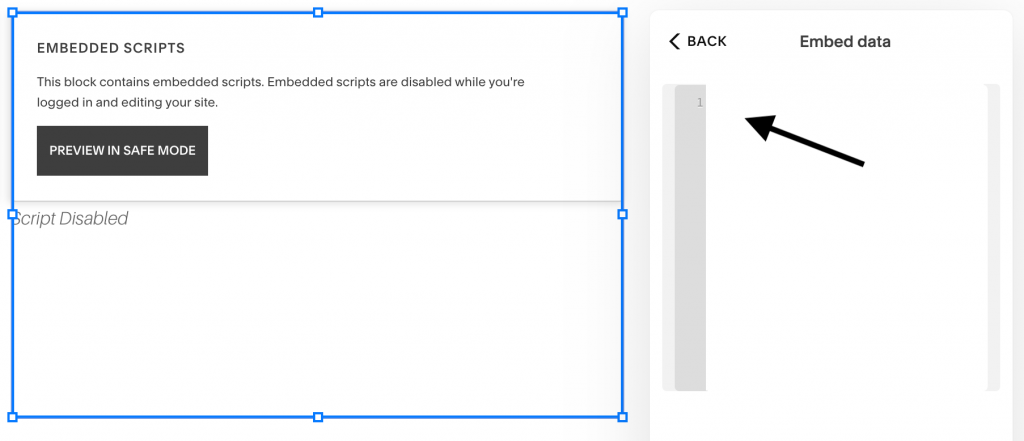
- When you are done, save the changes to your page.
- Next, go to the front end of your Squarespace site. There you will see that your Timely calendar have been properly installed, according to your embed code settings. If you still don’t see the calendar, try logging out of Squarespace.
3.2 Squarespace Calendar: Business and Commerce Plans
If you have a Squarespace Business or Commerce plans, you have an additional option to embed a full calendar view to your site. Before you begin, you will need to create the calendar installation code. If you haven’t done already, check the post How to Set Up the Embed Code for your Timely Calendar.
Once that step is completed, it’s time to add the embed code into your website. To do so, simply follow the instructions below:
- Log in to your Squarespace account.
- On the Home menu, click on Pages.
- Select the page you want to edit. Then, click on Edit on the top left corner.
- Hover over the block section where you want to add the calendar. Next, click on Add block or insert point, depending on the Squarespace editor type you are using.
- Next, select Code from the menu, and place the code block on your webpage.
- Open the block editor and then paste your Timely calendar embed code in the text field. Next, save your changes.
- Next, go to the front end of your Squarespace site. There you will see that your Timely calendar have been properly installed, according to your embed code settings. If you still don’t see the calendar, try logging out of Squarespace.
4. How to Add Widgets to a Squarespace Website
Squarespace Business and Commerce plans customers can also incorporate widgets, including mini calendar views, sliders and carousels, onto their Squarespace website or page.
Before doing that, you must first generate the embed codes for each widget. If you haven’t done already, follow the instructions below to create each embed code:
- How to Set Up the Embed Code for Calendar Widget Views,
- How to Set Up the Embed Code for Event Sliders
- How to Set Up the Embed Code for Event Carousel.
Once you have the embed codes set up, you can go ahead and follow the same instructions above to insert the codes into the chosen web page. The only difference is that, when designing the page, you will have to limit the embeddable area beforehand to ensure the widget appears in the correct location.

We hope that this user guide has helped you learn how to add an events calendar to Squarespace websites and pages. If you wish, you can even use Timely calendar to accept bookings and sell tickets to your events, directly from your own website.
For more user information, please go to our Help Center. If you have any questions, feel free to contact us. Alternatively, you can open a support ticket from your Timely account.