With a Timely account, you have the flexibility to customize and edit your invoice PDF templates, allowing you to enhance communication with your customers. By sending personalized email purchase information, you can showcase your brand’s unique voice and style while ensuring that all crucial data is shared. In this post, we will guide you on how to customize invoice PDF templates.
1. Invoice Overview
Invoices are essential documents generated whenever someone makes a purchase. With respect to events, invoices are issued when a customer completes a ticket purchase. If the purchase happens to be online, customers receive an email (ticket/RSVP template) containing the corresponding invoice PDF and tickets.
With Timely Event Ticketing Software, you can personalize your invoice PDF template by modifying the header, body, footer, and customizing the available dynamic fields. This guide provides an overview of how to edit these fields to create a comprehensive and reliable template.
2. Timely Standard Invoice PDF Template
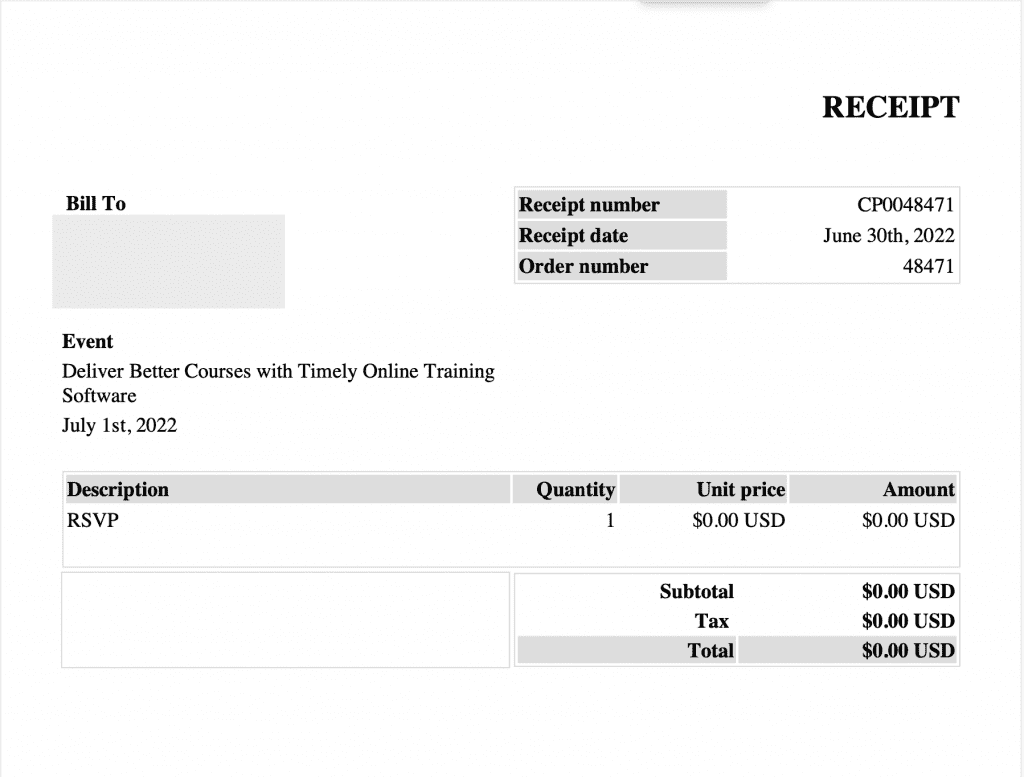
Timely’s standard invoice PDF template has a clean design. The image below shows an example of an invoice pdf a customer will receive by email after purchasing an event ticket.
3. How to Edit Invoice PDF Templates
By customizing your Invoice PDF Template, you can add more information and branding to the document, ensuring your customers have all the details of their order.
To edit Timely standard invoice template, follow these steps:
- Go to your Timely account
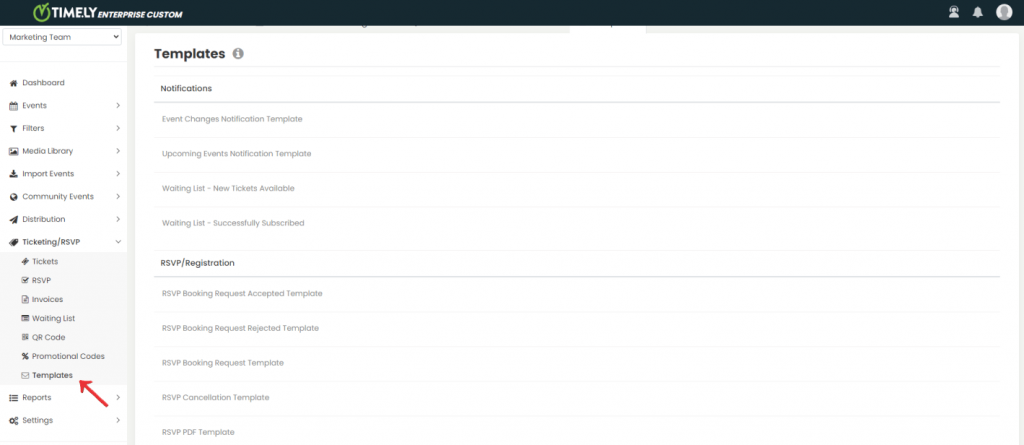
- On the left side, go to the Ticketing/RSVP menu. Then, click on the Templates tab
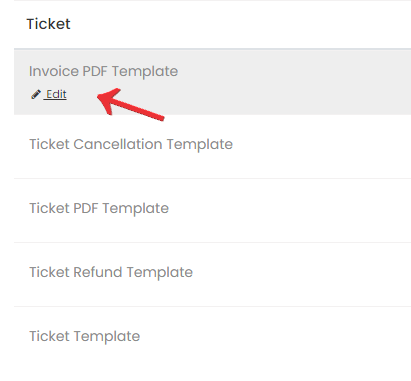
- On the Templates page, go to Ticket and choose the Invoice PDF Template option. Click on the Edit button
- This will open the Template Editor, where you can modify the template’s title, header, body, and footer.
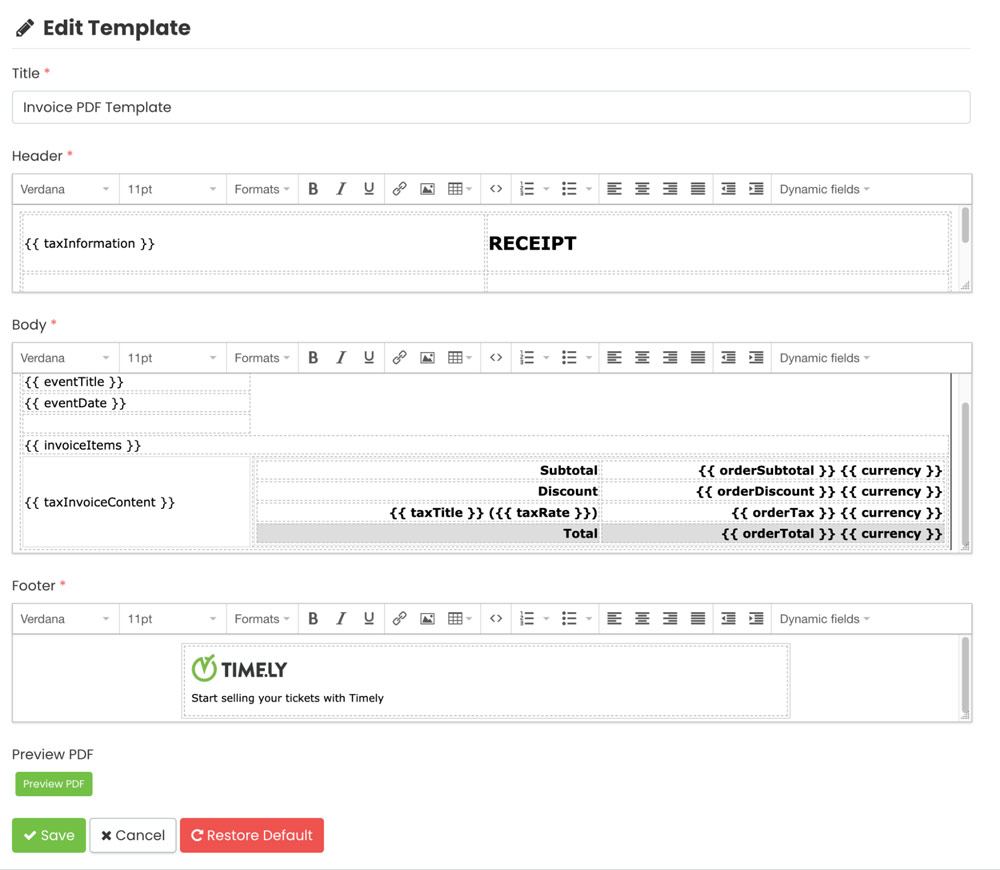
When rewriting your email template, make sure to include all the available dynamic fields as desired. It’s important to maintain the table structure for the data to be correctly displayed on the PDF. Any information placed outside the table will not be shown in the Invoice PDF.
Each ticket type generates a row in the table displaying the quantity, individual value, and total cost. If you remove this information, the corresponding column can also be omitted.
5. Adding Dynamic Fields to your Invoice Template
Dynamic fields are fields in Timely’s database you can use to display stored system information in your templates. For instance, if a customer adds their address while making a purchase, this information will be automatically populated in the dynamic field “Customer Address,” eliminating the need to enter it manually.
You can edit the following Dynamic Fields in your Invoice Template:
| Field Code | Field Name | Description |
| calendarUrl | Calendar URL | The website address of the calendar where the tickets were purchased or RSVP’d. |
| currency | Currency | The currency of the ticket of the event. |
| customerAddress | Customer Address | Address informed by the buyer on the checkout page.<<Address L1>><<Address L2>><<City>> <<State>> <<Zip Code>><<Country>> |
| customerEmail | Customer Email | The email of the customer who purchased or RSVP’d. |
| customerFirstName | Customer First Name | The first name of the customer who purchased or RSVP’d. |
| customerLastName | Customer Last Name | The last name of the customer who purchased or RSVP’d. |
| eventDate | Event Date | The date and time of the event where the tickets were purchased or RSVP’d. It can be the event, instance or slot. |
| eventTitle | Event Title | The title of the event where the tickets were purchased or RSVP’d. |
| invoiceItems | Invoice Items | The list of order items and details.Title / ValueDescription / <<ticketName>> or <<rsvpName>>Quantity / <<quantity>>Unit price / <<ticketPrice>> <<currency>>Amount / <<quantity>> x <<ticketPrice>> <<currency>> |
| orderNumber | Order # | The number of the order. The same on the Ticket/Invoice screen. |
| orderDate | Order Date | Date from the purchase transaction. |
| orderDiscount | Order Discount | The order total discount. |
| orderSubtotal | Order Subtotal | The subtotal order amount. |
| orderTax | Order Tax | The total amount of taxes. |
| orderTotal | Order Total | The invoice amount. |
| taxInformation | Tax Information | Tax account and Tax Address.TAX Id: <<tax account>><<Address L1>><<Address L2>><<City>> <<State>> <<Zip Code>><<Country>> |
| taxInvoiceContent | Tax Invoice Content | The Tax Invoice Content. |
| taxTitle | Tax Title | The Tax Name defined when the tax was created. |
| taxRate | Tax Rate | Tax rate related to the ticket. |
When you use a dynamic field, the order/purchaser information will replace the dynamic fields on square brackets. You can add these dynamic fields multiple times throughout your template, if you wish.
6. Preview, Save, Cancel or Restore Your Changes
After you have finished editing your Template, you will find the following buttons at the bottom of the page:
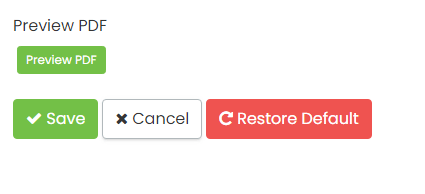
- Preview PDF: This button allows you to open the PDF you just edited and see how it will appear in your users’ email before saving it.
- Save: Click on this button to save the changes you made in your template.
- Cancel: Use this button to cancel the changes and close the editing tab.
- Restore Default: If you want to revert your template to its original version, click on this button. You can perform this action at any time. To confirm the restoration of your template to the original version, you must click the save button.
Need Additional Help?
For further guidance and support, please visit our Help Center. If you have any inquiries or need assistance, don’t hesitate to contact our customer success team by opening a support ticket from your Timely account’s dashboard.
In case you require additional assistance in implementing and using Timely event management system, we are pleased to assist. Explore all the professional and managed event services we can offer you, and get in touch with us today!