
Timely’s Contacts Management Module streamlines data collection and management for members, event registrants and event submitters, enhancing your overall workflow. This feature allows members to view their membership plan purchase history. It also allows attendees to easily access their event registration history and tickets. Likewise, event submitters can review, edit, or cancel their submitted events, depending on the permissions you grant them.
In this post, you’ll learn how to set up Timely’s Contacts Management Module and start benefiting from its powerful capabilities.
1. Benefits of Using the Contacts Management Module
The Contacts Management Module is designed to streamline your workflow and enhance user interaction by offering:
- Enhanced Customer Experience: Members, ticket purchasers and event submitters can create accounts for easier engagement. Members can see their purchase history, purchasers can also easily access their previous event registrations and tickets, while event submitters can log in to review, edit, or cancel their submitted events (depending on permissions). This creates a seamless, self-service experience for all types of users interacting with your Timely account.
- Centralized Data Management: All customer information is securely stored in one place, making it easy to manage, track, and analyze your customer base directly from your dashboard.
- Custom Fields: Create custom questions that contacts can fill out, mark as required, or reserve for internal use only, enabling you to gather relevant data tailored to your needs.
- Customizable Filters: Organize and segment contacts (such as members, ticket buyers, or event submitters) using customizable internal filters. This makes it easier to target communications and manage your audience more effectively.
2. Setting Up the Contacts Management Module on your Account
2.1. How to Enable End-User Login
To activate the Contact Management Module, follow these steps:
- Log in to your Timely account.
- Navigate to the “Contacts” menu and select the “Settings” tab.
- Then, check the box labeled “Enable Contact Management.”
- Click “Save” to apply your changes.
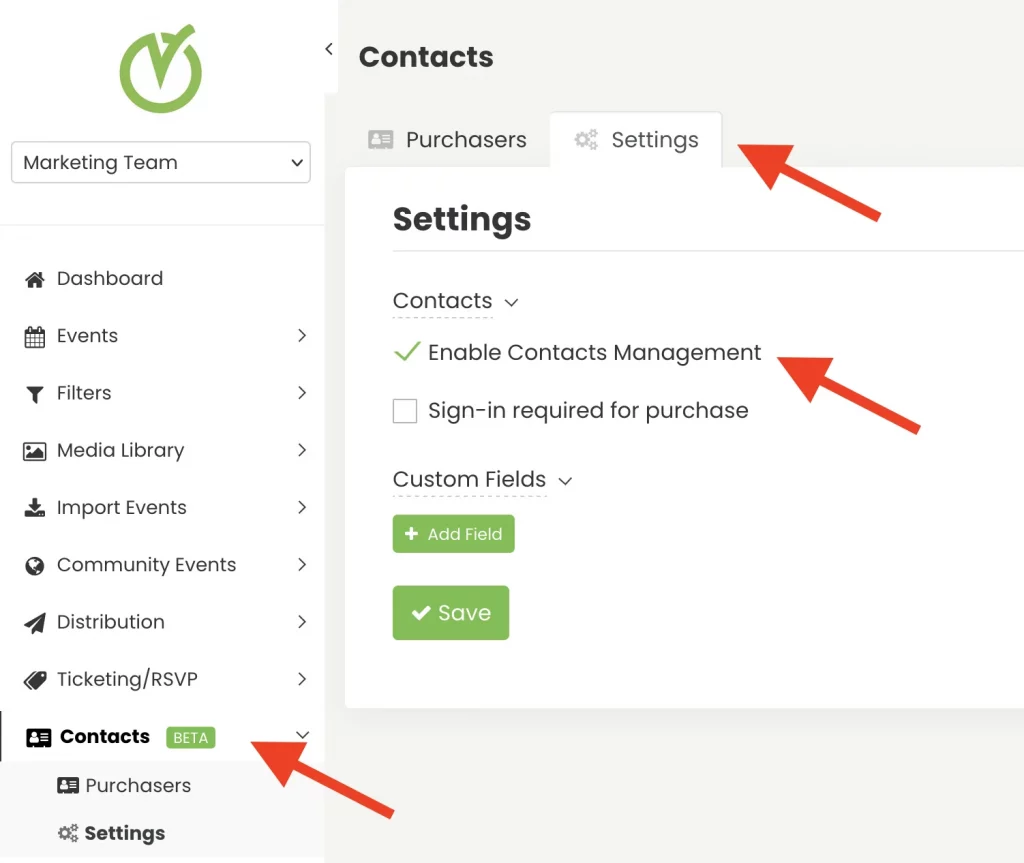
Once activated, you’ll be able to manage members, event registrants and submitters through the new “Contacts” menu, and they’ll gain access to their own account through your public calendar.
2.2 How to Make Sign-In Mandatory for Ticket Purchases
With the Contacts Management module, you can make sign-in required before purchasing tickets. To do so, follow the steps:
- Log in to your Timely account.
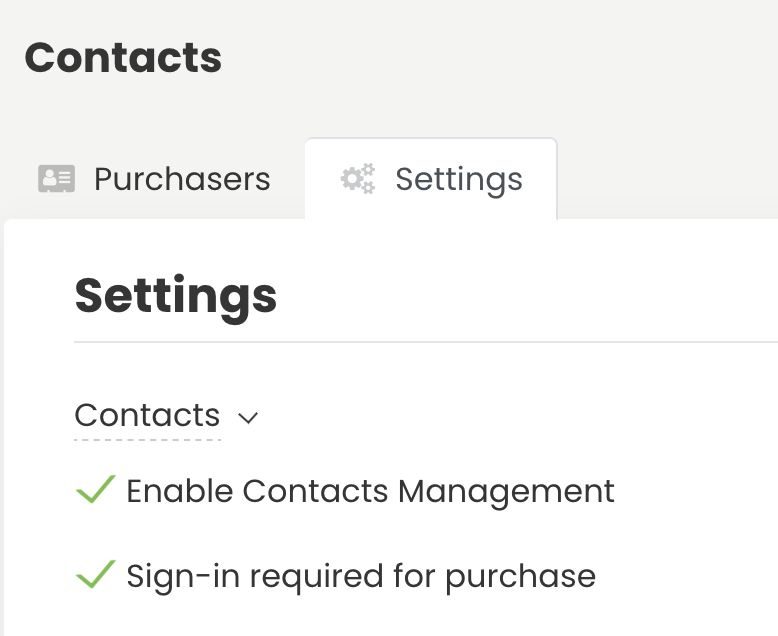
- Navigate to the “Contacts” menu and select the “Settings” tab.
- Then, check the box labeled “Sign-in Required for Purchase.”
- Click “Save” to apply your new settings.
Please note that members must sign in before registering for any program so our system can identify them and apply any applicable members-only access or discounts. Moreover, for privacy and security reasons, event submitters are also required to sign in before submitting events. Therefore, this requirement cannot be enabled or disabled in the settings for either members or submitters.
3. How to Create Custom Fields for Contacts
You can create custom questions for contacts, which can either be filled out by the contacts themselves, marked as required, or reserved for internal use only. To create custom fields for contacts, follow the steps below:
- Log in to your Timely account.
- Navigate to the “Contacts” menu and select the “Settings” tab.
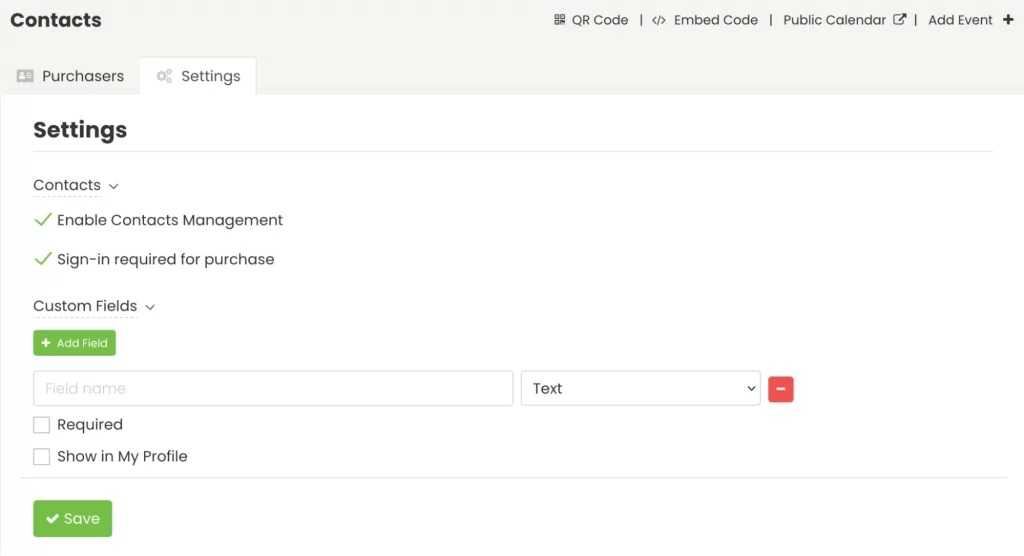
- Then, click on “Custom Fields” and “+Add Field.”
3.1 Custom Field Types
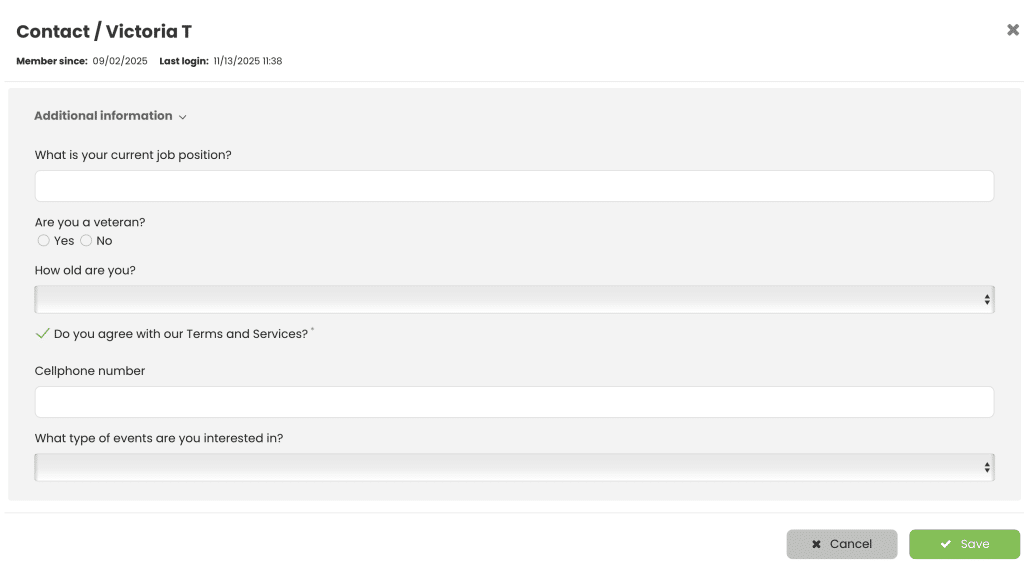
Currently, there are four different custom field types:
- Yes/No answer: requires users to mark Yes or No to respond to the question.
- Text answer: requires users to answer the question with a sentence.
- Checkbox answer: requires users to check the box if the sentence is applicable or to confirm understanding.
- Dropdown answer: provides a user-friendly interface to help users select the desired item from a list of available options.
- When creating a Dropdown custom field, an option called “Add choices” will appear, allowing users to enter choices on separate lines. Users can enter a maximum of 20 choices per dropdown.
- You can also choose multiple choices, so that more than one choice can be made and you can choose Unlimited, Exact Number or a Range.
3.2 Display Questions for Contacts or Leave them for Internal Use Only
Once you’ve set up your custom questions, you can select the option “Show in My Profile” to make them answerable by end users.

In this case, they will appear to end users in their My Account area.

Otherwise, if you leave them unchecked, they will only be visible to internal users, within the Contacts menu. After clicking on a specific contact, and accessing the “Additional Information” tab.
Need Additional Help?
For further guidance and support, please visit our Help Center. If you have any inquiries or need assistance, don’t hesitate to contact our customer success team by opening a support ticket from your Timely account’s dashboard.
Moreover, in case you require additional assistance in implementing and using Timely event management system, we are happy to assist. Explore all the professional services we offer, and feel free to get in touch with us today!