
With a Timely account, you can set up an event submission form to be displayed in the front end of the public interface of your events calendar. With an integrated event submission form, you can accept and manage event submissions from your community and local partners. Moreover, with this feature, you can populate your website calendar with events hosted by other organizations effortlessly. Learn all the steps in this post.
1. Creating an Event Submission Form
Once you log into your Timely account, follow the steps below to create a front end submission form:
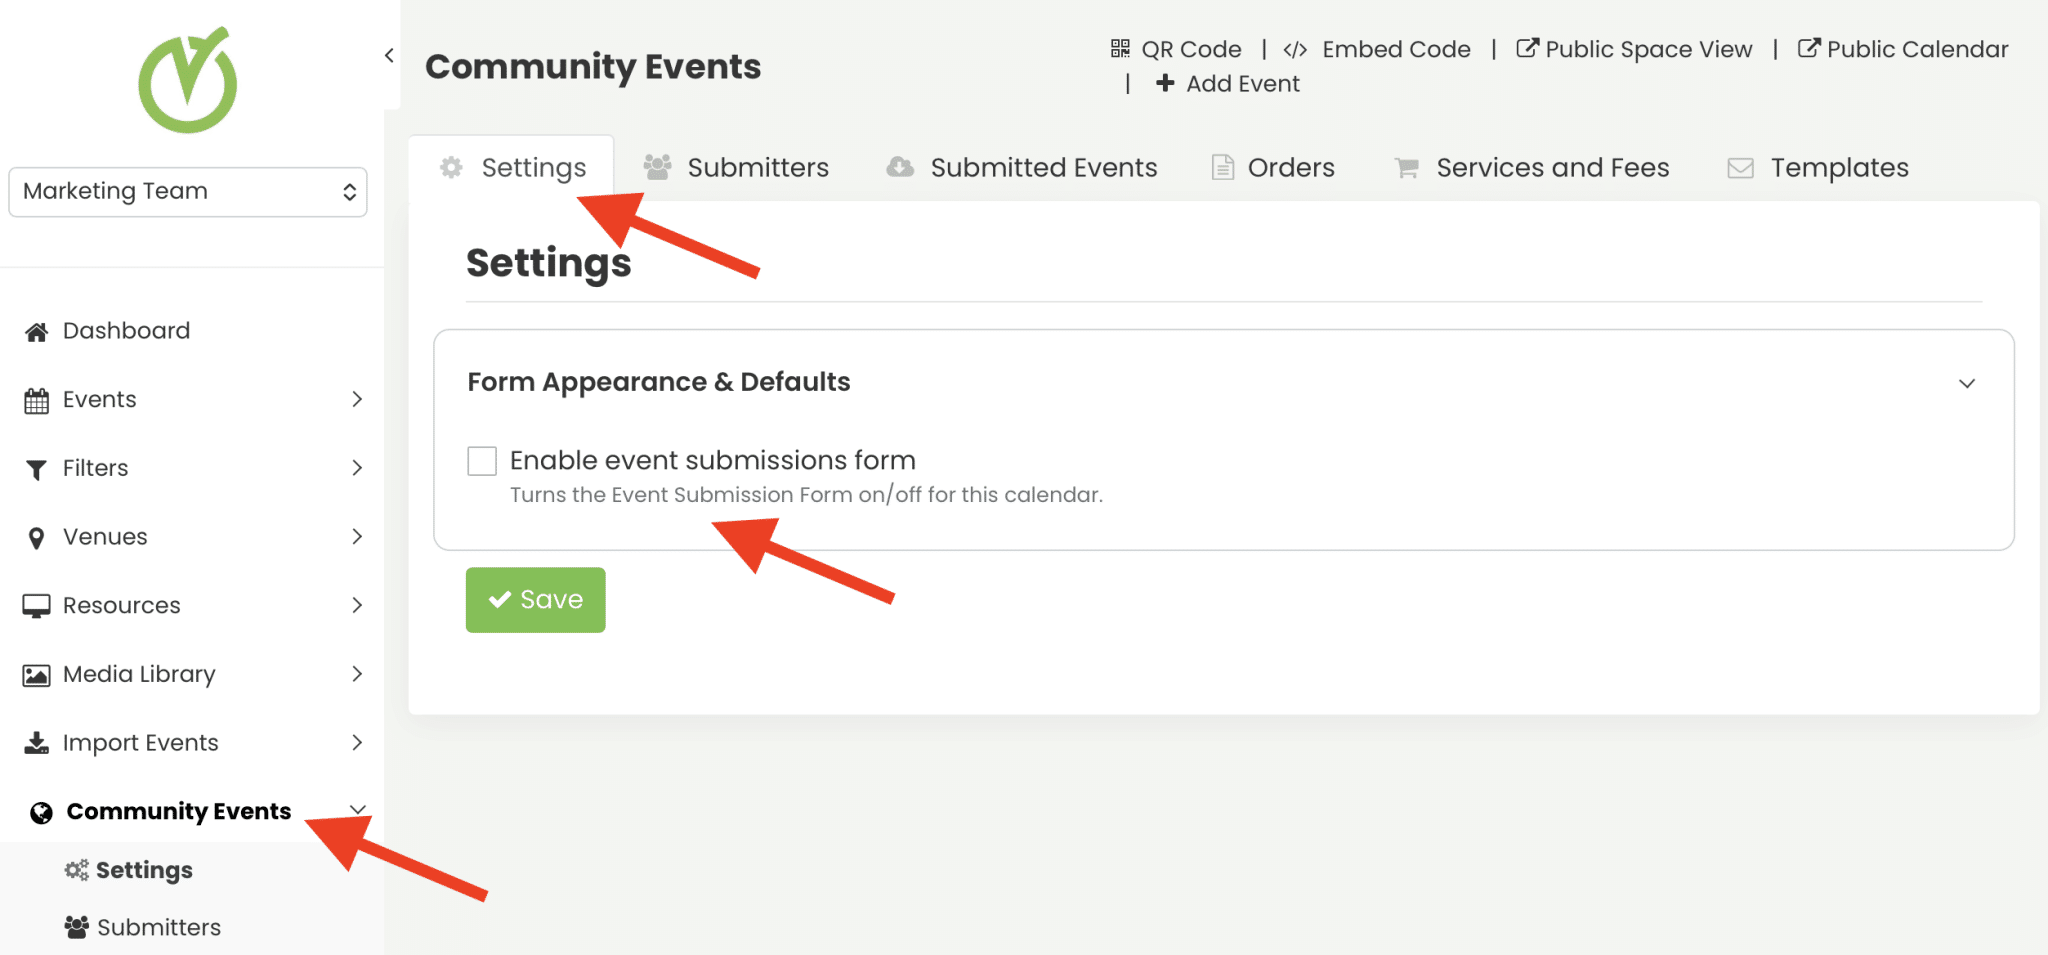
- On the main menu on the left, click on Community Events, and then on Settings.
- Check the Enable event submissions form to enable the feature.
2. Event Submission Form Set Up Options
2.1. Automatically Approve New Submitters
If you check this option, all submitters will be automatically approved by default. This will be the general rule, even if you had previously set up individual approval rules.

2.2. Automatically Approve New Events Submitted
When this option is checked, all events sent by all submitters will be automatically approved by default. If you enabled this option, any previous individual submitter approval setting will be disregarded. You can also grant this permission to specific submitters individually. Learn more in our guide How to Approve and Manage Event Submitters.

2.3 Allow Submitters to Edit Events
This setting will permit submitters to view their submitted events in a private section of the calendar. They will also be able to request edits to their own events when logged in. Please note, activating this setting will also activate the Contacts module, changing the layout of the calendar toolbar.

2.4 Automatically Approve Event Edits from Submitters
This setting allows admins to configure whether event edits made by submitters should be automatically approved. If enabled, submitters can modify events previously approved without requiring admin intervention. You can grant this permission to individual submitters. Learn more in our guide How to Approve and Manage Event Submitters.
If auto-approval is disabled, edits made by submitters will require admin review before being published. Pending edits will not be visible in the public view until approved.
2.5 Allow Submitters to Cancel Events
This setting enables event submitters to cancel their own events, reducing administrative workload. You can also grant this permission to specific submitters individually. Learn more in our guide How to Approve and Manage Event Submitters.
2.6. Hide add Event Button
By default, when you enable the Event Submission Form, the + ADD EVENT button shows automatically on the toolbar of your online events calendar.

However, you can hide it by simply clicking on the hide add event button checkbox on the Event Submission Form settings.

Please note that hiding the + ADD EVENT button does not affect the functionality of the event submission form itself. Submitters will still be able to access the form through alternative links or buttons you configure elsewhere on your website.
Additionally, you can add your + ADD EVENT button as a CTA elsewhere on your website. You can even re-label the button if you wish. Simply go to Settings > Embed Code and select the embedding options according to your needs.
For specific instructions on how to hide the button and create a new embed code, visit the complete guide on how to hide the add event button.
2.7. Featured Image Required
This setting allows you to set the featured image as a required item on your submission form. In other words, if this option is activated, your event submitters will not be able to submit events unless they upload an image for their event.

It is particularly relevant for event calendar owners who are careful on how their calendar looks in their audience’s eyes, and want to make sure all event posts have a featured image. Moreover, this feature can save time and improve productivity by making event submitters complete this step on the event creation process.
3. Form Layout
Users can select between Fullscreen or Popup layouts to match their preferences.
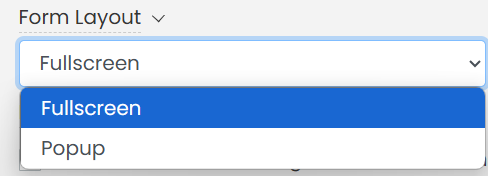
The Fullscreen option offers a distraction-free experience, ideal for detailed submissions.
The Popup format keeps the form compact and accessible within the existing page view.
4. Event Filter Options
4.1. Standard Filters
If you wish, you can require your event submitters to add filters to their events, so your calendar is always organized the way you want. You can allow them to search for available filters, or add new ones, if convenient.
The Filters option will list all default filters, such as Categories, Tags, Venues, and Organizers.
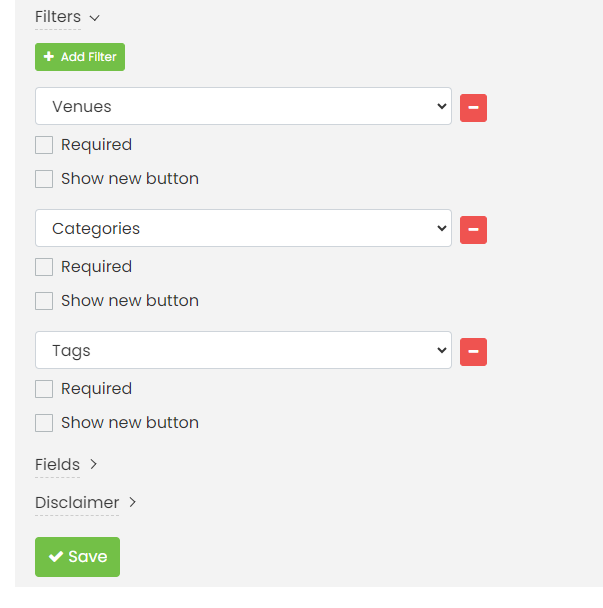
The default filters have two options:
- Required: if required is checked, then the submitter needs to choose one option; and
- Show new button: if this option is selected, then a button will appear next to the dropdown and will let the submitter add a new option to the filter.
4.2 Custom Filters
If you have Custom Filters in your plan, all filters created by you will also appear on this list. For example, you can add to the event submission form a Workshops custom field that you have previously created in the Filters menu.

4.3 Filter Order
It’s important to note that filter items are displayed on the public interface based on their creation time. Specifically, the first item that is created will be the first one available for users to see. So, in order to make changes to the filter order, you would need to add them in the specific order you want your audience to see.
For example, this filter order:
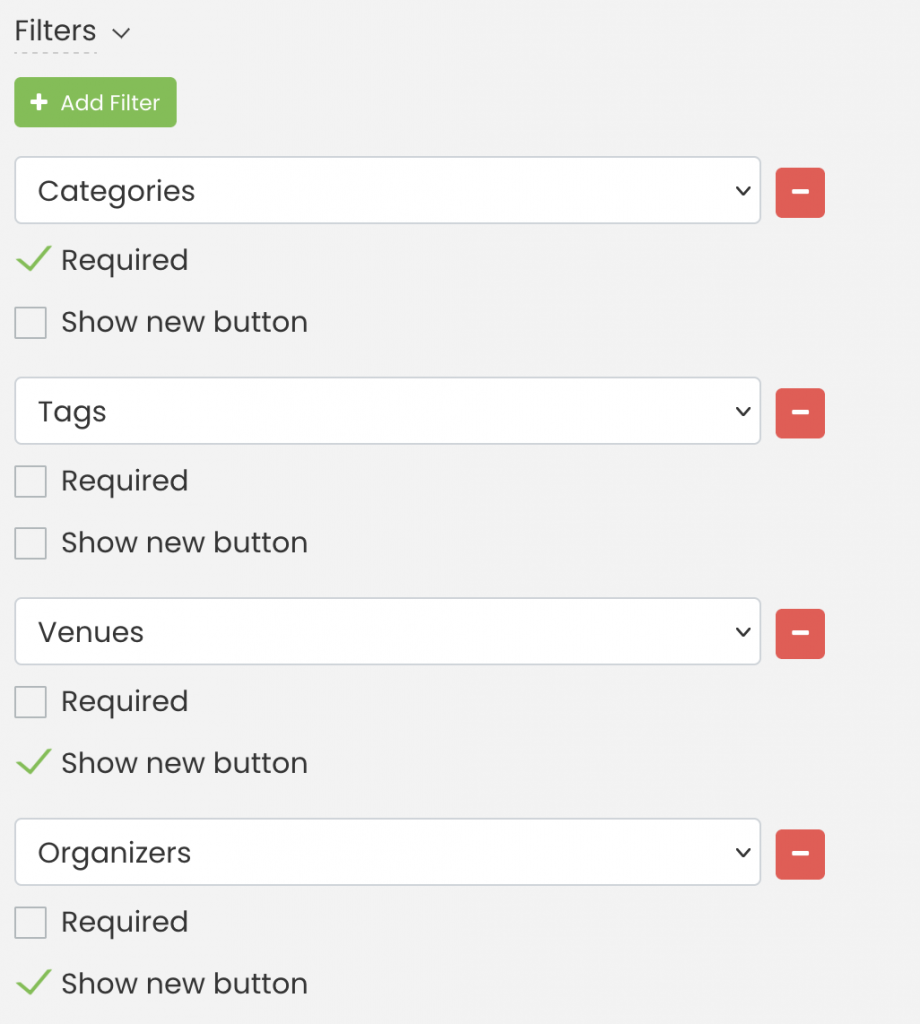
Will be displayed as follows:

4.4 Filters Use Example
Please see the example below:
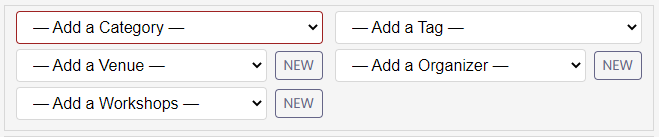
For this form, the field Category was set up as mandatory field (checked as required). In this case, the submitter did not select an option from the dropdown menu, so the field is marked in red.
Both Category and Tag don’t have the NEW button, so submitters can’t add their own categories and tags to the event post. In contrast, Venue, Organizer and Workshops have the NEW button, so submitters can add their own venues and organizers.
5. Fields Options
5.1. Standard Fields
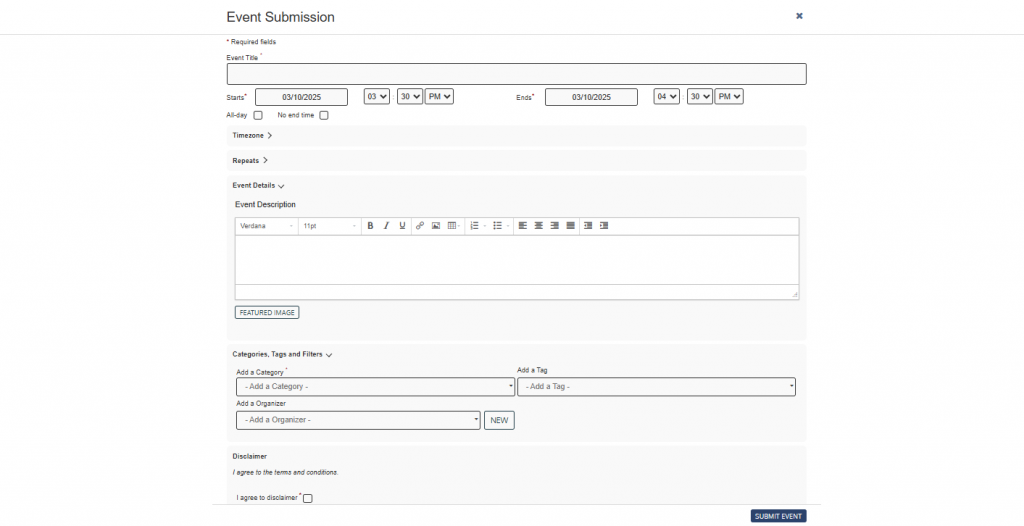
When you enable event submissions for your events calendar, our system generates a standard event submission for you.
The standard form contains all the relevant fields for an event to be created in our software. For instance, event title, date and time, including recurrence and timezone, event description and featured image.
The form with the standard fields will look exactly like the image below:

5.2. Custom Fields
Timely’s Custom Fields feature allows users to add fields such as text fields, yes/no answers, dropdown, or checkboxes to their forms. Users can set fields as required or optional and control whether they are displayed publicly.
For example, if you’re hosting a music festival, you might add a Performer Genre custom field where submitters can specify the genre of their performance. Another example could be a Special Requirements dropdown field for submitters to indicate which accessibility accommodations are offered at their events.
The feature is explained in detail in the Timely Help Center article How to Create a Custom Event Submission Intake Questionnaire. By utilizing Custom Fields, event organizers can gather tailored information from submitters, enhancing their understanding of the events submitted for publishing in their calendars.
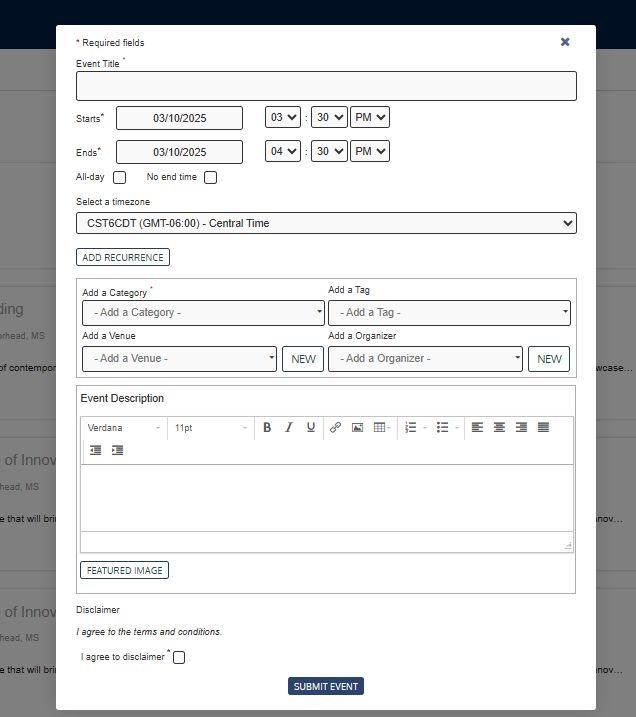
6. Event Submission Form Disclaimer
The Disclaimer option, if enabled, allows you to add a customized disclaimer for your event submission form. You can use this feature in many ways. For example, you can refer to your Terms and Conditions, Privacy Policy, or current safety precautions and protocols for events.
Moreover, you can make this a mandatory item on your form. In this case, the submitter will have to agree with the disclaimer before submitting the event. Otherwise, the system will not accept the event submission.
When enabled, the disclaimer will show up near the end of the event submission form, as shown on the image below:

Need Additional Help?
For further guidance and support, please visit our Help Center. Additionally, if you have any inquiries or need assistance, don’t hesitate to contact our customer success team by opening a support ticket from your Timely account’s dashboard.
Moreover, in case you require additional assistance in implementing and using Timely event management system, we are happy to assist. Explore all the professional services we offer, and feel free to get in touch with us today!