
With a Timely account, you can easily embed an events calendar into your website and display your events online. Once the calendar is embedded, all changes made to your calendar settings and events are updated automatically in your website. In this post, you will learn all the steps to set up the embed code for your Timely calendar.
Watch the instructions on video format, for a quick and easy walkthrough of the content:
1. Benefits of Embedding Timely Calendar on Your Website
Taking advantage of an online event calendar is simple with Timely. If you wish, you can always use the standalone public calendar provided by the platform. However, for optimal results, it is recommended to embed the calendar’s HTML code directly into your website, so you can display it live there too.
Integrating your Timely calendar into your website has many advantages. First, it is going to be quicker and easier for you to share your events with your audience. Second, you can accept online registrations or sell tickets to your events directly from your website calendar. Lastly, it is a great way to increase your website traffic. Indeed, instead of sending people to third party event ticketing platforms, they will come to your website to learn about your events.
2. Content Management Systems (CMS) Supported
Timely‘s event platform can be embed on any public or private website or mobile application. It works perfectly with many website content platforms, including but not limited to:
- WordPress
- HTML
- Shopify
- Wix
- SquareSpace
- Joomla
- Drupal
- Magento / Adobe Commerce
- Adobe Experience Manager
- Weebly
- GoDaddy
- MicroSoft SharePoint / Power Pages
- Agility
Regardless of the CMS you use, the general instructions to set up the embed code for your Timely calendar of events are the same. Continue reading to learn more.
3. Setting Up Your Calendar Embed Code
By adding the calendar embed code to the backend of your website you will be able to publish your entire Timely calendar on the webpage of your choice. However, if you wish, you can customize your embed code to display only certain events, or in a format different from your calendar default settings.
See the step-by-step instructions below:
- Log in into your Timely account.
- On the main navigation menu, click on Settings, and then on Embed Code. You can also use the shortcut on the top right corner of your dashboard.
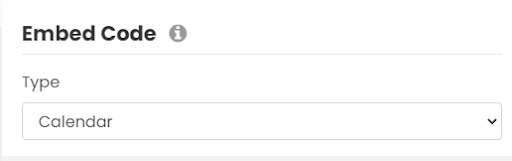
- Then, a new page will open displaying all your embed code options and preferences. Currently, there are 4 embed code types you can choose from: Calendar, Carousel, Slider, and Add Event Button.
- Since this post is about how to set up the embed code for your calendar, on Embed Type, choose the Calendar option.
If you don’t want to customize the embed code, you can go straight to the widget code section below (6. Setting Up Your Calendar iFrame Embed Code). Otherwise, continue reading this post to learn more.
4. Advanced Settings
Just below the Calendar embed code type option, you will see the Advanced Settings dropdown menu. These settings will be different depending on the embed code type selected.
This is how you can edit your calendar embed code Advanced Settings:
Date Range
It is possible to select a range of dates to display the events on your website by utilizing the available options:
- Upcoming Events
- Today’s Events
- Starting Tomorrow
- Custom date range
- Next n days
- Next n events
The options will be useful depending on the type of events you host, and where you want to embed the calendar code. For example, if you are using Timely to promote your 2-week festival, you can use the Custom date range option. Simply set the start and end dates to display events.
You can use the the Next n days option to choose the number of days to display events in your calendar. Suppose you have published 10 events that will happen in the next 5 days. By selecting the Next n days option and setting up the number “5” as the number of days, those 10 events will be displayed in the calendar. In contrast, if you use the option Next n events, you can choose the exact number of upcoming events to display.
Default View
On the Advanced Settings Menu you can choose which calendar view you will display your events for this particular embed code. This means you can choose more than one calendar view to showcase events in your website by creating a separate embed code for each view. For example, you can pick a striking view for your main events calendar page, and a cleaner one for your homepage.
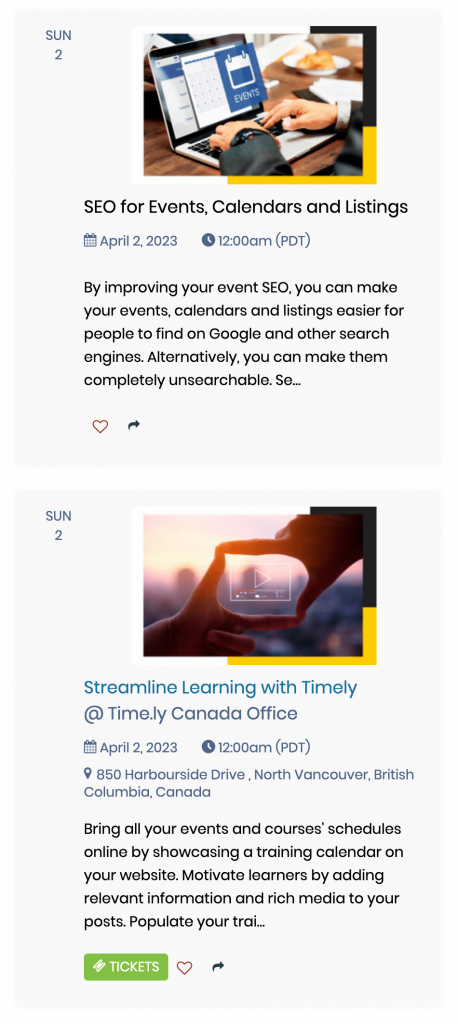
Currently, the available calendar views are the following:
- Posterboard view
- Tile view
- Stream view
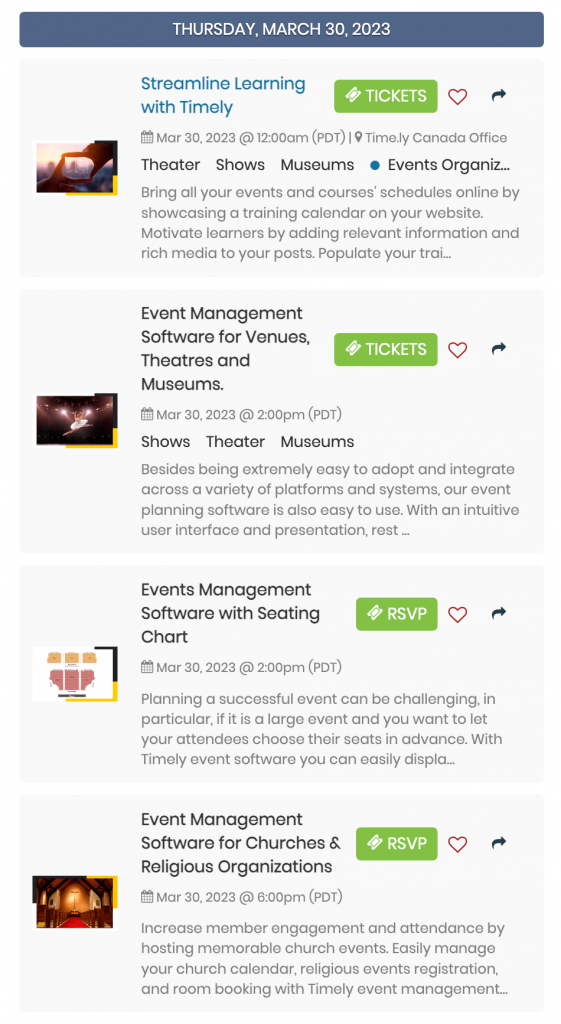
- Modern List view
- Modern Row view
- Clean List view
- Clean Row view
- Agenda view
- Compact Agenda view
- Year view
- Month view
- Week view
- Map view
Each view option will highlight one important feature of your calendar and events. You can get an overview of all Timely’s Calendar Views in our demo page.
Default Language
Although you can allow users to choose their preferred calendar language when navigating on your website calendar, you can also set a specific language to display. This feature is particularly useful, if you have a multi language website.
Currently, the languages available are the following:
- English (US)
- English (UK)
- Danish
- German
- Spanish
- French
- Italian
- Chinese
- Korean
- Dutch
- Polish
- Portuguese
- Turk
- Swedish
- Japanese
Hide Toolbar
By enabling the Hide toolbar option, your audience will not see the toolbar on the top of the calendar. As a consequence, people will not be able to search events by date and keyword, as well as use other toolbar functionalities, such changing the default calendar language or view.
Hide Filters
Hiding filters will prevent your audience from searching events using your preset event filters. In other words, event categories, tags, organizers, venues and any custom filters will not be displayed.
Note: The Hide Toolbar and Hide Filters settings can be useful in many situations. For example, you must hide the toolbar and filters if you want to create the embed code for a mini calendar or calendar widget view.
Featured Events
By selecting the Featured events option, the calendar will only displays published events that were marked as featured events.
5. Add Filters to your Embed Code
By setting up filters for your embed code, people will only be able to see certain events based on the filters you choose.

If you want to prevent people from finding events that are not part of the selected filters, it is recommended to enable the hide filters option for the particular embed code.
However, if that is not what you desire, you might consider having 2 separate Timely calendars under your account. For instance, a calendar for public events, and another one for private / internal events. To learn more about this possibility, please contact us.
6. Copying Your Calendar iFrame Embed Code
After customizing your calendar embed code advanced settings and filters, it’s now time to generate your snippet code. Just follow the instructions below:
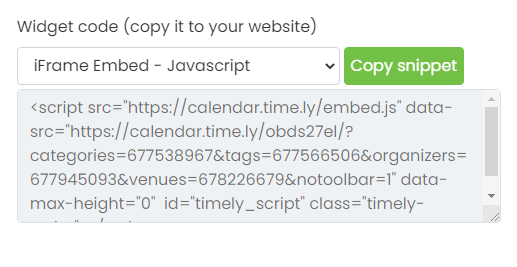
- Click on the Widget code (copy it to your website) filter and choose the option iFrame Embed – Javascript.
- Click the Copy snippet button to copy your embed code.
Next, you just need to paste the code on the backend of your website to display your Timely calendar. Click on the links below to see detailed instructions on how to embed your calendar on the following content management systems:
- WordPress
- HTML
- Shopify
- Wix
- SquareSpace
- Joomla
- Drupal
- Magento / Adobe Commerce
- Adobe Experience Manager
- Weebly
- GoDaddy
- MicroSoft SharePoint / Power Pages
- Agility
For instructions on how to install Timely on other CMS or mobile applications, please contact customer support.
For more user guidance, please go to our Help Center. If you have any questions or need additional assistance, do not hesitate to contact us. Alternatively, you can open a support ticket from your Timely account’s dashboard.