
With a Timely account, you can add users to your events calendar. You can also give them different permissions depending on their roles in your organization. This way, it is easier for you to manage and optimize the events that are added to your calendar. Continue reading to learn how to add users to your Timely account.
1. How to Add Users?
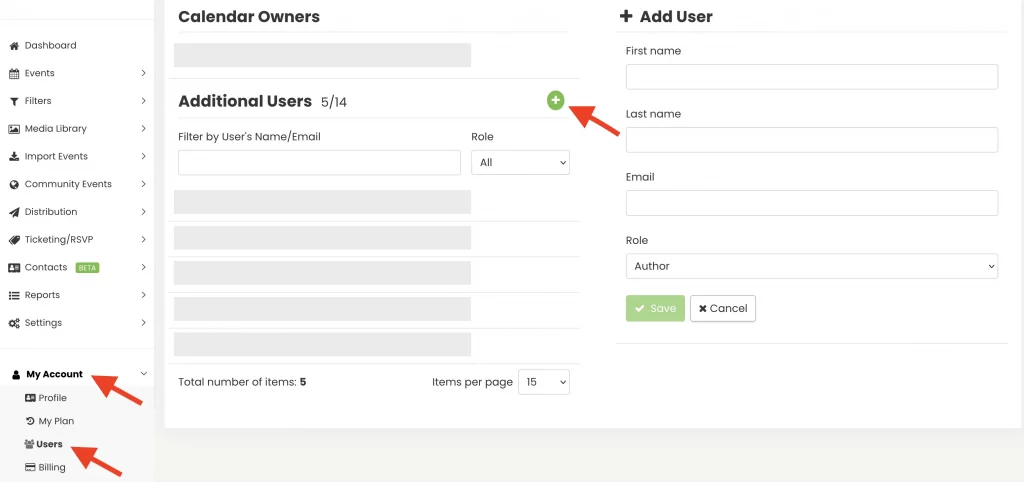
To create user accounts, navigate to My Account then click on Users. Then, click on the green plus button in order to add a new user. It is necessary to enter the name and surname, email address, and specify the user role.
2. What Are the User Roles and Permissions?
The roles have different accesses within the calendar. Available roles are:
- Owner: Allows access to the whole calendar settings, email notification, plus sensitive account information, such as plan upgrade and billing.
- Administrator: Allows access to the entire calendar settings, plus can receive email notifications.
- Editor: Allows publishing and editing all events in the calendar, plus can receive email notifications.
- Author: Allow publishing and editing only their own events, plus can receive email notifications.
- Attendant: Allows to scan QR codes on event tickets.
You can check each user’s permissions in the table below:
| Permissions | Owner | Admin | Editor | Author | Attendant |
|---|---|---|---|---|---|
| Create and edit own events | YES | YES | YES | YES | NO |
| Create and manage filters and categories for own events | YES | YES | YES | YES | NO |
| Create RSVP/Tickets for own events | YES | YES | YES | YES | No |
| Edit and manage events and filters for others | YES | YES | YES | NO | NO |
| Manage users and submitters | YES | YES | NO | No | No |
| Manage RSVP/Tickets and invoices | YES | YES | No | NO | No |
| Import Events | YES | YES | No | No | No |
| Manage Newsletters | YES | YES | No | No | No |
| Manage Social Media Settings | YES | YES | No | No | No |
| Manage Design Settings | YES | YES | No | No | No |
| Manage General Settings | YES | YES | No | No | No |
| Scan QR Codes | YES | YES | No | No | YES |
| List all calendars under the account | YES | YES | No | No | No |
| View and edit billing information | YES | No | No | No | No |
| Upgrade Plan | YES | No | No | No | No |
Please note that the Calendar Owner is able to add new users and assign them their respective roles. However, a Calendar Owner cannot make someone else a Calendar Owner. If you are a Calendar Owner and wants to transfer the account ownership to another person, please contact us.
2.1 Automated Notifications
In addition to creating system users, with Timely you also have the power to customize and designate the users who will receive notifications. This feature allows you to manage and streamline the flow of automated emails generated by the system.
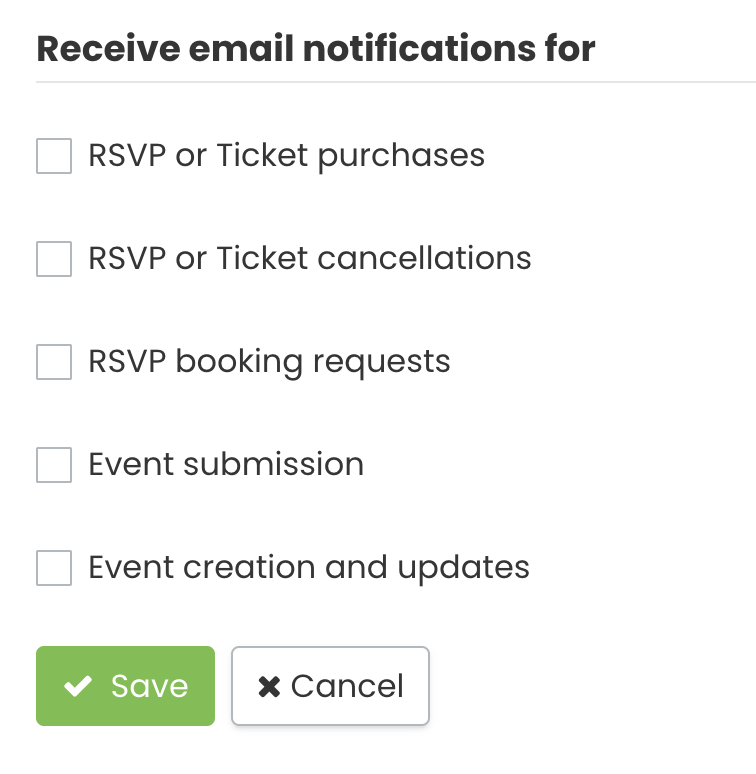
Currently, the software sends out automated emails for various events and interactions, such as RSVPs, ticket purchases, cancellations, event submissions, and updates. Here’s a breakdown of the notification categories:
- RSVP or Ticket Purchases: Users can receive automated notifications when attendees RSVP or purchase tickets for an event. This ensures that the relevant users are promptly informed about participant engagement and ticket sales.
- RSVP or Ticket Cancellations: Notifications are triggered when there are cancellations for RSVPs or ticket purchases. This allows users to stay up-to-date on changes in attendance and ticket availability.
- RSVP Booking Requests: Alerts users about new booking requests that require approval before confirmation.
- Event Submission: When someone submits an event, users can be notified through automated emails. This is especially valuable for efficiently managing the influx of event submissions.
- Event Creation and Updates: Automated notifications are sent when a new event is created or when there are updates to existing events. This keeps users informed about any changes made to the events in their purview.
2.2 Notification Settings by User Role
Only Attendants cannot receive email notifications. For the other user types, each role has different access to notifications. The following outlines what notifications each role receives:
2.2.1 Authors
Authors can receive notifications about:
- RSVP or Ticket purchases
- RSVP or Ticket cancellations
- RSVP booking requests
2.2.2.Editors and Administrators
Editors and Administrators can receive notifications about:
- RSVP or Ticket purchases
- RSVP or Ticket cancellations
- RSVP booking requests
- Event submission
- Event creation and updates
3. Managing Calendar Users
If you are a Calendar Owner or an Admin User, you can manage other users. To do so, go to your Timely account, click on the My Account menu, and then on the Users tab. If you wish, you can use the filters to list users by their names, email addresses or roles.
On the list of users, you will find information about all your users and be able to change properties for each of them, individually. The available options are:
- Edit;
- Download User Activity Log; and
- Delete.
Follow these simple steps to manage users within your Timely account:
- Log into your Timely account.
- From the main menu on the left, select Settings, then click on Users.
- Hover over the user’s name you wish to manage, then click Edit, Download User Activity, or Delete.

4. How Do Users Log in and Access the Calendar?
New Timely users will receive an invitation by email. They will need to create an account with a password, and then login into Timely’s event platform to be able to access the calendar.
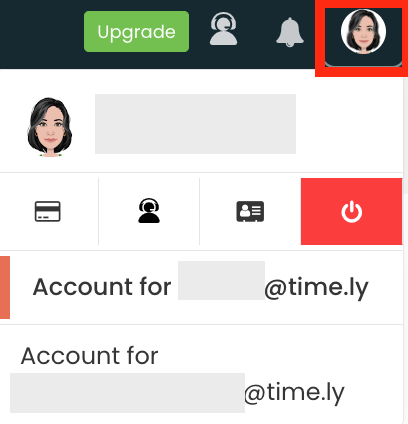
Current Timely users will also receive an invitation by email. After logging in with their Timely credentials, current users might need to click on their profile icon in the top right corner to switch between their own calendar(s) and the new calendar they got invited to.
Need Additional Help?
For further guidance and support, please visit our Help Center. If you have any inquiries or need assistance, don’t hesitate to contact our customer success team by opening a support ticket from your Timely account’s dashboard.
Moreover, in case you require additional assistance in implementing and using Timely event management system, we are happy to assist. Explore all the professional services we can offer you, and get in touch with us today!