With a Timely account, you can easily add images to illustrate your calendar filters. Highlighting your filters with images can create a unique visual identity for your calendar of events. Moreover, it can help people remember your events and filters easily while associating them with images chosen by you. In this post, you will learn how to add images to your event calendar filters.
1. Why you Should Add Images to Your Calendar Filters?
Did you know that, in general, it take 250 milliseconds for a human brain to process a single word, while it only takes 13 milliseconds to process an image? Indeed, processing pictures is much easier and faster than reading a text. This proves why visual marketing is so important. Also, that is one of the reasons why at Timely we are so focused on design and imagery!
Certainly, adding images to calendar filters can help you display your event types more effectively. It can also help increase event awareness, as people use your filters to search for events within your event calendar.
After organizing your calendar with filters, you may want to know how you can add images to them. However, if you wish to skip this step, it is ok since adding images to filters is not mandatory for your Timely calendar to work. Anyway, see below how to add images to categories, venues and organizers.
2. How to Add Images to Categories
If you wish, you can use images to your event category filters. You can do it directly while creating an event, or into the Categories submenu under the Filters section. For both options, the steps are quite similar.
See below the steps to add images to categories under the Filters section:
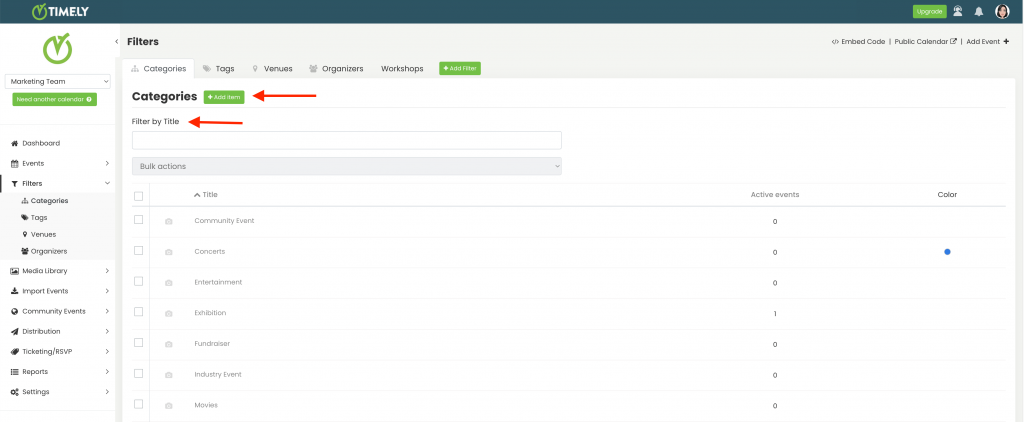
- Log in into your Timely account.
- On the main navigation menu, click on Filters, and then on Categories.
- Click on the green +Add item button to add a new category. Alternatively, you can use the search tool to find a previously created category to edit, if you wish.
- A new working area will appear on the right panel for you to add or edit the category. On the Image item, you will see two buttons: Media Library and Upload.
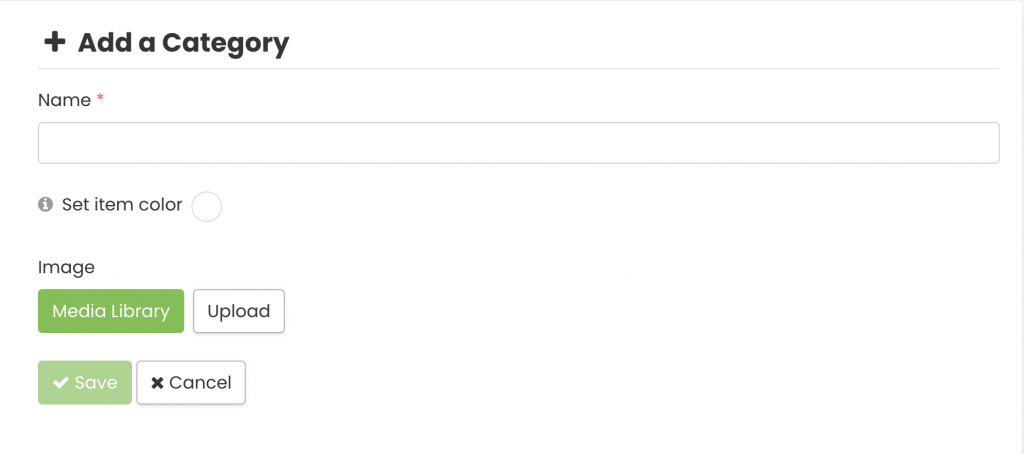
- To add a previously used image, click on Media Library. Your image gallery will pop-up on the screen. You can search for your image there, and then select the correct file.

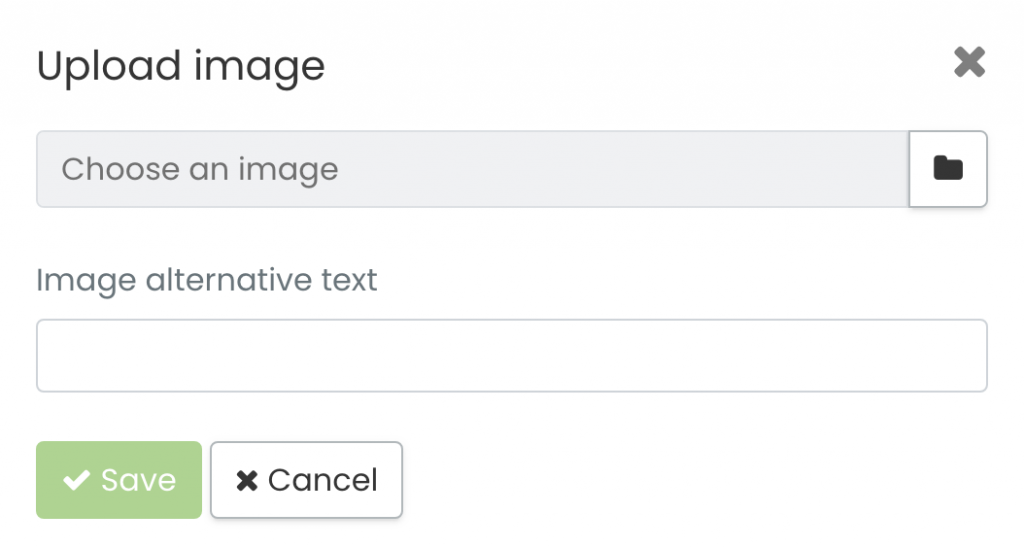
- If you want to add a new image, click on the Upload button. A pop-up window will appear, allowing you to select an image from your computer. Give it an appropriate alternative text, and then click on the Save button. Your image will be automatically stored into your Timely Media Library.
- Do no forget to click on the Save button to save your new category and image.
IMPORTANT: When uploading images to your Timely account, we recommend following our Images Best Practices in terms of file format, size, quality and image alternative text.
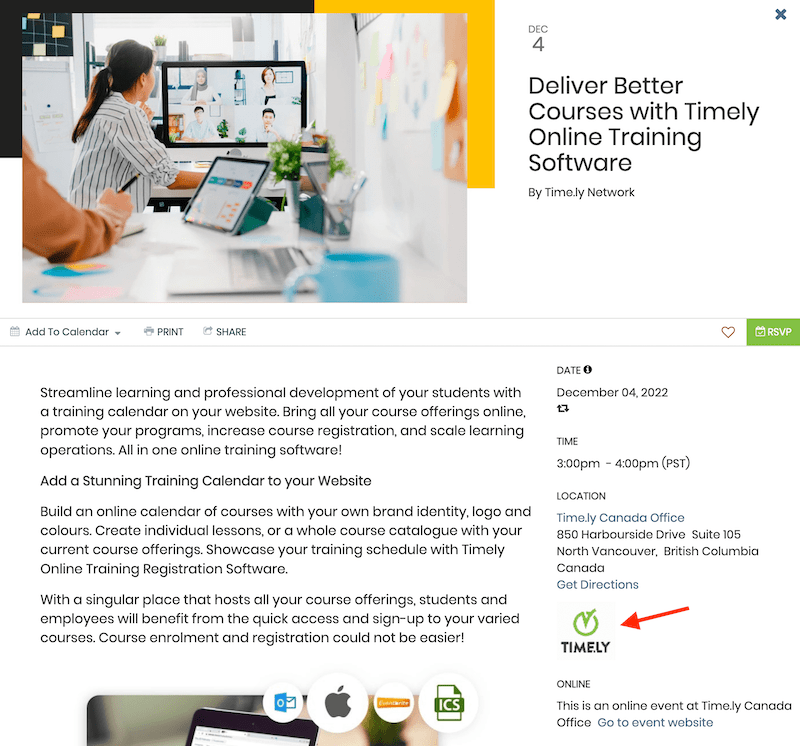
Please note that the category image will be used as the default image for events within that category that are missing a featured image. This function is very useful in situations where you do not want to create a featured image for each one of your events, but still want your calendar to look visually appealing.
3. How to Add Images to Venues
When adding an event venue to your calendar, you can also add an image to illustrate it, if you wish. You can do it directly while creating an event, or into the Venues submenu under the Filters section.
For both options, a new Add Venue area will appear on the screen with fields for you to complete your venue’s information, similar to the one below.
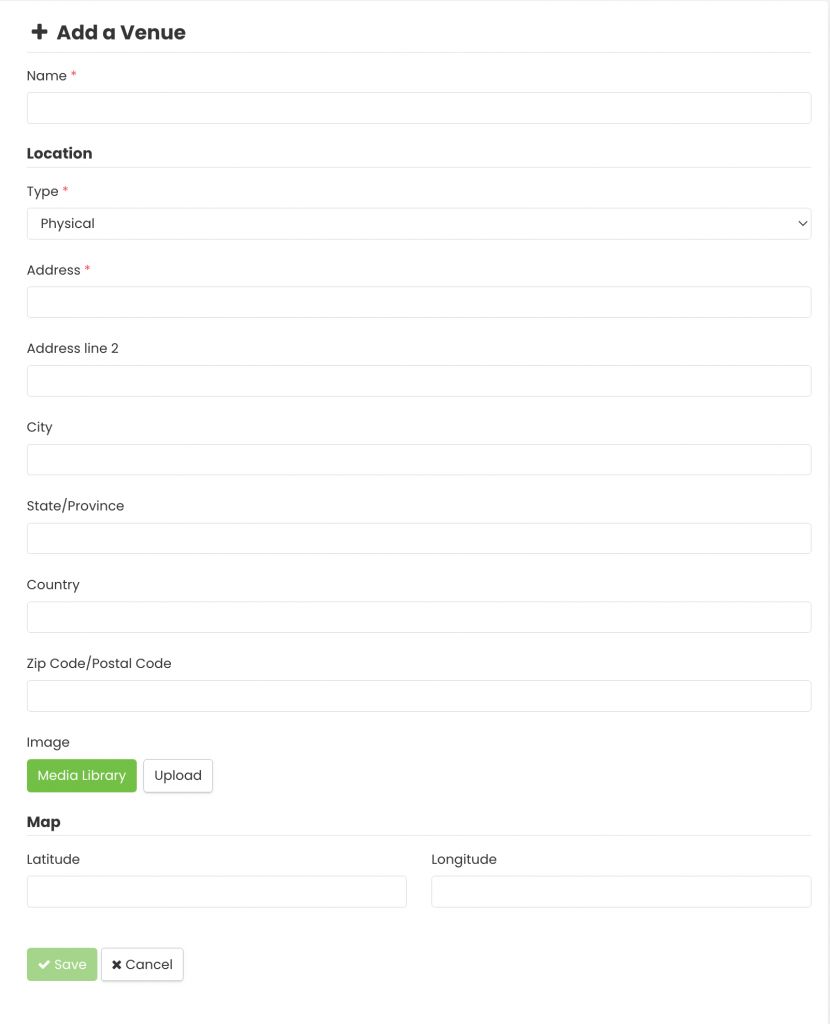
You will be able to choose an image for your venue from your Media Library or upload a new one. The steps are the same as explained in the section above.
When creating a venue, it’s very important that you complete all the fields in the form. All that information will give your attendees the best orientation to find your physical venue. Having a venue image is important for that same reason. Your attendees will know beforehand how your venue looks like, and find your event location much easier and faster.
The venue image can be seen on each event post associated with that venue.
4. How to Add Images to Organizers
You can also add images to your event organizer filters. You can do it directly while creating an event, or into the Organizers submenu under the Filters section.
For both options, a new Add an Organizer area will appear on the screen with fields for you to complete your event organizer’s information, similar to the one below.
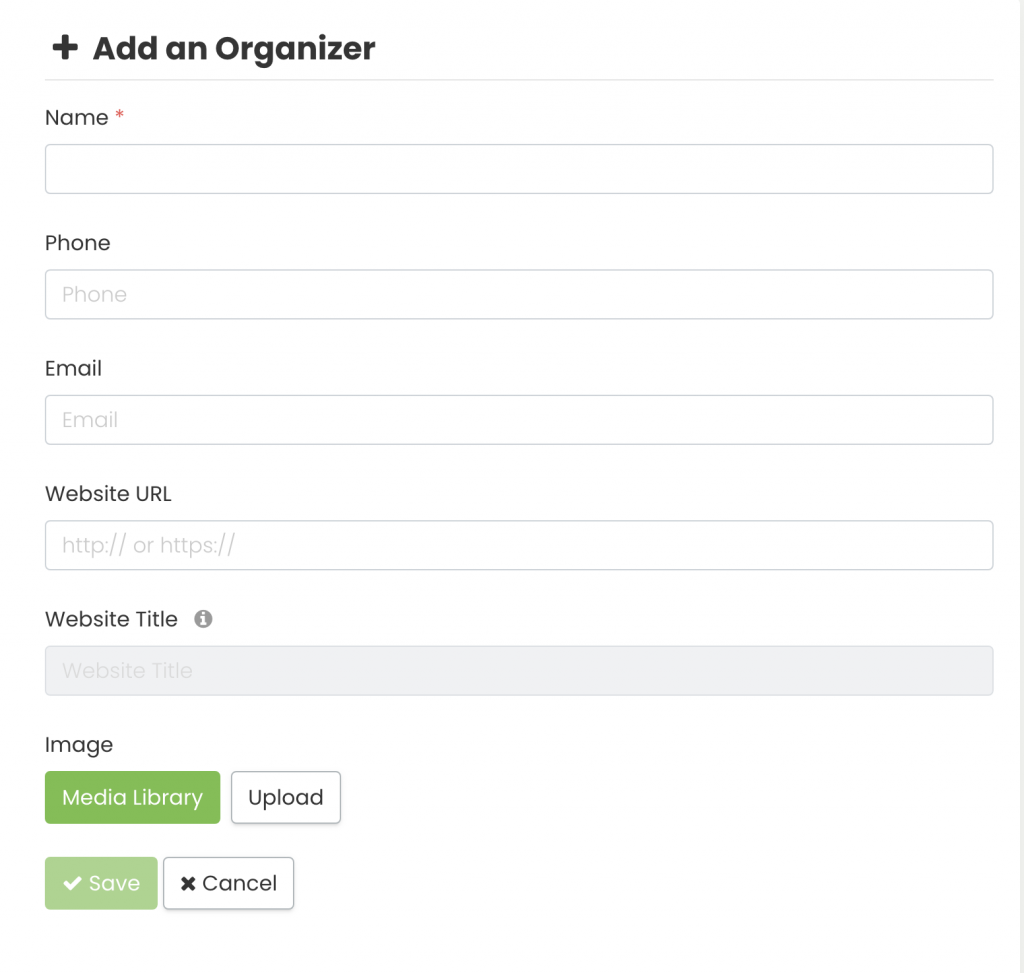
You will be able to choose an image for your organizer from your Media Library or upload a new one. The steps are the same as explained in the categories’ section above.
When creating an organizer, we recommend that you complete all the fields in the form. All that information will give your attendees more details about the person who is organizing the event. It can even allow them to reach the organizers directly for questions about the event, if they wish. In addition, it is a great way for you to connect and engage with the people behind the events you promote on your online calendar.
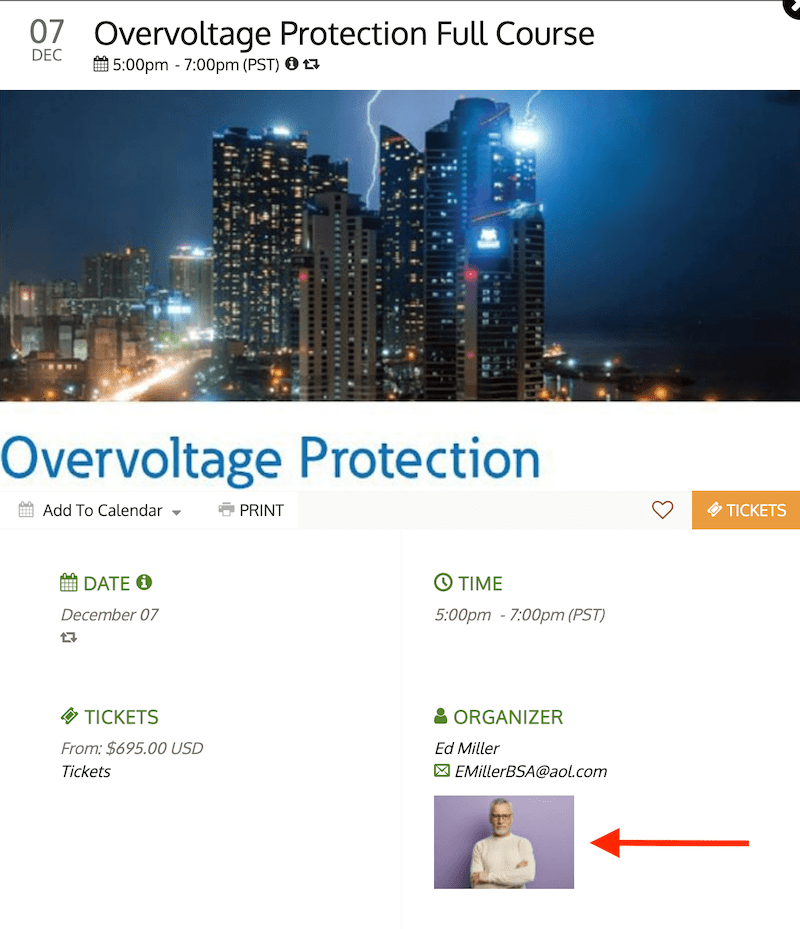
The organizer image can be seen on each event post associated with that organizer.
For more user guidance, please go to our Help Center. If you have any questions or need additional assistance, do not hesitate to contact us. Alternatively, you can open a support ticket from your Timely account’s dashboard.