With a Timely account, you can customize your event submission email templates and messages. This way, when event submitters submit events to your calendar, they will receive a personalized email notification on the status of their submission, for example. In this post, you will learn all the required steps to customize event submission email templates.
1. Event Submission Events Email Templates
If you promote events organized by others, you may want to add an event submission form to your website events calendar. To make this task easier and more intuitive, we’ve created a specific menu for “Community Events” on Timely event platform. In this new menu, you can manage all your event submission settings, including form fields, automations, submission fees, and email templates.
With respect to event submission, currently, there are 8 types of messages our event management software sends to your users and submitters automatically:
- Event Submission Email Templates – Event Related Notifications
- Submission Approved
- Submission Denied
- Submission Confirmation
- New Event Submission Notice (Internal)
- Event Submitters Email Templates – Accept / Reject User
- New Submitter Request Notice (Internal)
- Submitter Approved
- Submitter Denied
- Submitter ID Confirmation
If your subscription plan includes email customization, you will be able to customize all of these are the email templates. Continue reading to learn how.
2. How to Customize Email Templates
Follow the steps below to customize your standard event submission email templates:
- Go to your Timely dashboard;
- On the left side menu, click on Community Events;
- On the submenu, click on Templates;
- You will see all available event submission email templates;

- Hover the mouse over the email template you want to customize and click “edit”.


You will see a new page where you can edit your template. These are the items you can edit/change:
- Email subject
- Header
- Body
- Footer
To edit a field, just click on the box under the subject and start typing.
2.1 Using Dynamic Fields on your Email Templates
Even if you want to create a template using your own words, we recommend personalizing your message as much as possible. You can do that by adding dynamic fields to your event submission email template.
Dynamic fields are a feature that pulls information directly from Timely’s database, and populates your email template automatically. This way, you can personalize all your emails at once, without having to type one email at a time.
You can add any relevant dynamic field while editing your email template. On the top right corner of your screen, you will see the option to insert dynamic fields. You just need to click on this feature, and choose the appropriate field on the dropdown menu. Then, the chosen dynamic field will be added automatically.

2.2 Email Subject
The Email subject is the first thing people see when receiving your email.
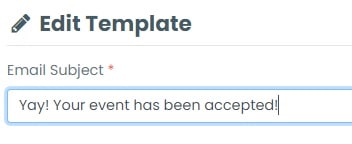
Note: This is the only place where dynamic fields won’t work. Don’t try to add them there.
2.3 Header
The email header is your greeting to the person who will receive the email. You can use dynamic fields and personalize it with names and other information you find useful.

2.4 Body
The body of your email is the main message your submitters or users will receive. The system already comes with a standard message, but you can edit it anyway you want.

2.5 Footer
You will also be able to edit the footer of your email. The footer is your farewell. You can add your name, team’s information, company logos and whatever else you’d like.

2.6 Preview, Save, Cancel or Restore Default
After editing all email sections, you will have the option to preview your email. To confirm how people will see it in their inboxes, just add your email address and click “send preview”.
If all looks good, all you need to do is to save your new event submission email template. If the final result is not what you had in mind, just click “restore default” to go back to the standard template.

Need Additional Help?
For further guidance and support, please visit our Help Center. If you have any inquiries or need assistance, don’t hesitate to contact our customer success team by opening a support ticket from your Timely account’s dashboard.
In case you require additional assistance in implementing and using Timely event management system, we are pleased to assist. Explore all the professional services we can offer you, and get in touch with us today!