With a Timely account, you can set up and change the event status of your events. This feature is very helpful to inform your audience about any changing circumstances or the current status of your ticket sales. Learn how it works in this post.
1. Event status definitions
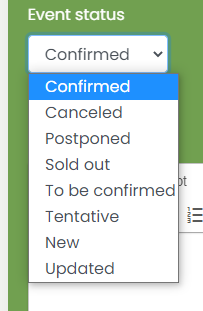
Each event is unique, and requires an individual status tag to reflect its current situation. Events can have one of the following statuses:
- Confirmed: you have confirmed your event will happen.
- Canceled: you have canceled the event.
- Postponed: you changed the date of your event.
- Sold out: you have sold all available tickets for your event.
- To be confirmed: you still need to confirm certain information about the event.
- Tentative: you plan to host the event as planned, but things can change.
- New: you just posted a new event.
- Updated: you just updated your event post.
2. Event Status Set Up
By default, events will be published with the status “Confirmed”. However, you can change that on your Timely dashboard manually, when creating or editing an event. Simply go to Events > Add Event > Event Status, and select your option.
For postponed events, make sure to inform your attendees of the changes. If you have collected RSVPs or sold tickets using Timely ticketing software, you can notify attendees automatically. If you are using a third party ticketing services, you will have to contact them directly or through the external ticket provider.
For cancelled paid events, you will also need to contact your attendees to cancel tickets and refund your customers.
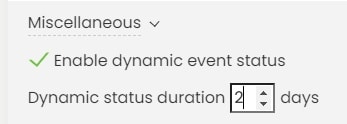
3. Automated Settings
You can automate the event status of your event. The system can automatically change the event to “New” when it is created, or “Updated” when there is any change to the post.
To enable the automation, simply go to the Settings > General > Miscellaneous. Then, click on the box “Enable dynamic event status”. Do not forget to press the Save button to save your settings.
4. View the Updated Status of your Events
Except for the status “Confirmed”, your audience can view and know the situation of your events in the public interface of your calendar. Each event will have its own label, as shown in the image below.
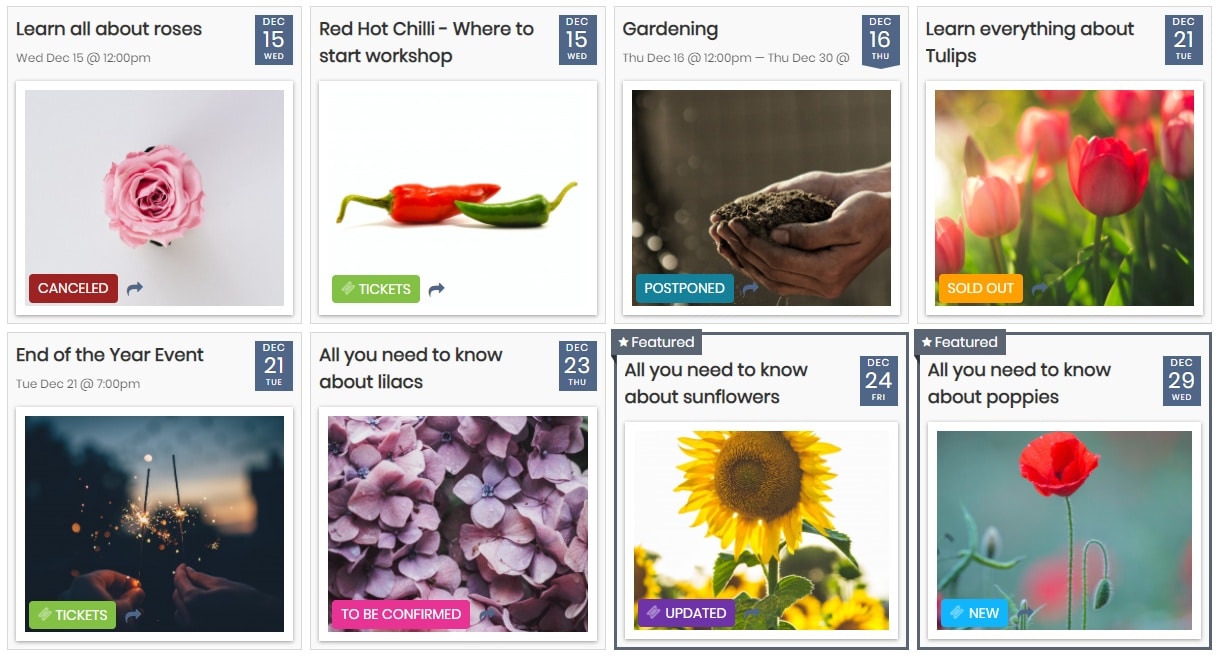
The tags for “New”, “Updated” and “Tentative” substitute the “Tickets” button, when the event has tickets or RSVPs associated with it. However, the tags are clickable, directing your website visitor to the ticket or RSVP checkout.
For more user guidance, please go to our Help Center. If you have any questions, do not hesitate to contact us. Alternatively, you can open a support ticket from your Timely account’s dashboard.