With a Timely account, you can create any type of event. Indeed, you can host a traditional face-to-face event, or the newest forms of online and blended events. You decide on your event format, and we provide you with the flexibility you need to the deliver the planned experience. In this post, you will learn how to create in-person, virtual or hybrid events from your Timely dashboard.
1. In-Person, Virtual and Hybrid Events
In-person events are events that take place at a physical address. For example, concerts, sports events, theatre plays, and organized trips. Since in-person events are face-to-face gatherings, they offer a better chance for human connection than the alternatives.
Virtual events are events that happen over the internet through a computer or mobile device rather than a physical location. Good examples of virtual events are webinars, virtual conferences, on-demand online courses, and live streaming events. Considering that virtual events allow people to attend online without the need to leave their homes or desks, they can be more accessible and convenient.
Hybrid events are events that take place both in-person and virtually. Some participants attend the event onsite, and others, online. Depending on how the event is planned, some parts of the event happen at the physical location, and other parts are broadcasted out to a virtual audience. The best examples of hybrid events are large conferences, companywide trainings, and live shows streaming. Hybrid events are a great solution for attendees who cannot participate due to health or safety reasons, have limited travel budget, or if the venue capacity is limited.
No matter the type of your event, you can set it up with Timely event software!
2. Create In-Person Events
If you are hosting a face-to-face event, you can display the physical address and directions of your event on your event landing page. This way, your audience will know exactly where your event is taking place, and be able to plan their trip to the event location accordingly.
To create a venue with a physical location:
- Log in into your Timely account;
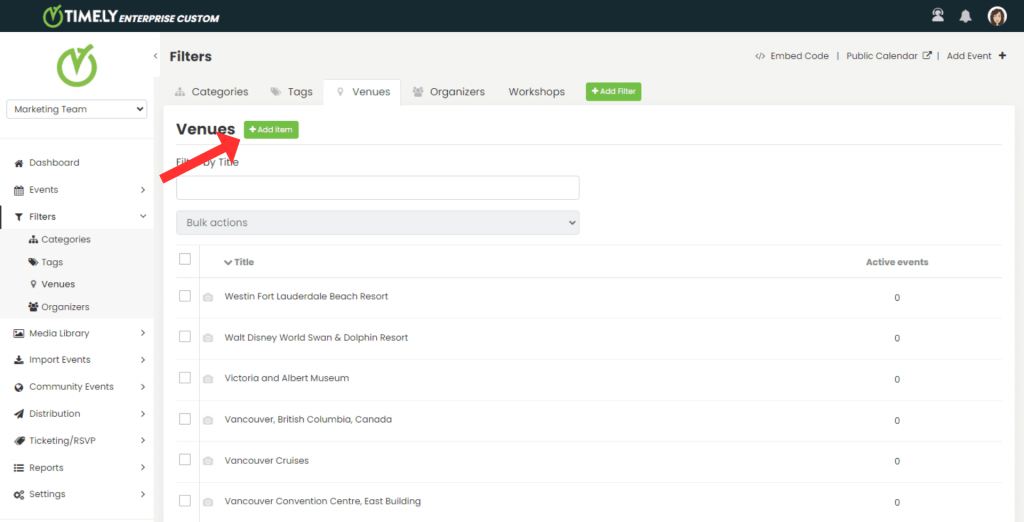
- Select Filters on the main navigation menu;
- Select the submenu Venues;
- Click the +Add item button. A column will appear on the right side of your dashboard.
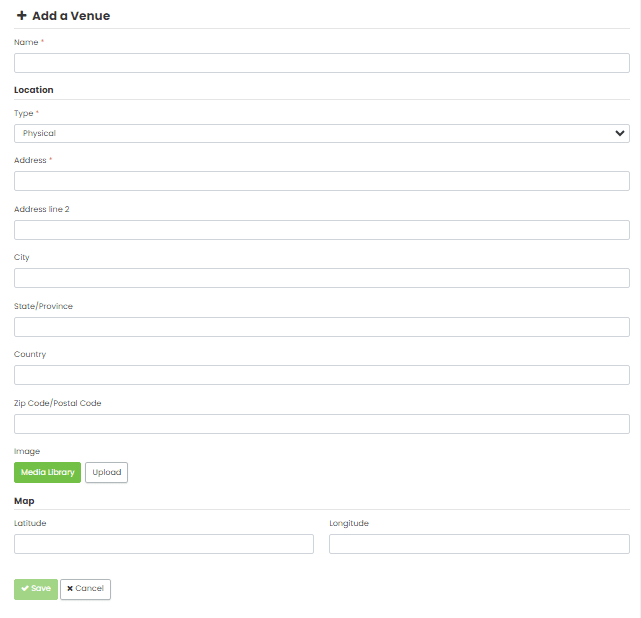
- Fill in the details. It is necessary to enter the venue name, select the type of location (in this case “Physical”), and enter the address of the event.
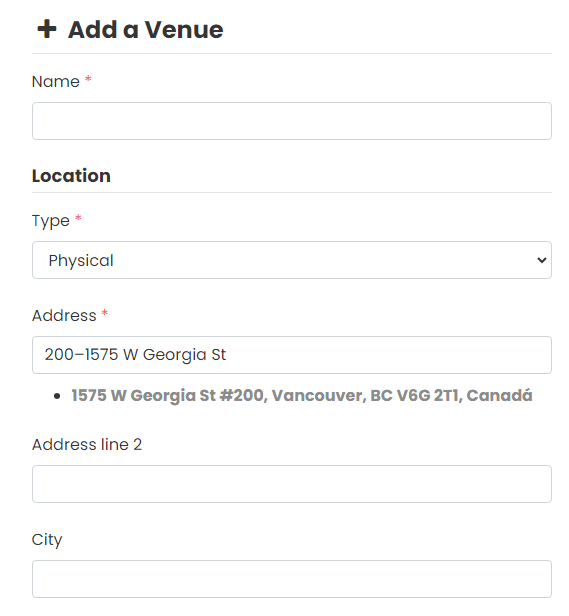
When you enter an address, our autocomplete feature will offer you the exact address below the field and automatically fill in other fields. If you want to highlight or further differentiate locations, you can also assign a default image to the location that will be displayed in the event landing page.
- Click the Save button to save the new venue location.
The next step is to assign the new venue to one of your events. To do so, select a published event or create a new one. If you do not know how to create an event or need a refresher, check the post How to Create an Event.
On the event creation section, under Venue Details, look for the already created location. You can also create a new location by clicking +New.
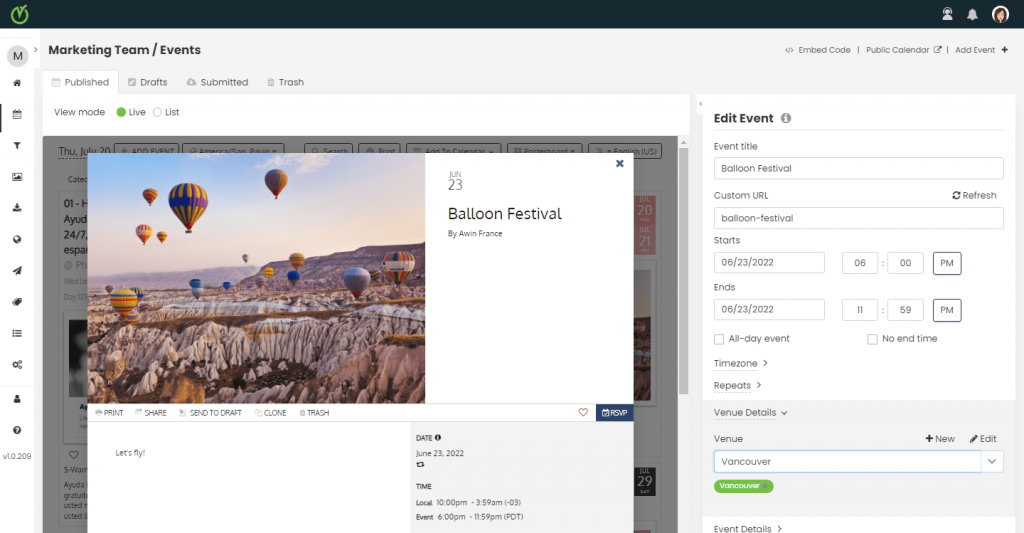
Once you’ve filled out all the details, save the changes. The location will show up in the event details on your events calendar.
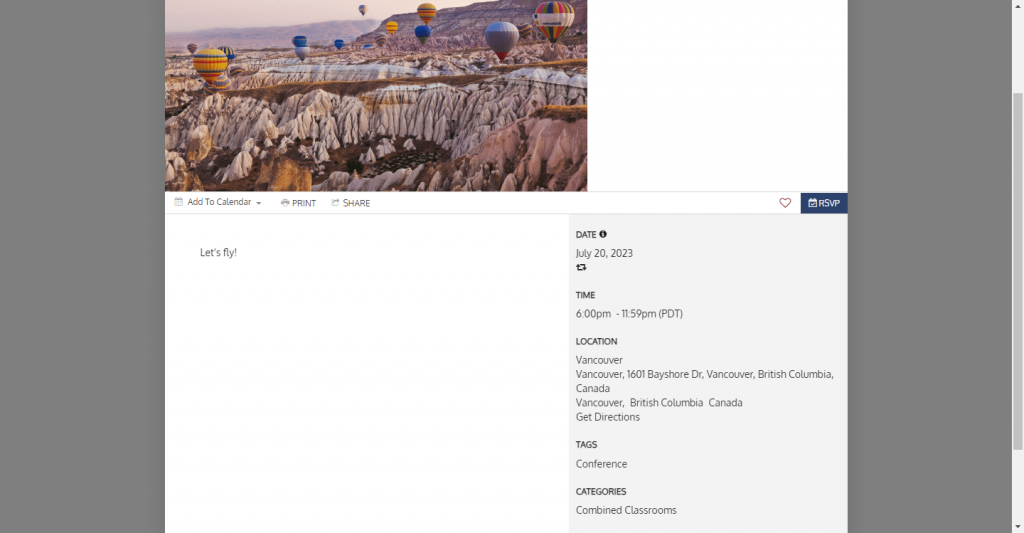
If you want to collect registrations or sell tickets online for your in-person events from your Timely calendar, you can use our event registration software, event ticketing software or event booking software. This way, it will be all integrated, providing your customers a seamless event discovery and reservation experience.
3. Create Virtual Events
It is easy to create a virtual event with the Timely events software. You can connect our application with your favorite virtual event delivery platform, such as Zoom, Google Meet, or Skype Meet Now. You can also use social media platforms for your online events.
The first step is to create the event link on your preferred video conference app. As an example, here are steps to get a Google Meet link:
- Go to Google Meet;
- Click on New Meeting;
- Select the option Create a meeting for later; and
- Copy the meeting link by clicking on the respective icon.
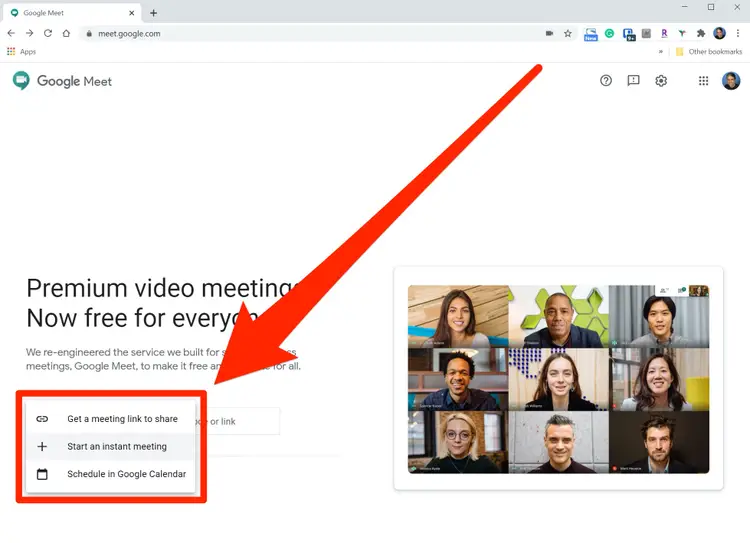
The next step is to create the virtual venue location on your Timely dashboard, similarly to how we created the venue for the in-person event above:
- Log in into your Timely account;
- Select Filters on the main navigation menu;
- Select the submenu Venues;
- Click the +Add item button. A column will appear on the right side of your dashboard.
- Enter a name for your virtual venue, choose the type of location (in this case “Online”) and enter the copied Google Meet link.
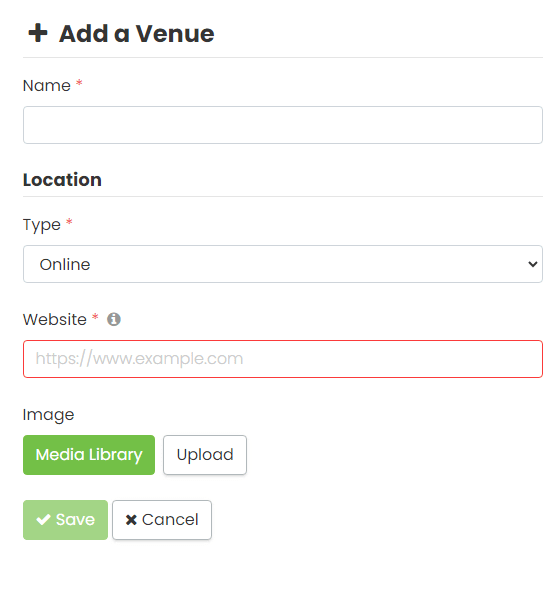
6. Once you’ve saved your changes, assign this virtual location to one of your events, as explained above. The meeting link will be available on the event landing page.
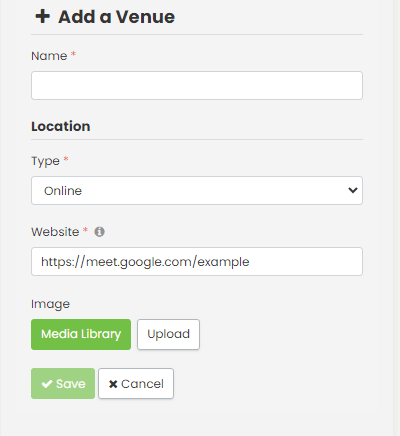
If you do not wish to make the meeting link available to public, you can show it only to event registrants using Timely event registration, event ticketing or event booking software. This way, people will only have access to your event link after registering for your online event. You can do that by adding additional information to tickets, RSVPs, emails and PDF templates.
4. Create Hybrid Events
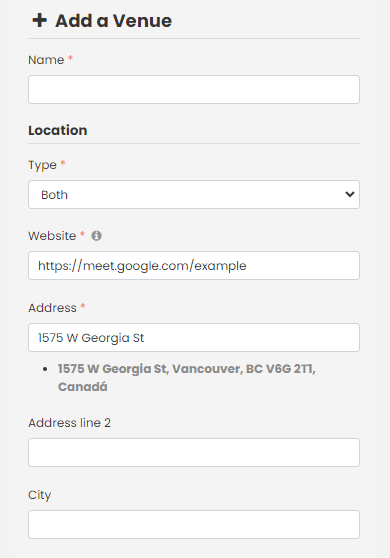
Creating a blended event is a simple process. It works on the same way as the creation of the in-person event and the virtual event location. When creating your hybrid event venue location, you just need to select Both under the location type. After that, you can enter the same details as for the Physical and Online event types described earlier.
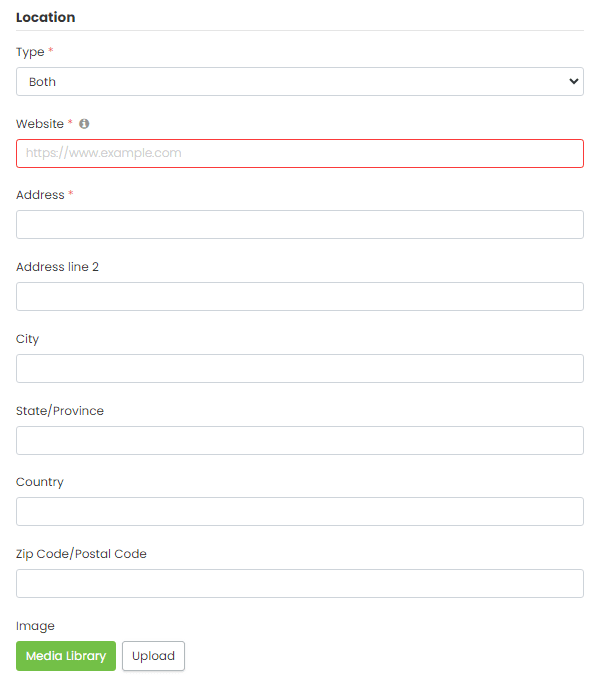
Once the hybrid event venue is connected to the event post, the landing page will display both the physical address and the meeting link.
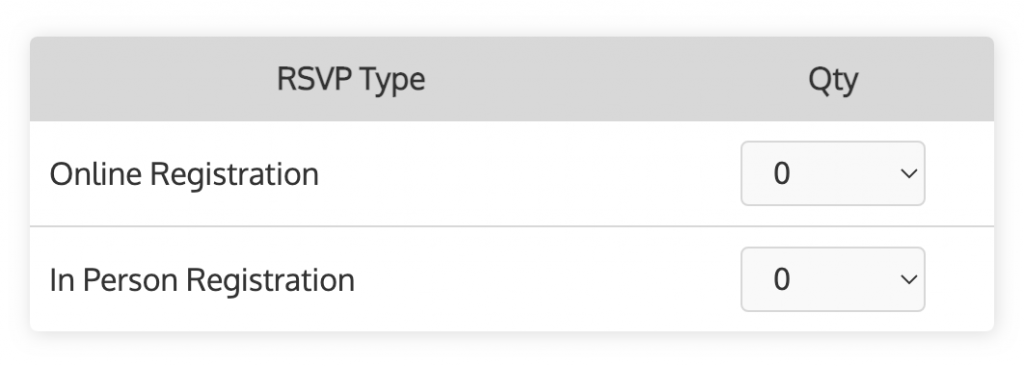
If you want to collect RSVPs or sell tickets online for your blended events, you can integrate your calendar software with Timely event registration, event ticketing or event booking system. Then, you will be able to offer both online and in-person tickets for your hybrid events on the same checkout.
You can also send separated event information for the participants depending on their chosen event delivery method. For example, you can send venue directions and instructions to participants attending in person. You can also send the meeting link just to to attendees who are attending your event virtually. Learn more on the post how to add additional information to tickets, RSVPs, emails and PDF templates.
For more user guidance, please go to our Help Center. If you have any questions or need additional assistance, do not hesitate to contact us. Alternatively, you can open a support ticket from your Timely account’s dashboard.