
With a Timely account and the use of the RSVP booking request feature, you can have total control over your events’ bookings. This means you can review each registrant and manually accept or reject them as it suits you. Enabling the booking request feature for your event helps you not only better manage event participants, but also proper oversee your event, from start to finish. In this post, you will learn how to accept or reject RSVP & Time Slot Booking Requests.
1. Why Should You Use the Booking Request Feature to Approve or Deny RSVPs?
Timely Booking Request feature was designed to give event organizers information on who wants to join their events, and the power to decide who will participate. This functionality is particularly useful for events for a specific audience or with a priority registration order. It is also applicable if you have an internal process that needs to be followed prior to confirming registration on an event. By manually approving or rejecting each event participation solicitation, you are in control of all your event bookings.
2. How Will You Know When Someone Requests to Participate in Your Event?
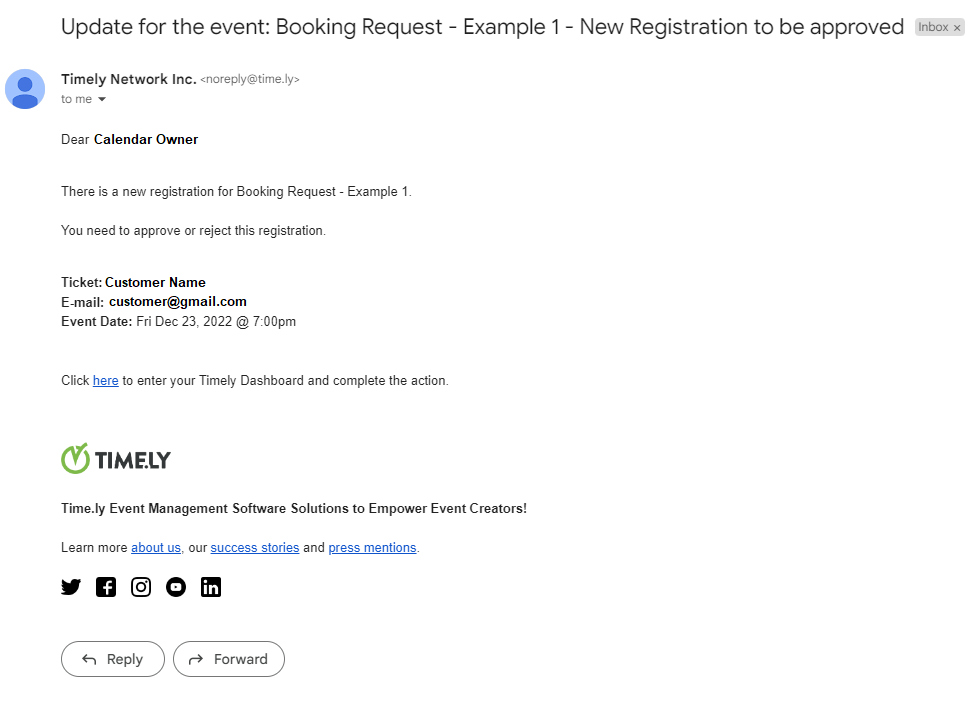
Timely is here to help you generate leads for your events. Thus, it is important that you do not miss any booking request from your audience. For this reason, we automate the booking request process to keep you and your team on the loop. Every time someone requests to participate at your event, your authorized users will receive an automated email informing about the request.
Find the automated notification email example in the image below:
You can review which users have permission to receive email notifications on Settings > Users. For detailed instructions on how to manage user permissions, please check the post How to Add Users to your Timely account.
3. How Can You Accept or Reject RSVP Booking Requests?
After receiving the booking request, you can then decide whether the registrant can participate in your event or not. There are two ways to manage your booking requests. You can accept or reject individual bookings, or multiple bookings simultaneously. See below for more information.
3.1 Manage Individual Booking Requests (RSVP Tab)
If you want to review each individual RSVP or time slot booking request received, before accepting or rejecting them, just follow the steps below:
- Log in to your Timely account.
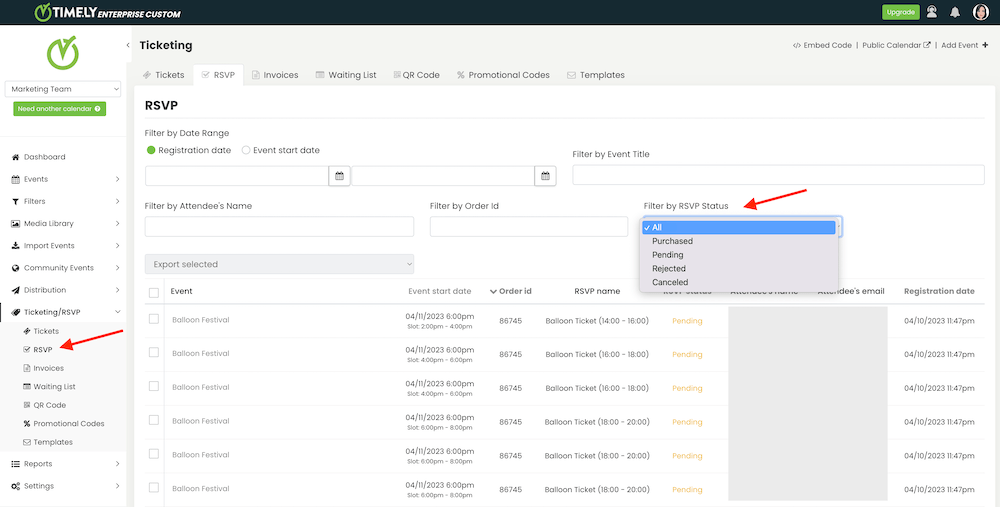
- On the main menu on the left, go to the Ticketing/RSVP menu.
- Next, click on the RSVP submenu.
- There, you will see all your new booking requests. If you don’t see them, you can use the filters on the top of the page. For example, you can use Filter by RSVP Status and choose Pending to see the requests that need to be approved or rejected.
- Go through the list and choose the booking request you want to manage. When you hover the mouse over the request, you will see the options to accept or reject RSVP or time slot bookings. Execute the desired action by clicking on the appropriate button.
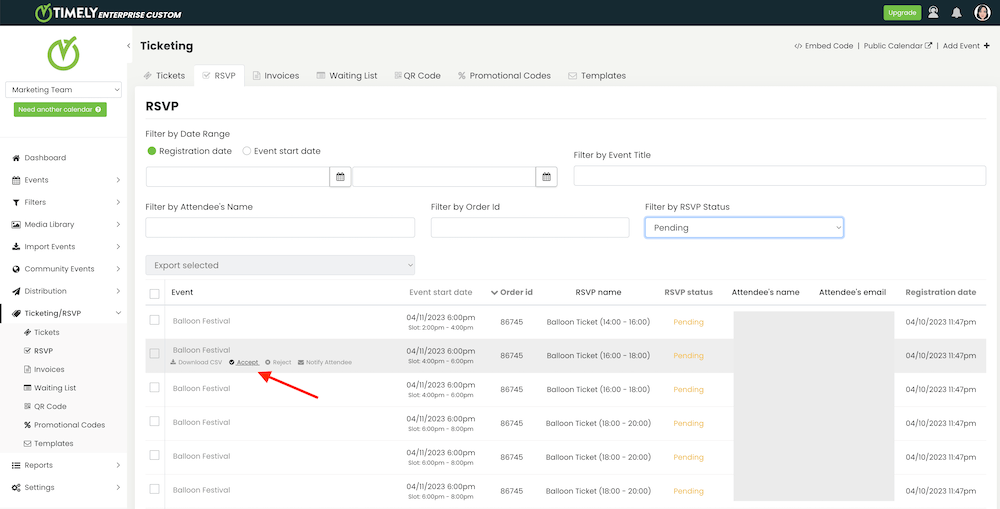
- Once you have accepted or rejected a booking request, the RSVP status will change accordingly. The Order status for Approved RSVP and time slot booking requests will show as Purchased, and for rejected will show as Rejected.
Important: When you manage booking requests using the RSVP tab, you approve or deny RSVP or time slot requests individually. Consequently, guests receive one automated email for each booking approval or rejection. This is true even if they have requested several bookings on the same checkout transaction. If you prefer that your guest receive only one automated email in relation to all the bookings requested on the same order, we recommend using the process explained on Section 3.2 below.
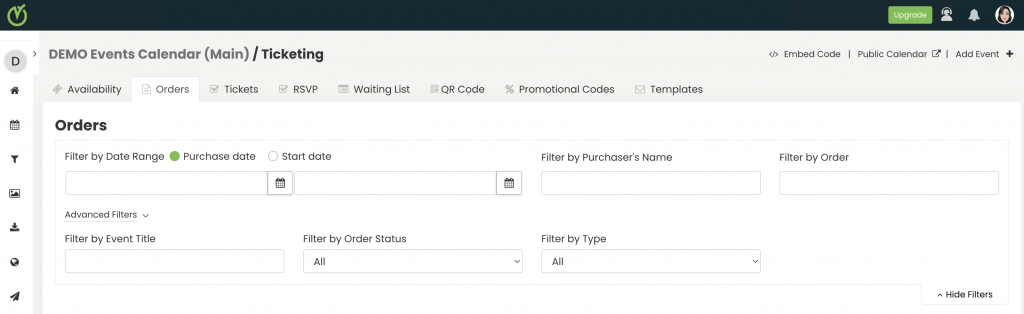
3.2 Accept or Reject Multiple Booking Requests Simultaneously (Orders Tab)
In the situation where a guest reserves multiple tickets or time slots on the same checkout transaction, and you want to approve all or deny all requests at once, it might be easier to manage your booking requests using the Orders tab. Just follow the steps below:
- Log in to your Timely account.
- On the main menu on the left, go to the Ticketing/RSVP menu.
- Next, click on the Orders submenu.
- There, you will see all your booking requests.
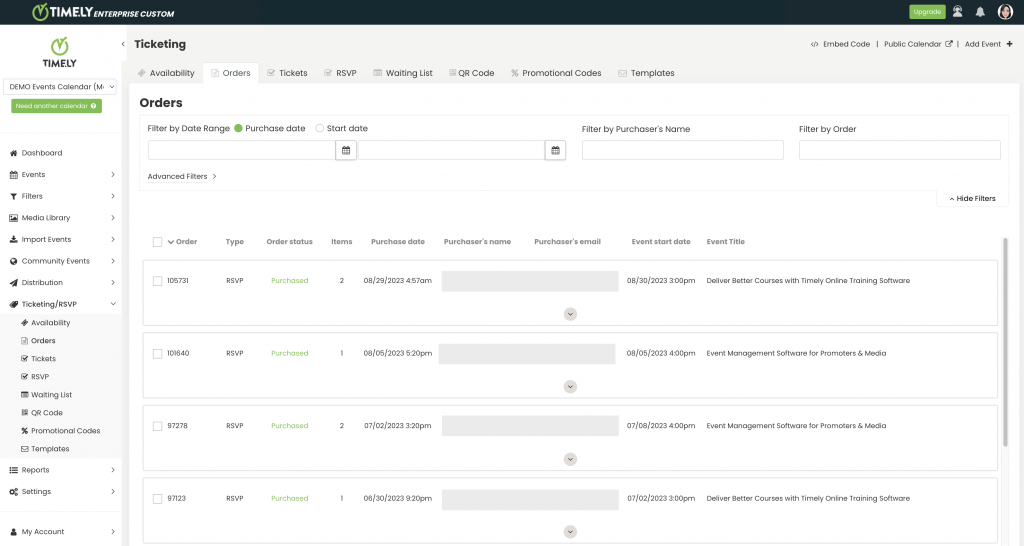
- If you wish, you can use the filters on the top of the page. For instance, you can use the Filter by Order Status and choose Pending to see only the requests that require an action from you.
- Go through the list and choose which registrants / purchasers you will approve and the ones you will deny entry to your event. Since an order contains all bookings requested on the same transaction, you can manage all requests in bulk with a single click. Hover the mouse over the selected registrant and click on Accept or Reject.
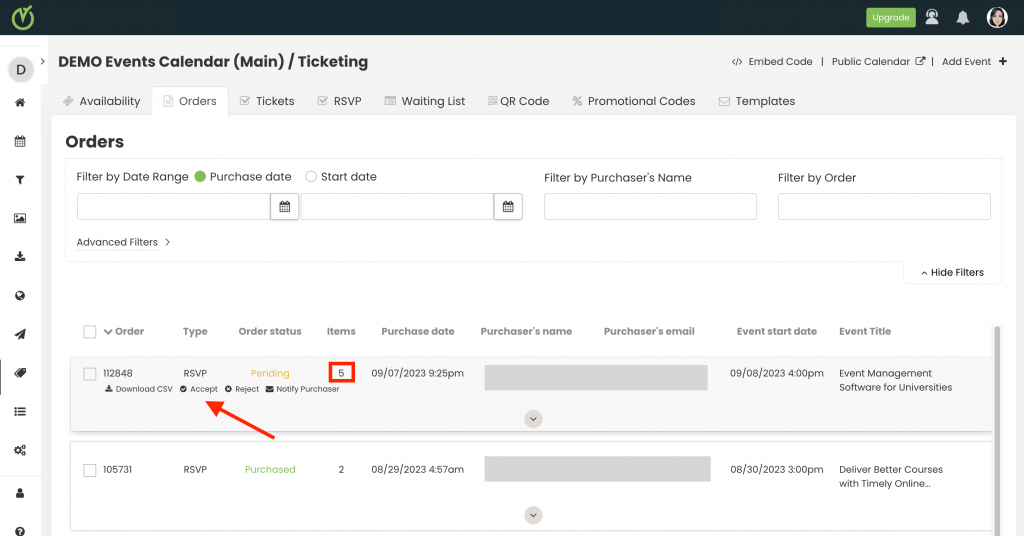
- Once you have accepted or rejected the booking requests, the Order status will change accordingly. The Order status for Approved RSVP and time slot booking requests will show as Purchased, and for rejected will show as Rejected.
Important: When you manage multiple booking requests using the Orders tab, you perform a bulk action. This means that you will approve all or deny all requests from the same order simultaneously. Consequently, your guests will receive only one approval or rejection email regarding all bookings requested on the same transaction. To accept some requests but reject others, you must manage bookings through the RSVP tab, as explained on Section 3.1 above.
4. How Can You Recall an Incorrect RSVP Request Approval or Denial?
If you accept a RSVP booking request by accident, you can still cancel it. Just hover the mouse over the booking request and click on the Cancel button. Our booking software will automatically cancel the corresponding RSVP ticket and invoice. Thus, you don’t need to perform any additional action.

On the other hand, if you reject a request by accident, you will not be able to undo this action. Thus, registrant will need to submit a new booking request through your event calendar to restart the process.
5. How Will Event Registrants Know About their RSVP Booking Request Status?
As soon as you accept or reject RSVP or time slot bookings, event registrants receive an automated email informing them about your decision.
This means that, whomever you approve the request will receive the RSVP booking request accepted template. Likewise, whomever you deny the request will receive the RSVP booking request rejected template. For more information, please check the post How to Customize RSVP & Time Slot Booking Request Email Templates.
Need Additional Help?
For further guidance and support, please visit our Help Center. If you have any inquiries or need assistance, don’t hesitate to contact our customer success team by opening a support ticket from your Timely account’s dashboard.
In case you require additional assistance in implementing and using Timely event management system, we are pleased to assist. Explore all the professional and managed event services we can offer you, and get in touch with us today!