With Timely, you can easily sell time slot-based tickets for your paid events. If you are hosting a paid event that requires people to register based on time slots, you can use the “Time Slot Ticket” setting for your event listing. Learn all the steps in this post.
1. Time Slot Ticket Basic Settings
Selling time slot-based events is very easy with Timely event management solutions. If you do not have this feature in your plan, contact us to upgrade your account.
After logging into your account, go to the Events menu. You can create a new event or select the event you want to add the time slot ticket feature.
Create your Ticket Type
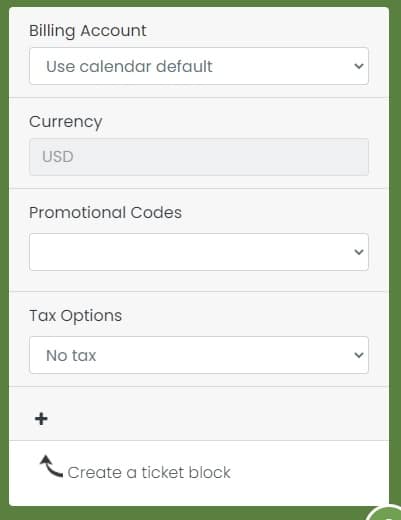
First, go to the Cost and Tickets section of your event, where you find all the RSVP and ticketing options. Then, select Time Slot Ticket on the dropdown menu, just below “Paid Events”. A panel will show up. Next, you can select the billing account, the currency, any promotional codes you have already created, and your tax options.
After selecting the necessary information, click the plus button to add the first ticket block.
Give a name to your ticket block and add a short description. Please note that this information will be visible to your audience in the event page.
For example, if you are hosting a job fair and want to allow attendees to book appointments with career advisors for a fee, you can create different time slots for each advisor according to their availability.
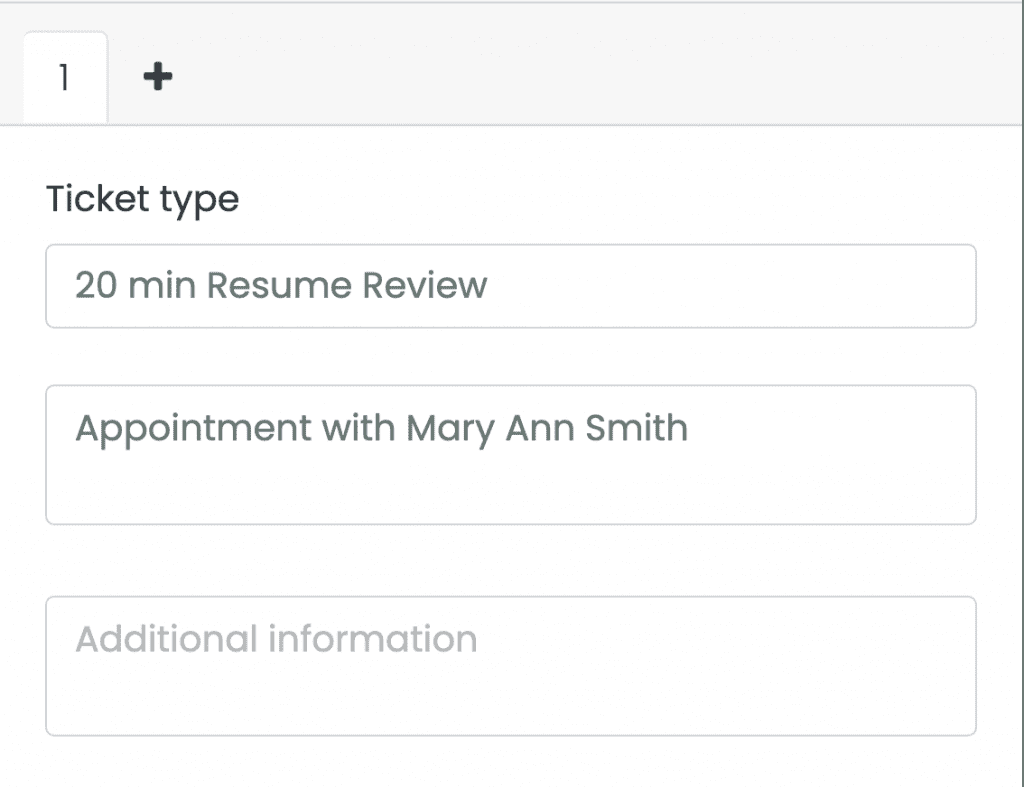
Add Additional Information
You can add additional information to each one of your ticket blocks. This information will not be visible to your audience in the event page. However, it will show up on the automated confirmation emails and PDF ticket they receive after purchasing time slot tickets for your event. For more information, check how to add additional information to tickets, RSVPs, emails and PDF templates.
If you are hosting a paid virtual or hybrid event, you can add an online meeting link as an additional information. As a result, the link will appear in your confirmation emails and PDF tickets. If you want to learn more, read how to add an online meeting link to tickets and emails.

Create your Time Slots
Now, you can create your time slots. You can add as many time slot ticket blocks as you see fit by clicking on the + Add Slot button.

Limit Ticket Availability
After naming your time slot-based event and adding additional information, set the ticket limits. Add the maximum number of tickets available, on the respective field. Since Timely event ticketing system updates your ticket inventory automatically every time you sell a ticket, it keeps track in real time of ticket limits until the event is “sold out”.

If you do not have a limit, simply click on the Unlimited checkbox and our event ticketing software will sell tickets indefinitely. You can change these settings anytime you want by editing your event, in the Costs and Tickets section of your event settings.
Your event registrants will be able to see the ticket limits on the check out. This value is also updated as your tickets are sold.
Limit Number of Tickets Per Registration
While setting up your time slots and the number of tickets available for each time slot, you can also set the maximum number of tickets event attendees can purchase with a single registration.

Please note that, by default, Timely event ticketing system limits the number of tickets per registration to ten (10) tickets. If you want to change this setting, just type the correct number in the appropriate box.
Ticket Cost
The next step is to set your ticket price. If you are using the Timely Ticketing Add-on, you can choose to pass this fee on to your customers, or absorb them into the ticket price and pay them yourself.
For more information on how to pass the cost fee to your final customer, check this useful user guide: How to Change Who Pays Ticket Fees (Pass On or Absorb).
Waiting List
If you anticipate high demand for your event and have limited ticket availability, a waiting list can be a valuable feature to have. A waiting list allows interested attendees to sign up for a spot once tickets are sold out, and it helps you efficiently manage potential last-minute cancellations or no-shows.
To set up a waiting list for your event, follow our step-by-step guide How to Create a Waiting List for Your Event. This post will walk you through the process of configuring the waiting list settings and seamlessly integrating it into your event registration process.

Once you have a waiting list in place, it’s crucial to know how to effectively manage it. Our guide How to Manage Waiting Lists and Subscribers provides valuable insights and strategies for handling waiting list subscribers. From prioritizing bookings to manually confirming them, this guide offers practical tips to ensure a smooth and efficient waiting list management.
By implementing a waiting list for your event and mastering its management, you can enhance attendee satisfaction, optimize event capacity, and create a seamless experience for both organizers and attendees.
Appointment Ticket Sales Start and End Date
By default, upon publication of an event, online ticket sales will immediately become available ti the public. However, you have the option to modify the start and end dates and times using the dropdown menus.
For the start of ticket sales, you can tailor a start date that can span across weeks, days, hours, and even minutes before the actual event. In addition, you can customize the end date and time, with option to close ticket purchases at the commencement of the event, the conclusion of the event, or a designated time of your choosing.

Block Availability
When plans go awry, planners can use Timely software to easily make last-minute changes to time-slot events. Our software enables you to modify time slot availability even after tickets have been made public.
For detailed instructions, consult our user guide How to Block RSVPs and Ticket Availability for Your Events.
Time Slot Ticket Status
In addition, you can set the status of each of your time slot ticket types to inform your audience. The options are:
- Open
- Canceled
- Ended
Deleting Time Slot Ticket Blocks
You can use the delete button at the bottom of the section to remove a specific ticket block. This step has to be performed individually by ticket block. In other words, you have to delete them one by one.
2. Appointment Ticket Custom Questions
Sometimes you may need to ask questions or confirm eligibility prior to booking appointments with your attendees. For example, if you offer a cheaper price for members, you can ask them to inform their membership number prior to booking the appointment.
With Timely, you can request any information from customers at the time of the ticket purchase. Simply create a customized booking questionnaire by adding custom fields to your time slot-based ticket. The questions can be answered with a simple checkbox, Yes/No answers, or a text field. You can also add links to any custom field, and make them mandatory or optional.

If you want to use this feature for your appointment bookings, learn how to create and event booking form with custom fields.
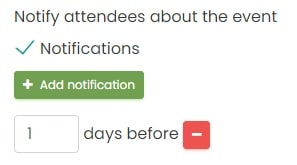
3. Appointment Email Notifications
A great way to keep your attendees informed about the upcoming appointment is to add notifications to your event. You can add as many notifications as you see fit. By confirming this setting, the system will send automated emails to your event participants reminding them about the appointment.
If you want to customize the notification emails, you can change the respective template. For more information, read this helpful user guide: How to Customize Event RSVP and Ticket Email Templates.
4. Agree with the Terms and Save your Changes
When you are done creating the ticket for your event, make sure you check the I agree to all Terms checkbox to proceed.

The final step is to scroll down the page and hit the Publish button. You can also click on the button Save as draft in case you want to review your event and publish it later.
5. Time Slot Tickets Checkout in your Event Page
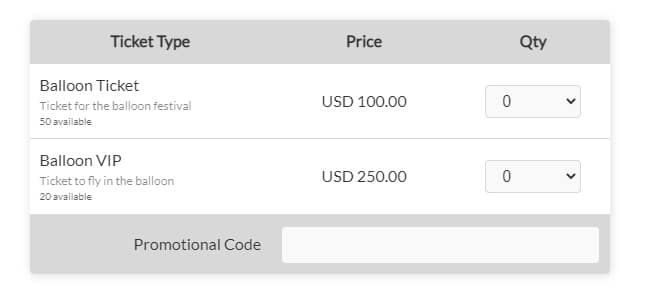
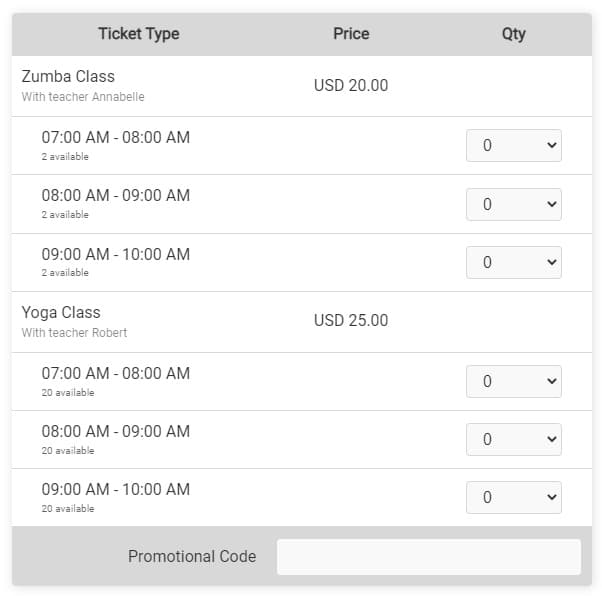
When you are done setting up the time slot-based ticket for your paid event, you can check how it looks in your public calendar. The appointment checkout box with your ticket types will show up exactly as you have configured them.
Now you can check your public calendar. The Time Slot Ticket option will show up as you have configured them.
With Timely, you can not only sell time slot tickets, but also sell event tickets for your paid events, and collect single event registrations and time slot- based registrations for your free events.
For more user guidance, please go to our Help Center. If you have any questions or need additional assistance, do not hesitate to contact us. Alternatively, you can open a support ticket from your Timely account’s dashboard.