The All-in-One Event Calendar from Timely is a FREE calendar plugin, that allows you to easily create, manage and share your events with the rest of the world, whether they are in-person, virtual or hybrid.
It is made for freelancers and entrepreneurs, who are looking for a free but powerful event calendar to start or power up their event-related business. If you are a larger organization and need more sophisticated event management tools, check out our Event Calendar Software and more event management software solutions.
Learn here how to install, set up and use your Timely All-in-One Event Calendar plugin for WordPress (v.3 + new platform). Please note that we no longer support Timely’s WP event calendar widget versions 3.0.0 (old platform), 2.6.8 or older (deprecated / superseded).
1. How to Install your Timely All-in-One Event Calendar WordPress Plugin (v.3 new platform)
Your first step will be to download and install our All-in-One Event Calendar plugin. You can download it from the plugin page on WordPress. If you need help installing the plugin you can read the article Managing Plugins on the WordPress Support page.
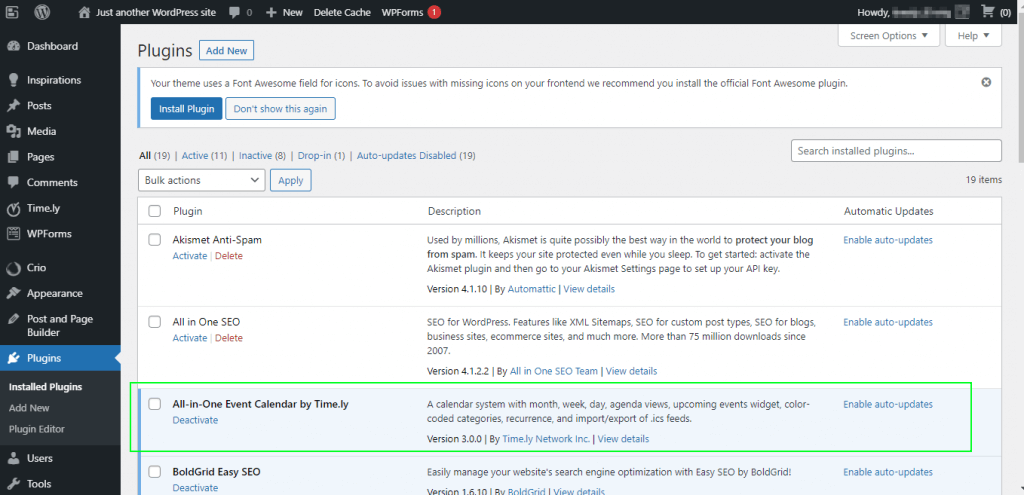
You can go to the Plugins menu in your WordPress dashboard to check if the plugin is installed correctly. In the following image you can see the All-in-One Event Calendar correctly installed highlighted in green.
2. How to Create and Activate a Timely Account
The All-in-One Event Calendar is a SaaS service provided by Time.ly. After installing the plugin, you will need to create and activate a Timely free account in order to use it.
2.1 Create an Account
Access Timely’s All-in-One Event Calendar plugin by clicking on the new menu Timely, on the left panel of your WordPress dashboard. The login page will show up. If you already have an account, you just need to sign in. If you are new to Timely, you will need to create an account.

To create a new free account, click on the Create an account link on the bottom of the login page.

2.2 Review Cart
A new page will appear on your screen with the details of your free account. Please note that, while free accounts are free, the use of our integrated event registration and ticketing system is is not provided free of charge, and fees are based on usage. Therefore, if you choose not to use our registration or ticketing system, no charges will be imposed. Currently, we charge 2.5% + US$ 0.90 per registration or ticket sold (fees are paid by ticket buyers, unless you choose to cover them).
After reviewing the free plan information on the screen, please click on Proceed to Checkout to create your new account.

2.3 Provide Billing and Payment Details
Next, type your email address and click on Proceed. You will then be prompted to input your billing address and credit card details. This requirement is mainly aimed at preventing spam registrations and verifying your authenticity. Moreover, providing your credit card upfront allows you to utilize our integrated event registration and ticketing system, if you wish to do so.

After entering the required information, click on the Subscribe button. We will then send you a verification email with instructions on how to login into your new account.
2.4 Activate your Account
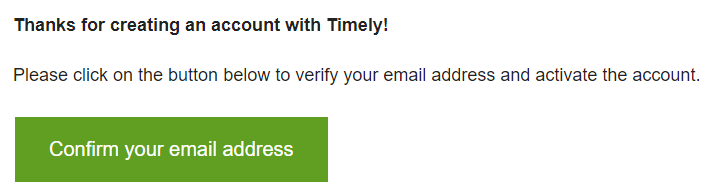
Please check your email inbox and follow the instructions in the email. Open the confirmation email and click the “Confirm your email address” button to activate your account. You will receive the message below:
2.5 Sign In
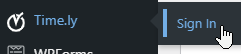
After confirming your email address, go back to your WordPress dashboard. Then, click the Sign In button at the Timely plugin menu item.
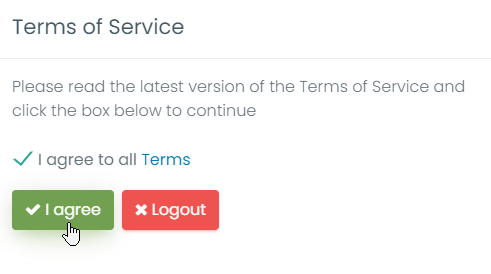
After entering your email address and password, you will be redirected to your Timely dashboard. To be able to proceed with your new event calendar you will need to accept the Terms of Service. Please agree to all terms and conditions by clicking the I agree button.
3. How to Set Up your Timely Events Calendar
With a Timely account, you can change your calendar general settings in many ways. For example, you can change your events calendar’s name, colours, timezone and more.
Read our user guide How to Set Up Your Account General Settings and How to Set Up your Account Design Settings for more information. If you prefer to watch a short video, check our tutorials Configuring your Account General Settings and Configuring your Account Design Settings.
4. How to Create An Event
With a Timely account, you can easily create an event. Read our user guide How to Create An Event to learn how to create events and display them beautifully with your Timely events calendar. If you prefer to watch a short video, check our tutorial Creating and Publishing Events with Time.ly.
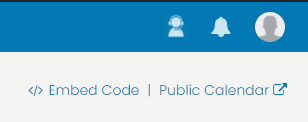
5. How to View your Events Page
While logged in into your Timely dashboard, you can click the link Public Calendar to access your events page. This link is always visible at the top right corner of your Timely dashboard.
6. How to Embed your Timely WP Events Calendar
To embed your calendar, first click on Embed Calendar on the left menu of your Timely dashboard.

To insert the calendar into your website, copy and paste the shortcode [timely-calendar] on the webpage where you want your calendar to be displayed. For more information about shortcodes, please go to the WordPress.org shortcode support page.
Alternatively, you can install Timely calendar and widgets on your WordPress website using custom embed codes. Learn more on our user guides How to Set Up the Embed Code for your Calendar and How to Add Events Calendar and Widgets to a WordPress Website. If you prefer to watch a short video, check out tutorial Setting Up the Embed Code for your Time.ly Calendar.
7. How to Set Up Timely Tickets & RSVP Add-On
If you want to sell tickets or simply offer event registration to your clients and have not activated Timely Ticketing & RSVP Add-on yet, when creating or editing an event, click on the area Cost and Tickets. Then, choose the Timely Tickets & RSVP option and you will see the message with the Activate button.
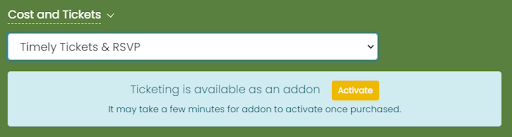
Click on the Activate button. A new page will appear with information about the add-on.
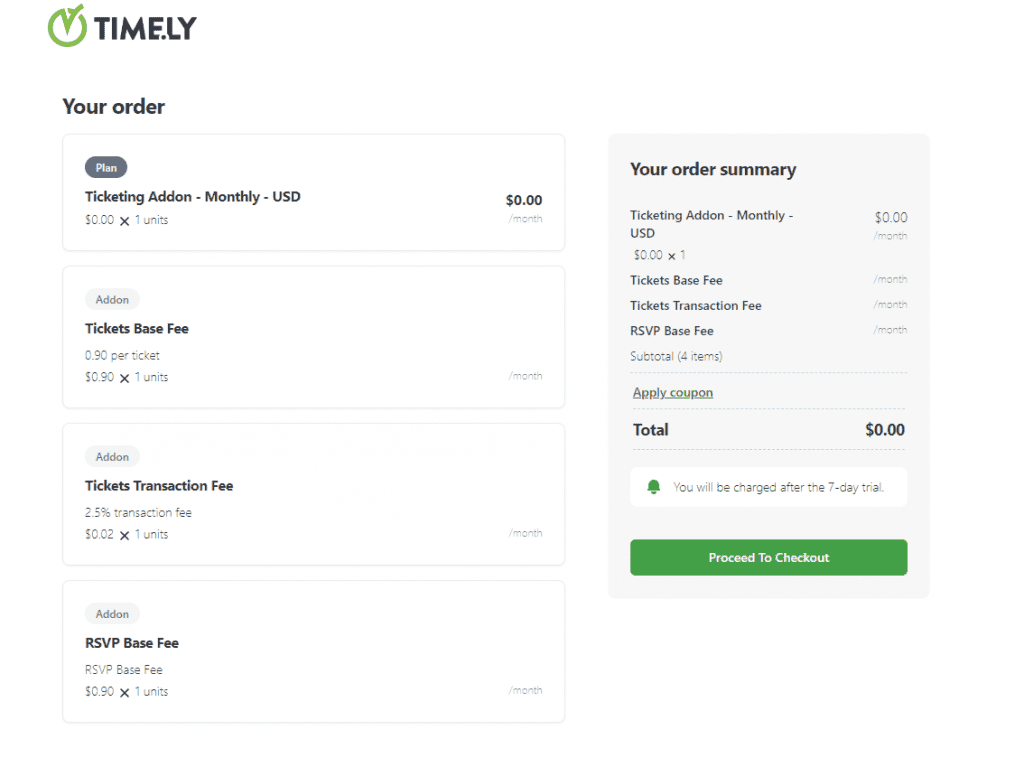
Fill your credit card information and start using the Timely Ticketing & RSVP feature immediately. For more detailed instructions, read our user guide post How to Add the Ticketing Add-On to your Timely account or watch our short video tutorial Adding the RSVP & Ticketing Module to your Timely Account.
8. How to Upgrade to a More Advanced Plan
If you want to upgrade to a paid plan, go to My Account, then click on My Plan. There you will see the upgrade options that are available to you. Alternatively, you can go to the desired feature, and click the Contact Us button to contact our Sales team.

Need Additional Help?
For further guidance and support, please visit our Help Center. Please note that we DO NOT provide live support to free users. If you need official support from us, consider upgrading to a premium paid plan. If you have a paid account, don’t hesitate to contact our customer success team by opening a support ticket from your Timely account’s dashboard.
In case you require additional assistance in implementing and using Timely event management system, we are happy to assist. Explore all the professional services we can offer you, and get in touch with us today!